Search This Blog

Thursday, October 29, 2009

Kettle Bread

Yes, bread on a Weber, in hopes of creating a wood-fired oven feel.  I made a basic bread dough, using an overnight biga to get a good start on the dough.  I added flour and salt this morning and proceeded to make a fairly relaxed and soft dough.  It went through one punch down and two rises, then formed into sandwich rolls.


I am including this shot, cause I think it is cool


The loaves after bench proofing and ready for the kettle.


And here they are on the kettle, I really need a smaller stone, as my baking stone did not fit into the kettle. I think the bread would have been better with the stone.


And done, here they are, all cooked and cooling, ready for the sandwich.


These came out with a fine crumb, a resilient texture and a crisp crust, they made an excellent sandwich roll. I think they would make an excellent bruschetta or even garlic bread.  But that is for another day.

Turkey Day the Pre-party

Well, a break from pork, it is coming up on Thanksgiving Day and I thought I would post at least one turkey post.  Not the cooking of the turkey, but, what to do with the leftovers. My plan was simple, acquire a turkey, get the fixings together, and then come up with a great turkey sandwich.  Well...plans...hmmm....

Turns out the local grocery stored got rid of their turkey stocks that they normally keep handy, to get ready for the new stock of turkeys coming to a market near you soon.  So, I found thighs and breasts, these would have to do, I would make my turkey loaf, which would offer both dark and light meat, perfect for mimicking leftovers. Here it is, all tied up, seasoned on the inside with an herb rub (read Todd's Dirt here) and seasoned on the outside with a poultry rub (read Plowboy's Yardbird here).


Placed on the kettle, indirect, 375F, I would normally have gone 400F or more, but, I had some ribs on there for dinner last night.


Sliced up, I got a perfect turkey loaf, light and dark meat, juicy and very flavorful.  This was an excellent revisiting of a child hood favorite.


Now, for the sandwich, I wanted to make an above average sandwich, not your usual sandwich. In part, this was because it was gonna serve as dinner.  I actually went ahead and made some sausage pecan cornbread stuffing, cucumber and carrot tsunemono, home baked bread along with jellied cranberry, mayo and lettuce. Yes, jellied from the can, it is what is supposed to be served on a turkey sandwich, it just is! Now, here is that sandwich.

Wednesday, October 28, 2009

Oh Baby Backs

In the process of doing a little cooking for tomorrow, I decided I might as well cook some dinner tonight on the kettle.  And since I wanted to try out yet another new rub, in this case, Simply Marvelous Sweet and Spicy rub.  This is another product from the same company that made the seafood rub I last tested.  I found this rub has a medium to medium coarse grain texture, with evidence of herbs along with the spices. Steph, who created this rub, suggests it is an excellent pork rub, so ribs with rub as shown.


I prefer to put the rub directly onto the meat, no adherent or moisture, and let the rub sit on the meat for 30 minutes or so to allow the rub to 'cure' onto the meat (yes, form a pellicle).  The kettle was started and settled into 250F, the ribs were put on at 2:30pm and allowed to run for 2 hours.  I ramped the temperature up to 375F to get the second part of the cook started.  I put on a turkey loaf (tomorrow's post) which is why the temperature had to go up. At 4:45pm, some glaze made from BBQ sauce, bourbon and rice wine vinegar was brushed onto the ribs.  I left the middle part unglazed to test the rub. Ta Daaaa!


Dinner was just ribs and pickles.  Yes, just ribs and pickles, when you have ribs this good, that is all you need.  Since the cook was done quickly and over low smoke, there was not the characteristic pink ring of smoke, but, the cherry wood flavor was definitely in the meat, the rub was fantastic, once again showing a balanced flavor of a very east spice flavor with just a hint of sweetness. This rub has a flavor that complements the sweet character of the cherry smoke and pork. Here is the parting shot.

Monday, October 26, 2009

Simply Marvelous Shrimp

Since joining the BBQ Brethren, I have had the opportunity to connect with rather a lot of folks that really have a passion for BBQ and outdoor cooking, amongst these great people, there are many that are professional BBQ cooks and caterer's.  Simply Marvelous BBQ is one owned by one of these fine folks, and he recently shipped me some samples for me to try cooking with. I received two generous amounts of his Simply Marvelous Sweet and Spicy Season-all and a pack of his Simply Marvelous Seafood rub.

Well, here is what I did with it.  My riff on shrimp and grits, using a honey jalapeno cornbread in place of the grits. The shrimp was marinaded in a mix of clarified butter and the Seafood rub for 5 minutes, then skewered and dusted with more rub...


There they are all dusted and ready for grilling...


The cornbread was also mixed with some roasted jalapenos, red bell peppers and some of the Sweet and Spicy rub used instead of salt.


I will have to post about this cornbread next, it was quite tasty.


And here is the final product, it was perfectly seasoned which I credit to the rubs that Steph from Simply Marvelous sent to me, they were very balanced seasonings with a mild heat and very savory balance to the other spices.  One of the most notable aspects was that the sodium was not overpowering, which is a problem for me, as most of my diet is lower sodium.  Oh, and I had a Lagunitas 'Little Sumpin Extra' ale to keep the palate refreshed.

Saturday, October 24, 2009

Yet another new rub

Yes, another new rub to test.  In the style of BBQ that I prefer, the rub is an important part of the process, since I use sauce sparingly, the flavor of the meat really becomes the center point of the dish.  I prefer a lighter smoke, and simple rubs, preferring to invest as much as I can in acquiring the best tasting meat that I can source.  This being the case, I want a rub that will complement the meat, not over power it.

Tonight's dinner was to be a tri-tip, grilled directly over hot coals, in the manner of Santa Maria style BBQ with the exception that I used charcoal and white oak instead of building the fire exclusively with Coastal Oak. The rub (the whole point of this post) was from Burnt Sacrifice, which I found in a local grocer (yes, I bought it).  The tri-tip roast was washed, dried and then rubbed with about half of what the manufacturer suggested. Here is what it looked like.


The roast was allowed to rest with the rub on it, a small fan running to help create a pellicle, this is important in my process, as I use no adherents to adhere the rub, the salt in the rub chemically reacts with the meat and fluids in it to create a sort of skin over the surface which assists in holding the rub in place.  The roast was then placed over a fully lit bed of coals, about 6" above the coals and allowed to cook for 7 minutes a side. I would estimate (based on the thermometer) that the temperature at grill level was 400F. Then pulled and allowed to rest for 10 minutes.  Resting tri-tip as shown.


Here is another view after slicing.


Yes, I prefer my tri-tip on the rare side, it is a lean cut and I do not believe it benefits from being cooked to medium in any way.  The meat was beefy, very juicy and tender.  There was not a lot of bark, I do not consider this a flaw in this style of meat preparation; as I stated before, I prefer this be all about the meat. It was served with cole slaw and some rice, and accompanied by a Lagunitas Ale, the limited release ' Little Sumpin' Extra', which was a classic West Coast ale with a load of everything hoppy and un-subtle.

Oh, and stay tuned here, as later this week, maybe tomorrow or Monday, there will be a couple of reviews of rubs from Simply Marvelous BBQ, including a seafood rub that I will be using for the first time as well.

Monday, October 19, 2009

Dirty Gumbo

A few days ago, I received notice from a fellow BBQ Brethren that I could get some of his product, Todd's Dirt and Todd's Bayou Dirt at a discount.  I have wanted to try these products for a while now and decided, now is the time.  It seemed that since it said Bayou Dirt on the label, I should cook something that is from the regional cuisine. Gumbo, oh glorious gumbo, this had to be the thing.

Since I wanted to use the kettle in some form, I decided that I needed to make a stock, since I would not be adding the meats to the gumbo until the last minute.  This took the form of an enriched chicken/seafood stock using chicken bones, clams and shrimp shells. The clams being steamed over the stock to allow the 'clammy' flavor to drip down into the stock.  The stock also received a couple of stalks of celery, half an onion and a tablespoon of Todd's Dirt.  I took the chicken meat and prawn meats and coated them with a layer of the Bayou Dirt. These would be grilled on the kettle at high heat to sear and seal the meat. Here is the meat ready to hit the grill.


Once the stock was done and the chicken and prawns cooked, I was ready to start the rest of the gumbo preparation.  This involved the chopping of onions, green bell peppers and celery into a regular dice.  Then I took the dutch oven and fired up some oil, roughly 1/2 cup, and flour, and equal amount to the oil.  Now the fun begins, Cajun Napalm time.  Started cooking the roux and was determined to head to a chocolate stage, there are no photos of this, as once you get to a chocolate milk stage, it can go fast, it can go badly fast. Once the roux is done, I dump in the diced vegetables and cook them down to where they are wilted. Here is a gratuitous shot of cooked chicken and shrimp.


I added the stock to the roux, along with some andouille sausage.  It is key to get the stock well flavored and the roux to a chocolate color, it isn't going to have the right flavor otherwise.  I added another tablespoon of the Bayou Dirt at that time.  After a few minutes (like 20 minutes) to blend the flavors a bit, I added the prawns, clams and sliced chicken.  For serving, I remove one serving to a mixing bowl and mix in a little Filé to thicken. Filé is best not cooked, unlike okra, if you cook gumbo filé it will get 'ropey' and over-thicken the gumbo.

Served over plain white rice, which should traditionally have been long grain, but, I like short grained rice and that is what I had in the house. And yes, I do need to get some bowls and stop using pie plates for serving.


Overall, I found that Todd's Bayou Dirt added a nice balanced herbal note to the sauce without over-powering heat.  I could easily use this seasoning for any group of people with no fear of anyone having issues with the heat, it was just subtle enough to support all of  the herbal flavors and give the dish a sense of bayou flavor without being overpowering.  If I was cooking for a bunch of culinary adventurists, I would hit it with some more chile powder.

Friday, October 16, 2009

Mac-n-Cheese

Tonight, I did not get home in time to get the kettle where I wanted it and get what I had planned cooked.  I decided that tonight was a good night for Macaroni and cheese.  And this is how things got out of hand.


Sauce:
1/2 cup butter
1/2 cup flour
1 teaspoon salt
1/2 teaspoon pepper
1 teaspoon dry mustard
3/4 tablespoon chile powder, Plowboy's Bovine Bold (more on this later)
2-1/2 cups Half & Half or whole milk.
1/2 cup sherry
2 cups cheddar cheese
1/2 cup each gruyere and smoked gouda
1/2 cup finely chopped onion
1 finely chopped jalapeno

Pasta:
1 pound of macaroni or other suitable pasta shape. Prepared 'al dente' drained.

I start the process by using a small amount of oil to saute the onion, add the peppers after the peppers have softened and turned translucent.  Meanwhile, I dice up very cold butter and mix it with the flour, presifted with the dry spices. Once the onion/pepper mix is softened, I add the butter/flour mix to the pan.  This is cooked over low heat to make a blonde roux.  Then the milk or half-n-half is added to make a white sauce, sherry is added to finish the sauce.  The cheeses are then placed in a large bowl, the sauce added to make a cheese sauce.  Toss this with the pasta and place into an oven or BBQ proof container.  Since I planned on the kettle originally, I went with cast iron. I topped with a mix of walnut bread crumbs, panko and parmesan cheese.  Into an oven for 45 minutes at 375F.


And for a beverage to wash it down with, Augustin Ale from Belgium, which I figured the match of beer to the heavy texture and flavors of cheese and FAT would match up well with the sweeter, malty profile of a Belgium double.  I used the Plowboys Bovine Bold in lieu of chile powder, just to see.  I also heavily dusted the top of the dish with Todd's Dirt, these were both excellent additions, you can taste the herbal qualities of the Todd's Dirt and the fullness (boldness) of the BBQ rub Bovine Bold in the sauce. Even though I did not 'que this dinner, I like the idea of leveraging the techniques and flavors for indoor cooking.

Thursday, October 15, 2009

Chicken - Proof of Concept

It worked, I figured it would, but wanted to try before I go for it with a turkey.  I had read that but taking boneless breast sections and turning them thin end to fat end, the entire breast would cook evenly and stay juicy. I am preparing for an upcoming turkey cook and wanted to try this.  I also recently received a new rub to try, Plowboy's Yardbird, one of the more highly regarded rubs in the BBQ community I belong to.

Here is the preparation of the breasts, carefully skinned, boned and waiting for seasoning.  I decided I would use just the Plowboy's Yardbird and some butter and snipped flat leaf parsley in between the breast sections.


After seasoning I laid the sections thin end to fat end, tied it with cotton string and then seasoned the outside with more of the rub.


Here is the carry pan with the breasts and a similar roll made from thighs. These were waiting to be loaded into the kettle, which was toasting away on it's path to 500F.  Note the cotton butcher wrap, see how even it is, yes, I am bragging.  About 40 minutes later, 150F with a nice crispy skin tells me it is ready to come off the grill.


It worked beautifully, both the thighs and the breasts were juicy, tender and very flavorfull.  The Yardbird rub has an excellent savory quality with a good balance of salt to the other flavors.  It is not hot, I would describe it as savory with excellent depth of flavor and harmony between herbal and spice notes.


 Some beauty shots showing the beautiful color, juicy meat and finally plating. The mini-roasts were rested for about 10 minutes to finish off the cooking and let the meat relax.  I found that the flavor worked it's way through the entire depth of the meat.  On to the turkey, details will follow on that one as it further unfolds.


Thursday, October 8, 2009

Dessert

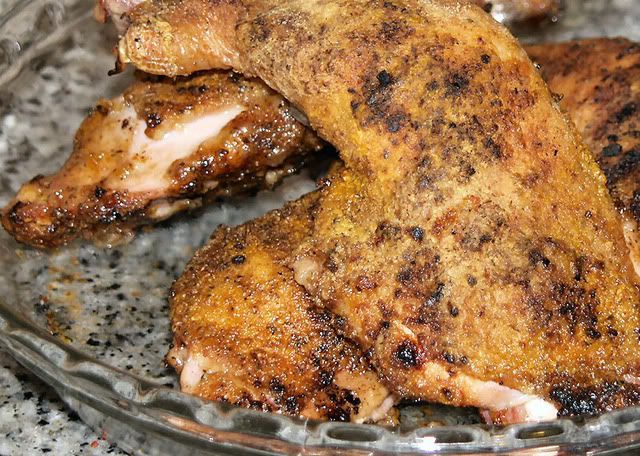
Because man cannot live on meat alone.  And this is a better way to get roughage than drinking an orange wheat cocktail.  I made an apple crisp, in part because the members of the Outdoor Cooking Guild were talking about doing and apple cooking event.  And since I will be out of town for the Oinktoberfest being organized by some of the BBQ Brethren and CBBQA.  Back to the apples, the crisp was made with a mix of Fuji and Jonathan apples, I find that both of these apples cook up well and have a better flavor profile than the usual Granny Smith.  Now to the pics.

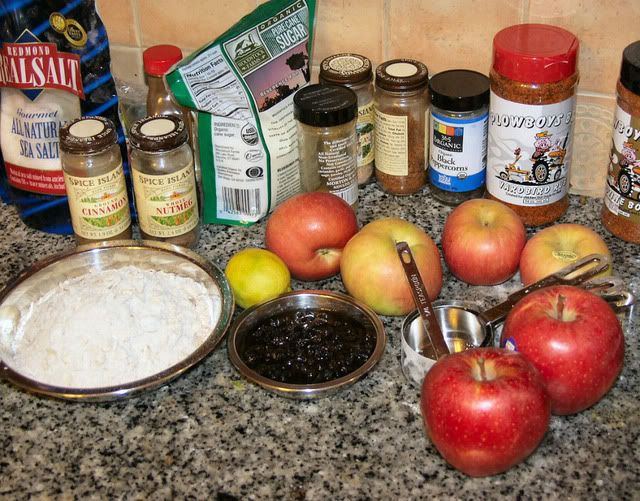
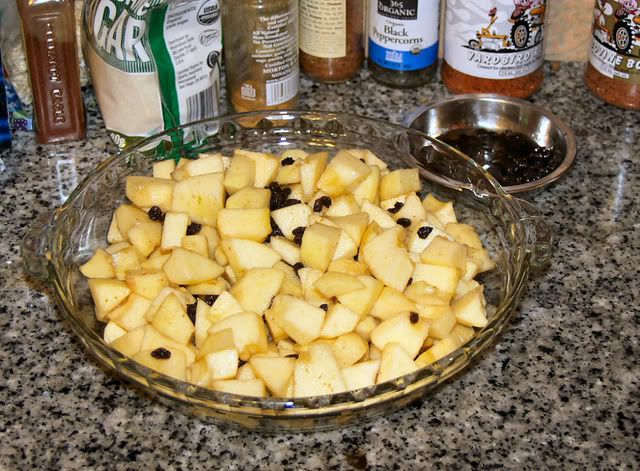
The ingredients, staged and ready to go.  Ignore the Plowboy's, it had just arrived and was just on the counter. The raisins are being macerated in Woodford's Reserve bourbon, I believe the bottle is not in the photo due to being re-tasked to the beverage counter off camera.


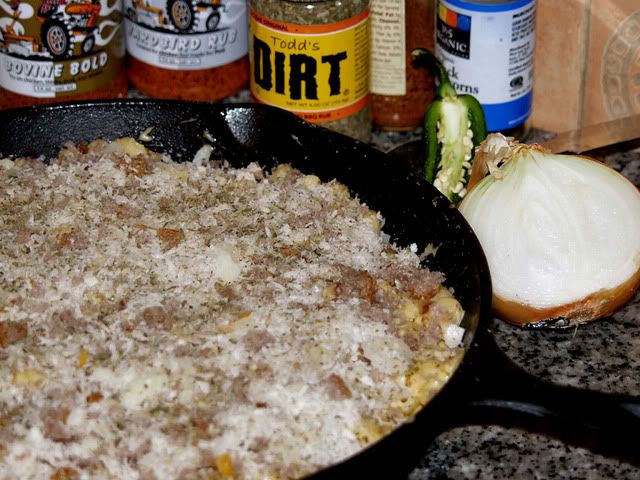
The apples peeled and mixed with raisins and sauce ingredients.


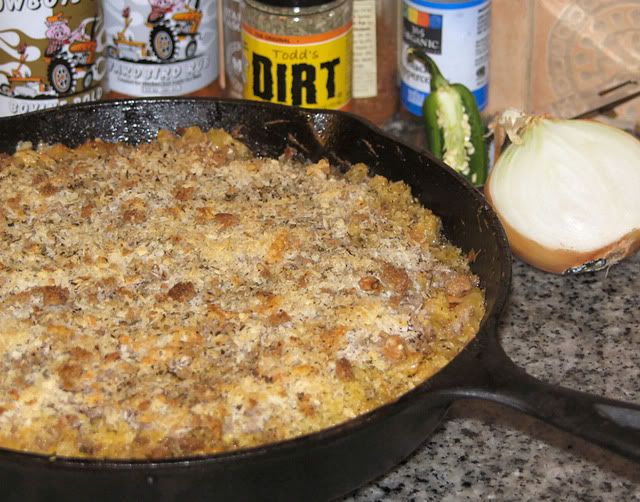
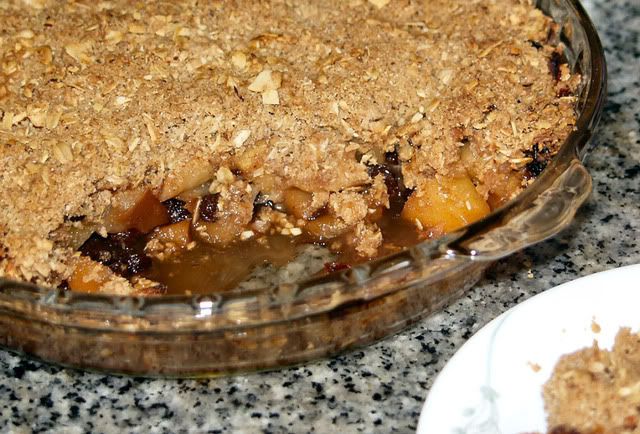
Out of the kettle, and with a little bit missing.  The topping was a little over worked, thus was smoother and more finely textured than I would normally like.  This did not detract, as I was very happy to eat this serving, and more.


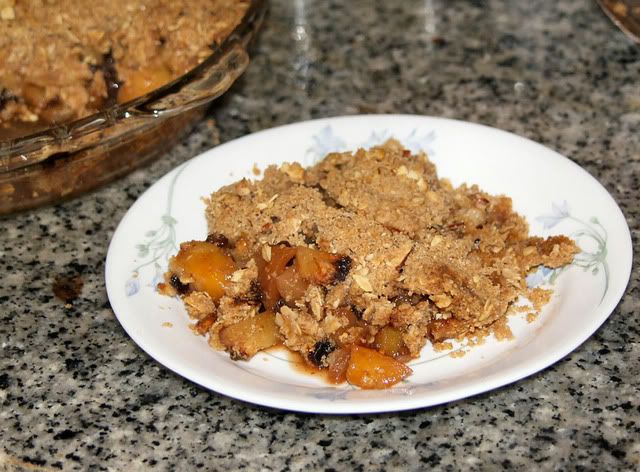
 Yum, the topping broke up nicely, the apples and raisins played nicely together with the bourbon and maple syrup helping smooth the way.  This would have been great with ice cream or whipped cream, sadly, the 'fridge was devoid of the necessary ingredients to make that happen.  This will happen again, next time with something sweet and creamy along for the ride.

Apple Crisp
Topping:
1/2 cup all-purpose flour
1/4 cup granulated sugar
1/4 cup light brown sugar
1/2 teaspoons ground cinnamon
1/8 teaspoons fresh ground nutmeg
1/8 teaspoons salt
6 tablespoons cold unsalted butter, cut into small pieces
1/3 cup rolled oats
1/3 cup chopped walnuts or pecans

Filling:
6 cups Fuji and Jonathon apples, peeled, cored and cut into 1" pieces
1/2 cup Zante currants soaked in 1/4C bourbon
1-1/2 tablespoons granulated sugar
1/8 cup maple syrup
1 tablespoon lime juice
1.5 tablespoons granulated sugar


For the topping: I mixed all of the dry ingredients into the bowl, then added the butter and using fingers, pinched the butter into the dry ingredients to create a crumbly texture.

For filling: I added all the ingredients into a large bowl and toss to mix.  I then covered and let the mix macerate for an hour.  Then place the filling into the pie pan (or ramekins) and cover with topping.  Bake at 375F until bubbly and topping is golden brown.

Monday, October 5, 2009

'Fried' chicken

Well, I wasn't gonna make a blog entry tonight, but, I decided this deserved a mention.  I like wood roasted chicken, I like fried chicken and I like Shake and Bake chicken (I know, weak).  So I got to thinking, maybe I can get a little of all of this into one piece of chicken.

I made up a batch of heavily seasoned flour using equal parts of my chicken rub, a mixed herb rub and some all-purpose flour.  I then took some chicken legs (washed and dried) then rubbed with canola oil.  This was coated liberally with the seasoned flour and allowed to sit for an hour while the coating set.  I started the kettle up and got it up to 450F indirect heat, then put the chicken on the grill and let it go.

At 45 minutes I went and checked and it appeared done. checked temps and found it was 150F. Time to remove and rest, let the cooking finish to 160F.  This is what I ended up with.


The skin was crunchy, not quite like deep fried, but, crunchy enough with a crisp skin underneath, a mild smoke flavor and lots of flavor and juice.  I think I am gonna try this technique for chicken kara-age soon.

Sunday, October 4, 2009

Pastrami


So what to cook on a Sunday where I have to get some drawings done.  I have been reading a bit on people making their own pastrami and this seemed like a good day to try it.  Since I will be working all day, the length of a brisket cook will not cause any problems.  Pastrami, as it applies to this application, is nothing more than a smoked corned beef, easy enough it would seem.  I cheated and bought a packaged corned beef, I am not up to pickling meat.  I did soak the meat over night with several changes of fresh cold water to try and draw some salt out of the meat.

The corned beef brisket was seperated into a flat and point, they were rinsed, dried with a towel and dry rubbed with medium coarse black pepper, dried orange and lemon rind, chile powder and some natural cane sugar. No salt as I figure there is already plenty in the meat. This ended up looking like this...


The spiced meat was then placed in the kettle over an indirect fire, with a couple of small chunks of hickory for smoke.  This was allowed to run for a little over 5 hours with the kettle just rock solid at 250F grate temperature whcih it maintained throughout the whole cook time. At 5 hours, the metal skewer slid in like butter.  Done! Meat looked and smelled incredible, this had better taste good.

The meat was allowed to rest, in the pan and foiled to keep warm.  The flat was sliced for testing and found to be acceptable.   The slices were a little drier than I expected from the short cooking time, but, still very good taste. There was almost no indication of the meat being smoked, no ring at all, although the meat was pink throughout.


Then it found it's way between a couple of slices or lightly toasted Jewish style rye bread and some spicy brown mustard.  This was a successful first shot at making pastrami, not sure where I will take this recipe and the technique from here, but, it was a tasty lesson into what pastrami is.

Saturday, October 3, 2009

Finally!

Haven't been able to cook on the kettle for a while, but, finally got back to it. And I decided to do something relatively simple and quick, since my ankle and foot are not up to a lot of going in and out to the kettle. One of the things I love about the kettle is it's versatility. Today, it was spaghetti and meatballs.


Step one was to halve 5 large roma-type tomatoes, slice up one large onion and about 8 cloves of whole garlic were peeled. All were placed into a pie pan, liberally salted and hit with black pepper, freshly ground. This was placed into the kettle at a low temperature (225F) to melt. This took one hour to get to the interim product.


After the veggies were suitably melted, they were run through a blender and then a sieve to produce a very smoky, garlicky, tomato sauce. After straining, this was added to an equal amount of tomato sauce made on the stove. I then reduced the sauce, added vinegar to adjust for some of the concentration of the sugars that occurred during the smoking process. I also added a tablespoon of hot sauce to perk up the flavors, this did not make it hot, just enough to add a little tingle.


The meatballs were made with grass fed/grain finished beef, dry bread crumbs, egg, flat leaf parsley and grana padano cheese grated. It was lightly blended and then formed into meatballs, about 1/4 pound each. I placed these onto the grill at 250F for an hour to smoke them up and get the meatballs crusted up a little. I finished the meatballs in the sauce and then plated. Spaghetti was cooked and some sauce was sauteed into the pasta to dress it. Meatballs and some more Grana Padano to finish, with a little iced tea to wash it down.


The overall  dish had a nice smoky undertone, a mild heat just on the end of each bite and a very fresh tomato taste despite the use of slow-cooked tomatoes. I think the use of dry heat in the kettle helped intensify the sugars and flesh of the tomatoes and onions that kept a fresher taste in the sauce.  The meatballs had the distinct flavor of smoked meat that is the hallmark of cooking over fire.