
I decided to give the process a try, but, in searching around, could not find a single 'Choice' grade brisket, so select it was, not my favorite grade of meat to cook. I performed the cook in my UDS, using a mixture of lump charcoal, natural briquettes and apple wood. The temperature was started at 225F for two hours, then ramped to 300F for three hours, two of which were in paper. I then ramped it another time to 350F for one and a half hours. I used standard white, uncoated butcher paper.
The Rub (Bob's Mother Rub sort of)
3 parts Redmond Real Kosher Salt
2 parts Phu Quoc Black Pepper, ground to a medium grind, no fines
1 part each of organic onion granules and garlic granules
1/2 part lime powder
1/4 part Natural sugar, finely ground
The Liquid
2 parts water
1 part Red Boat Fish Sauce
1/2 part Bragg's Amino Acid
I ended up using 2 packers, which is to say, briskets that have both the deckle (aka point) and the flat still attached. They stareted out around 14 pounds, went on to the cooker around 11 to 12 pounces once they were all trimmed up, I like to trim off the excess fat and any meat that looks grayed. One of the things I believe is a good starting point, is if the packer brisket is flexible, I believe this translates to a more tender end product, these were flexible.

One Packer, folded in half, what you want.
From here, both packers were seasoned with the rub, just the ingredients above blended in a shaker and applied over the meat. I changed my ususal process, which was a mistake. Normally, I apply a base coat, let it melt onto the meat, then apply a second coat once the pellicle forms on the meat surface. I didn't do this, and the price was a mediocre bark. Bummer.
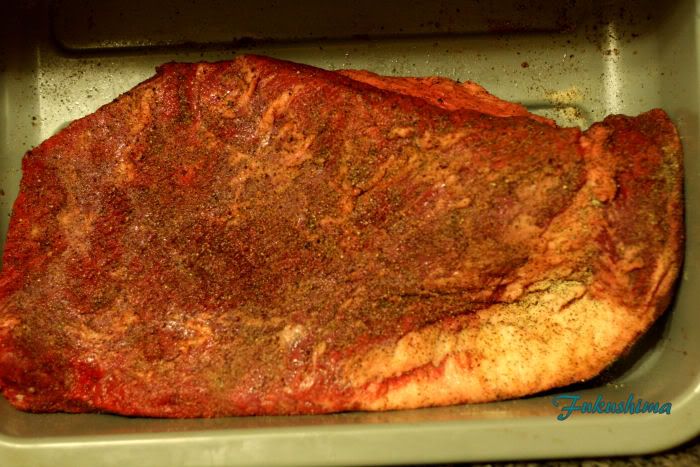
My Rub on Brisket
I was also cooking a brisket for my friend Rob, who, with a newborn, doesn't have the chance to fire up his smoker. His rub is more powdery, a much finer texture, which made for a difference in the bark. I prefer a more medium textured rub, which normally gives me more of a textural coating on the meat. I also cooked some whole chuck ribs, I really like these and they are easy to make on a smoker. I hit them with the same rub.
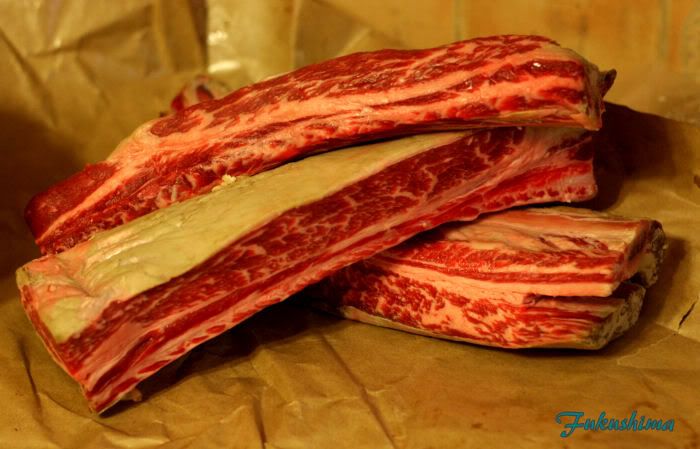
Nice Choice Chuck ribs
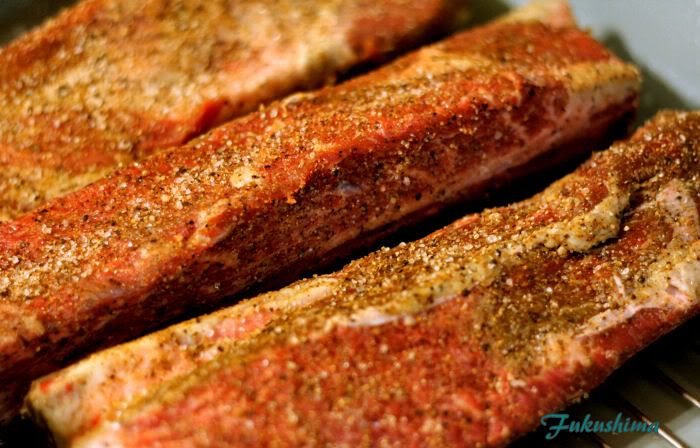
Rubbed Up
Sadly, this is the last shot of the ribs, I ran out of time to deliver Rob's share of the cook and no done shots were taken. I assure you, these were tender, juicy and have a great color, a deep mahogany. Anyways, this all went onto the cooker. Chuck ribs on lower rack, briskets on upper rack.
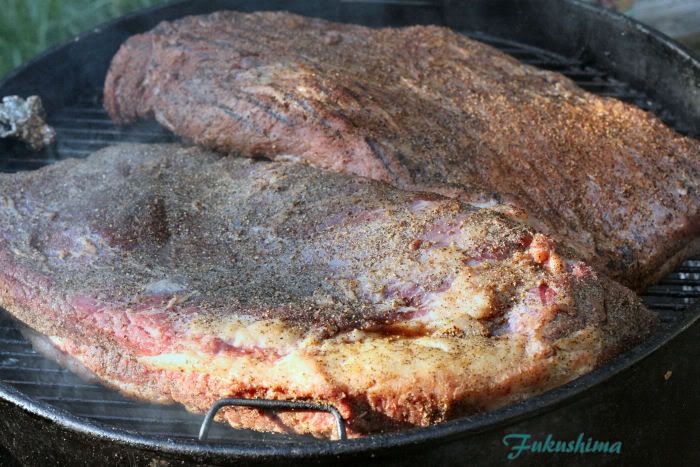
Oops, forgot to change white balance
It was a snug fit. From here, it was just waiting for the color, then wrapped and waiting for the meat to get done. I mentioned the timing above, I do not cook brisket by temperature of the meat. This leads to a lot of bad cooks, judging by internal temperature. I use a method of checking once the meat gets to around 190F internal of poking it with a metal skewer to see if the skewer goes in easy. This often happens at temperatures of 200F to 205F, but, the only way to be sure is to use a probe method. I did have some temperature issues, trying to keep the smoker at 350F, and one of those fancy PID controlled fans would have been nice, but, they are too pricey for me. I do have a small fan and a funnel though, and a BOB controller.

This worked well
Rob's brisket looked like this when it came off the UDS and out of the paper. I have to say, his brisket just about flopped over in half when I pulled it. I am expecting that it will be very tender.
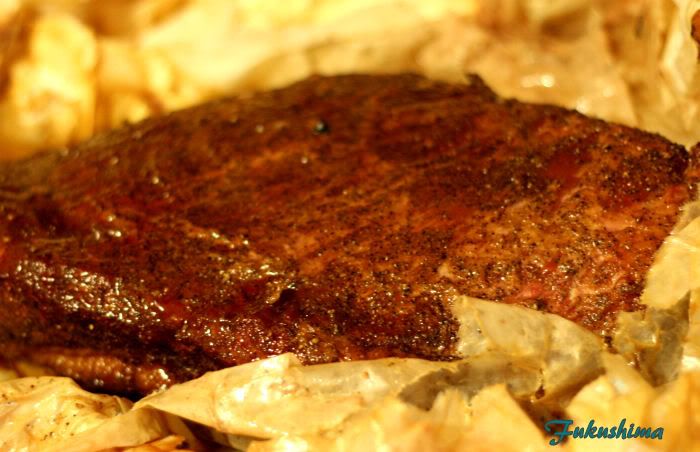
Rob's Brisket (I think)
Mine took a little longer to get done, still working with the whole testing with a probe method. I pulled it after another hour on the cooker and put it to rest in my oven. I prefer to use a cooler, but, it is doing duty as a vessel for bottle conditioning some oatmeal chocolate milk stout. So into the oven for a minimum one hour rest, two or three hours is better. I went with one hour.
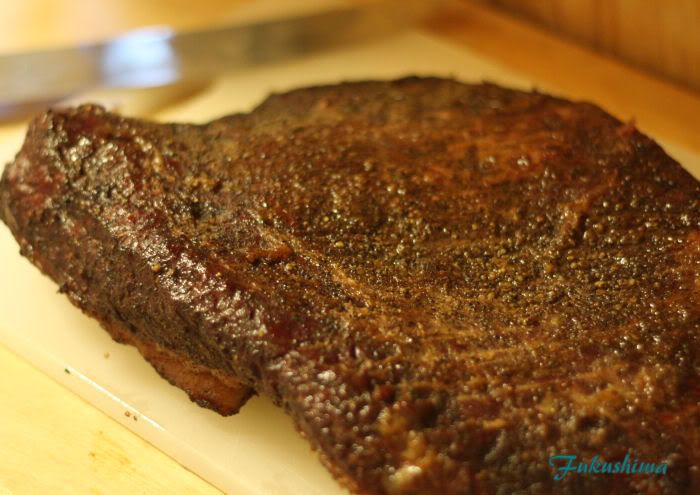
The finished brisket flat
The flat turned out terrific, the surface bark was noticeable, firm yet cut easily. The meat was tender and moist, it could maybe have used another 30 minutes. But, it was very good as it is, with great flavor.
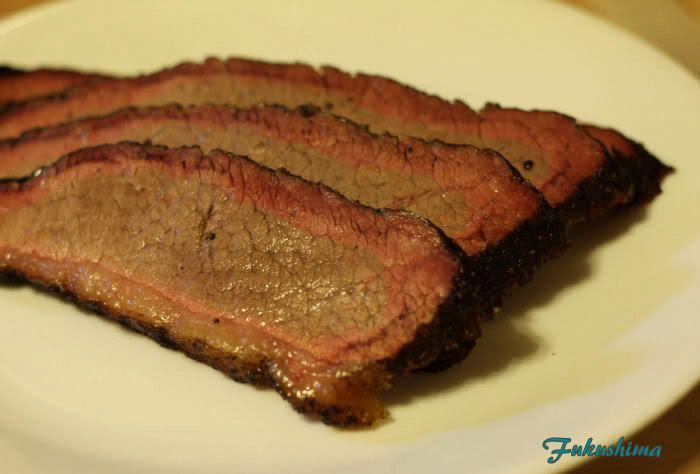
Sliced and plated flat
Often referred to as 'lean brisket', the flat can easily dry out and get hard when being cooked. The use of the paper, along with the liquid I added to the paper when it was wrapped seemed to help with the retained moisture. I am very happy with this product, it sure looks good.
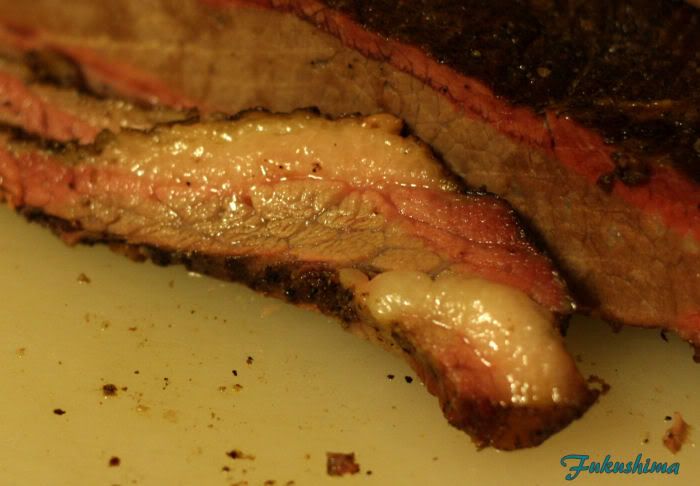
Sliced and plated point (or deckle)
Sometimes referred to as the point or deckle, this is the part of the brisket that you would get if you 'fat' instead of 'lean' at a BBQ joint in some parts of the country. Many folks will cook this down in a sauce and call it 'burnt ends', referring to the old practice of stewing down the hard edges of smoked meat in the sauce to make it more palatable. I prefer it sliced when it is properly cooked. This was unctuous, meltingly tender, salty and peppery, everything I think of for a great piece of smoked brisket. You wouldn't want to eat a lot of it, but, like foie gras, it isn't always about volume.
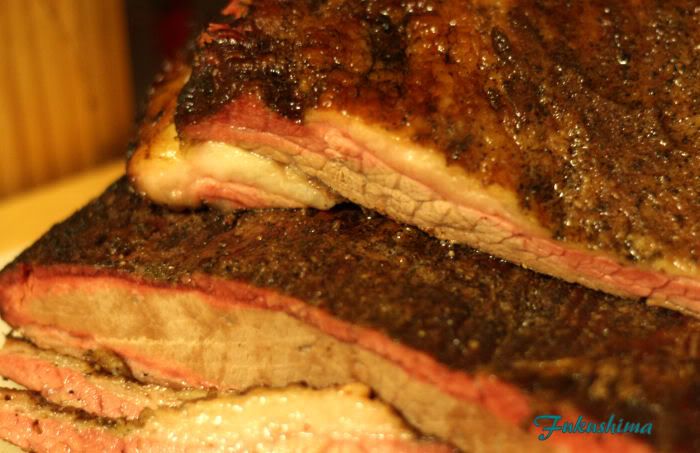
Point and Flat in repose
There is no doubt in my mind, this is an excellent method for cooking brisket, or chuck ribs for that matter. The meat had an excellent bark, great color and the texture and moisture is spot on. I cannot wait to get a nice 'Choice' packer and try this again, see if it is even more tender and moist.