Search This Blog

Tuesday, January 4, 2011

New Years BBQ Brisket and Chuck

One of the new traditions that has begun to become part of just about everyone of our gatherings has been the addition of grilled or smoked meats.  This is largely due to my influence; although it also reflects the changing traditions that have become a part of my family's journey in the United States.  While I do not believe that we will ever completely give up our Japanese heritage or the connections to those traditions, I believe we will continue to incorporate and celebrate our growing heritage here.  A slow smoked brisket and pulled chuck roast is a part of the American tradition we have adopted.

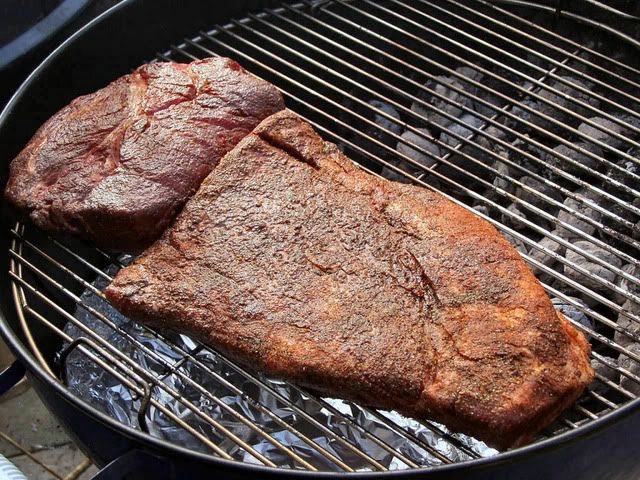
I found an excellent Painted Hills chuck roast that had excellent marbling of both fat and connective tissue.  This is key, for in a long smoke, both fat and collagen rendered from connective tissue add to a moist end product.  Finding the right piece of meat is quite important for making great BBQ.  The brisket appeared to be more problematic, as it was from Humboldt Grass-fed Beef, it was pretty lean in terms of internal fat and connective tissue was hard to determine, although it is hard to miss on connective tissue in a brisket.  I coated both with a medium coating of Simply Marvelous Sweet and Spicy and then Bob's Top Rub.  This was allowed to sit for one hour.

The BIL's kettle was fired up to 275F with Lazzari Hardwood Briquettes and a little oak.  The meat was put on and the kettle was brought back to 250F for the first hour and a half, then up to 280F to 300F for the balance of the cook.
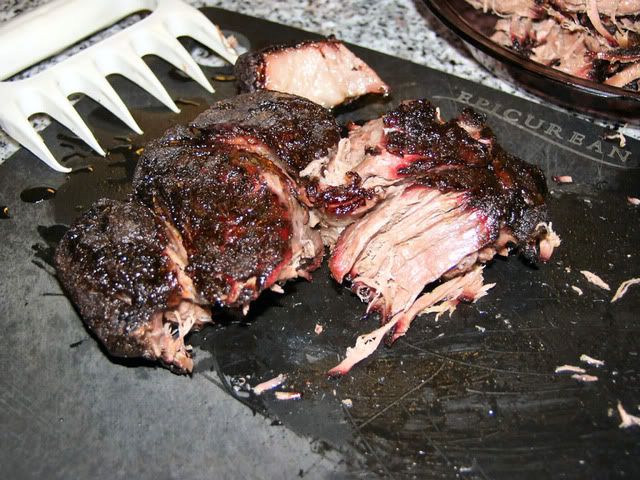
The meat ran for 6 hours, at which time, fortunately for me, both meats were ready for pulling and resting.  I used a method for testing the meat that involves poking a skewer into the meat, when there is almost no resistance to the probe, I shut down the kettle and let it coast down for 30 minutes to an hour, once the temperature drops to 140F or the meat drops to 170F, I remove the meat and tent in foil. In this case, this meant resting under the foil for 15 to 20 minutes.  I then pulled the chuck, which had a medium bark and dark color.  This is not burned, it is just a dark bark and has no bitterness.

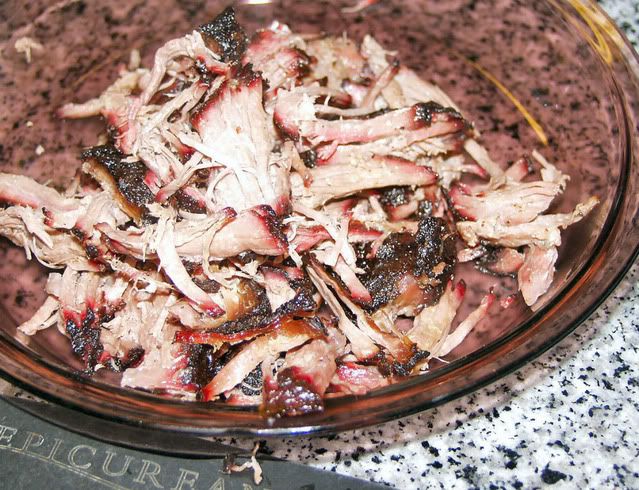
I pulled the chuck into rough shreds and then mixed a little thin sauce into the meat to add a little moisture and punch up the flavor.  I really like a little acidity with BBQ beef and pork, this is one of those cases.  Here is a look at the in-process shredded chuck.
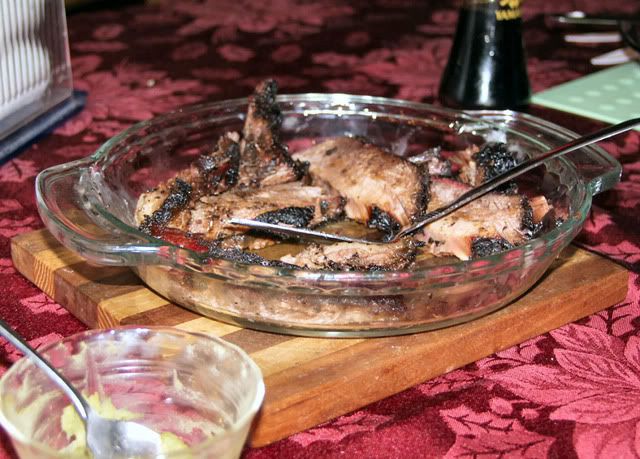
The brisket was then sliced, sadly there are no pictures of the beautiful flat and point slices that came off this brisket.  The meat glistened when cut, and the meat held onto the moisture as it hit the plate.  The point was chopped into chunks and served to the little guys as it was so tender.  There was a little left after dinner...
All of this was served with a sauce I threw together from the stuff hanging around the kitchen.  I found a 1/4 cup of locally commercial sauce, to which I added 1/4 cup Worcestershire Sauce, 1/4 cup, Viet Phu fish sauce, a little dashi (yep, hitting the umami hard) and 3/4 cup rice wine vinegar.  This was then tastes and corrected with a little black pepper, Tabasco and aloe syrup to create a little sweetness and heat.  Brought to just hot, no bubbles, then strained and served alongside the meats after a 1/4 cup was mixed into the pulled beef.  Good stuff, on the thin side with a good kick of sour and sweet and a umami hit.  It went great with all the beef.

Dashi-the building block

One of the basic ingredients we use quite a bit of for New Year's Osechi-ryori is dashi.  We use dashi to impart a key taste to many of the dishes we prepare for many different types of meals.  The basic stock we make is based on katsuoboshi shaved into what essentially looks like wood shavings (at least to me, back to this later).  We also add a little piece of kombu, a type of dried sea algae, often called kelp in the U.S.  There are many forms and types of kombu, but, we use the sheets of the kombu leaves.  This broth finds it's way into all of the soups, stews and some of the seasoned vegetables we prepare throughout the year.

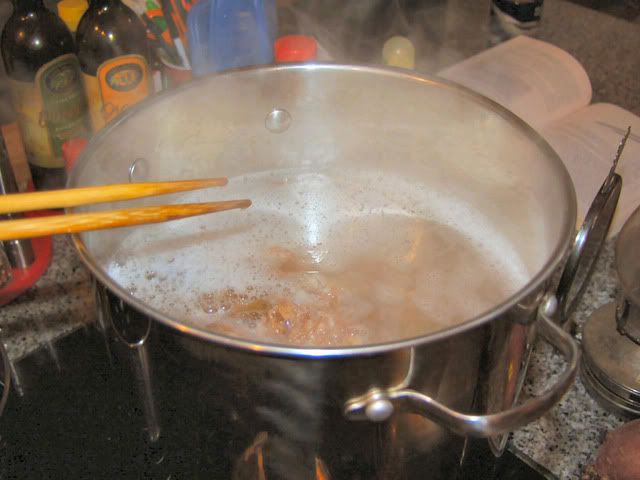
Here is our pot or dashi being simmered. 
Some believe it should be boiled, others feel it should be steeped.  We believe it is best and strongest when brought to a low simmer, then allowed to steep for 15 to 20 minutes.  It takes on a stronger flavor when boiled, and lighter flavor when steeped.  It is largely a personal preference based on taste, and often on the region your family originates from. That is about 8 quarts of dashi there. 

From here, the katsuoboshi is removed, drained and discarded. The broth is allowed to cool and settle, which avoids filtering.  The broth at this point is a building block of umami flavors.  The kombu and katsuoboshi adding amino acids, salt, protein and complexity.  We will end up adding this to eggs for tamagoyaki and sushi, sushi vegetables for makisushi, BBQ sauce (my own swing, he he), oden and soup.  In fact, if you touch it up with some fish sauce and herbs, you have a great Pan-Asian soup base, I use it for a base in fried rice and noodle sauces, soba broth and dipping sauces.

I have experimented with it for adding a MSG effect to BBQ sauces that would otherwise not be there, since I choose not to add MSG to my home cooking.  This is the element of flavor many people do not recognize in Japanese cooking. Oh, and that wood shaving thing...when I was a kid, maybe 10 or 11, I was learning to help cook with my mom and grandmother and decided to help by shaving the bonito stick in the new katsuoboshi shaver.  I took what I thought was the bonito stick, but was actually my grandmothers surikogi, an old one at that, and proceeded to shave it.  It smelled oddly of pepper and wood, not the expected fish. Hmmm...there was lots of yelling, something about 'bakatare'.  You try to help...

Monday, January 3, 2011

Prime Rib for Christmas

As I mentioned, my family does a lot of 'fusion' if you will.  One of these is Christmas dinner and how we approach it.  While my family came to this country with the religious backgrounds of Buddhism and Shinto, a pagan religion indigenous to Japan, we changed once my generation was born with some of us being raised as Christians.  This was to become part of the culture of our new home.  Celebrating Christmas became a part of our holiday celebration, and prime rib became a part of our dining.  Who would not want to eat this?
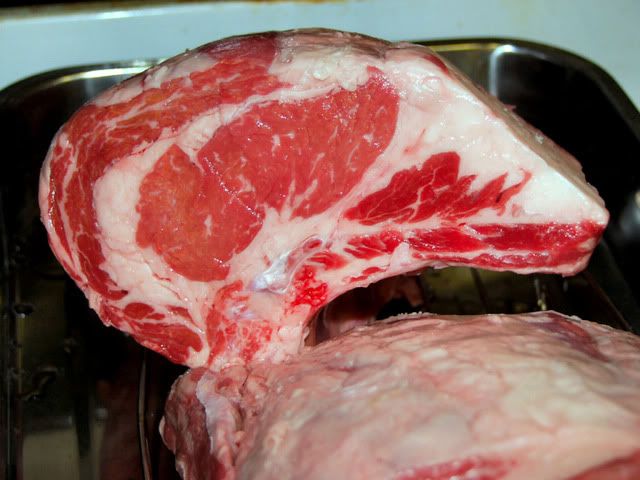
But, I am jumping the gun here.  For starters, you need meat. I got up north and found that we still needed to go find the meat, cool, I like meat shopping. And I have not been doing as much of that since I was told to stop eating so much meat. We found Painted Hills Beef, Humboldt Grass-fed Beef and some store brand stuff which was all select. The Humboldt grass-fed is quite lean and while I like it, it is too lean to make a good prime rib. So, Painted Hills it was, and it was outstanding choice beef, some of the best choice I have seen. I felt the roasts were a little over-trimmed from what I asked for, and the butcher asked me over and over if I didn't mean to trim and retie the ribs, until I finally told him that I really really meant, leave them fully attached. But, these roasts were terrific quality.
 Roast One - 7 lbs
Roast Two - 5 lbs.

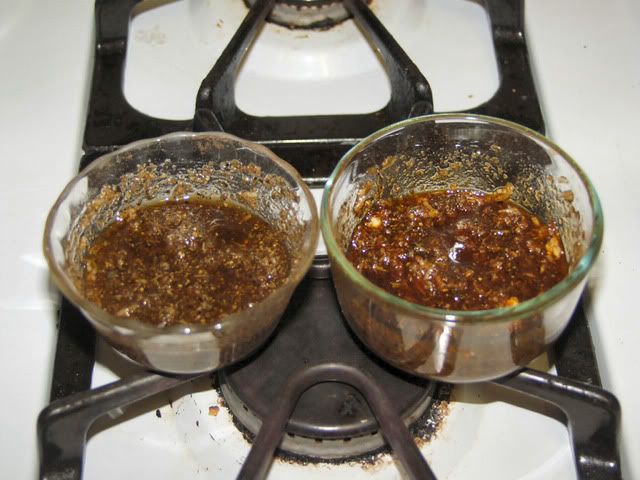
Then a slurry was prepared, Roast One got a mixture including Simply Marvelous Sweet and Spicy Rub. Roast Two got Dizzy Pig Salt Free Dizzy Dust. The other ingredients of the slurry rubs included olive oil, fish sauce, grated garlic and Bob's Top Rub mix.
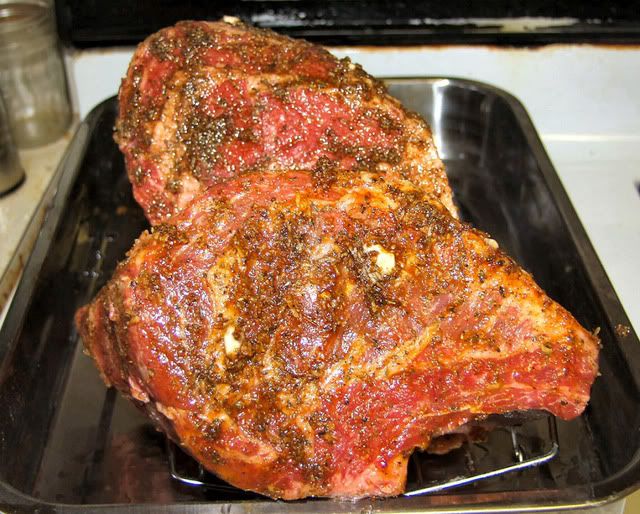
Here they are ready to go. This is after having the wet rub applied and sitting for around 90 minutes to finish coming to temperature.
These little guys headed out onto the kettle, in this case my brother's OTG kettle. The kettle was was going along at 275F, the temperature outside ran from 55F down to 47F during the cook, it was pouring rain (yes, I think this matters). The meat was placed in a pan with onions, celery, scallions, garlic and 1 cup of water and 1 cup of Pacific beef broth. The rack in the above photo was for air circulation around the roast.
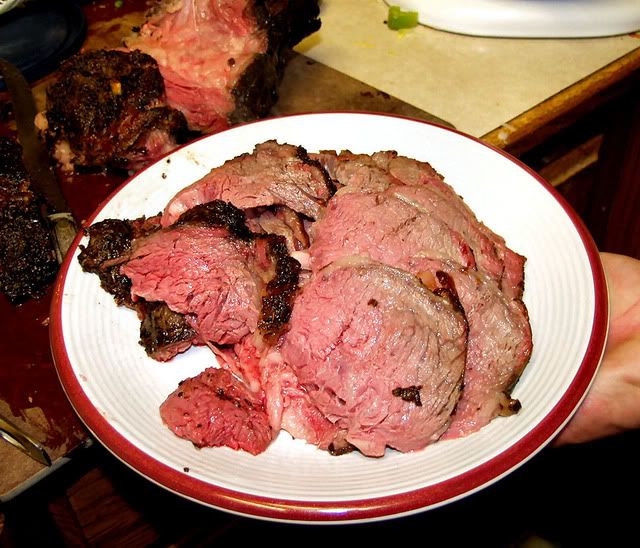
These were cooked for 5 hours to an internal of 130F, the meat was then removed, tented with aluminum foil and allowed to rest for 45 minutes. Bones were removed, meat was carved, and one platter disappeared from the adult table while I was carving the portions for the kids. Fortunately, I allowed 1.3 lbs per person, so there was no lack of meat for me.  Both of the wet rubs were outstanding, I would use either one without hesitation, which is why I use them, I suppose. We ate the Simply Marvelous on Christmas Day and everyone raved about the flavor.  I have to say that it has become my go to rub for most cooking I do in a more traditional smoking or live fire roasting.

Tamagoyaki

One of the great things about Osechi-ryori is all of the little 'finger' foods that are prepared and consumed throughout the day on New Years.  One of these, and a favorite of mine, is tamagoyaki.  It is a rolled omelet of seasoned eggs fried in a special pan which allows a specific level of done-ness.  Here is the special pan, which has a particular shape and depth, to create the layers of the omelet.
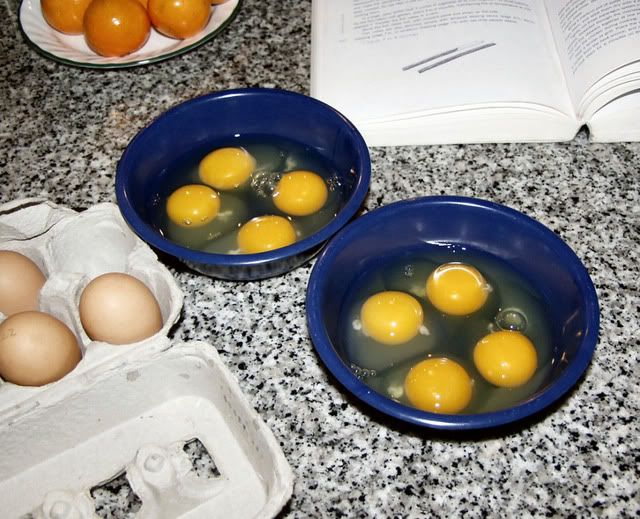
The eggs mixture consists of four eggs per roll, you could do more if you want a special large roll, but, this really gets a little unwieldy unless you are trying to create some impression of over generosity.  We like to keep things at one or two bites at most.  So, four eggs, in this case from my sister's personal stash of chickens.  Wyandotte chicken eggs are particularly good, especially from the coop.
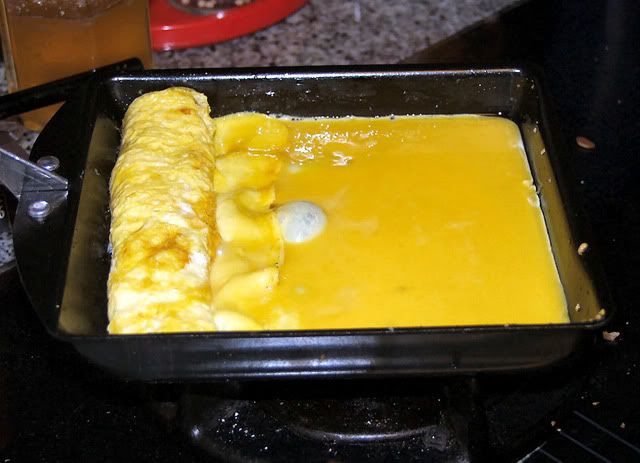
These were seasoned with a 3 to 4 tablespoons of katsuo dashi stock, or whatever stock you might have chosen to make.  We make our dashi from katsuoboshi (shaved bonito) and a little konbu (algae/seaweed).  We make a relatively strong stock, so 3T is more likely what we go with.  We also add a little sugar, the traditional amount is 2 to 3 tablespoons per four eggs.  We cut this amount by half now, as our taste has moved to a slightly more mild and less sweet profile.  In the past, we also added a small amount of shoyu (soy sauce).  No more than a tablespoon.  Since we have cut back on salt, and the dashi is quite strong this is often omitted or added in very small amounts.  The mixture is cooked in layers in the pan to create a concentric pattern of the brown edges and yellow centers.  The layers are thin and the roll is not removed until the whole omelet is competed.  Here it is in progress.
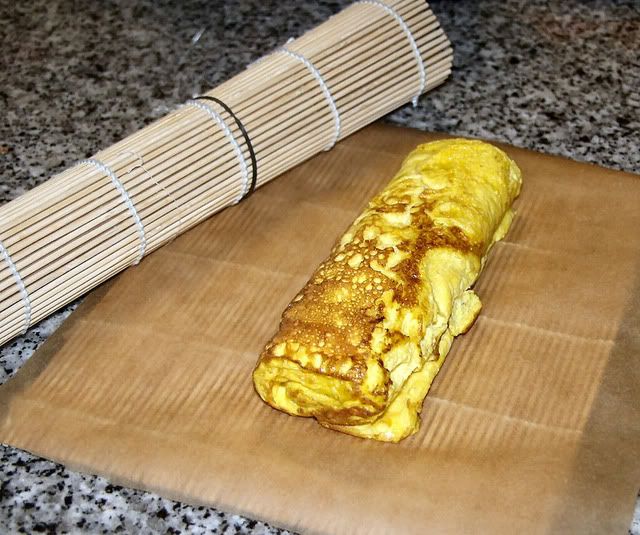
As you can see, each layer is connected to the previous layer by a small overlap during the cooking of the next layer.  It is worth noting that each layer is cooked until almost done. The omelet is rolled while the top of each layer us still a little moist, the ensures a tender and cohesive roll.  This shot represents the 4th of 5 layers I believe.  I could be wrong as I was busy fiddling with other stuff while the cooking was being done by my sister.  Once the omelet is completed, it has a particular shape that is not really round, and the desired shape is round.  So we wrap the roll in parchment lined sushi makisu mats and then tie (or rubber band) the rolls into a round shape and then cool the rolls.  Sadly I was busy eating and did not get a finished shot.  Trust me on this, they were round.
 Now, a similar recipe will result in the omelet used for making the tamago nigiri-style sushi often served to the fish-phobic at sushi bars.  I am one of the fish-phobic, which does not bother me as I particularly like this type or preparation.  If you wanted to use this for tamago sushi, you could use a rectangular mold or form the maki-su into a squarer shape to achieve the more familiar rectangle seen in nigiri-style sushi.

Sunday, January 2, 2011

Fish Sauce

Well, howdy!  I am back from my Christmas and New Year's vacation, during which, much food was made, cooked, assembled and consumed.  This is, in fact, a period when I and my siblings families have a chance to revisit some of our families cherished food traditions as well as special foods that not only hold symbolic meanings, but, very personal meaning to our family.

However, one of the things that has happened to our traditional dishes is an evolution of these dishes.  As my own journey in food has changed, along with the very different journeys of my sister and brother, as has our food, cooking styles and approaches.  This year was no different, as you will all see over the next few posts.

One of the big changes was the presence of fish sauce at this years preparation counter.  As many of you may have noticed, my personal choice of food is often BBQ heavy, with smoke and red meat making notable appearances.  My sister is much less focused on meat, while my brother uses simpler easier t prepare food that focus on the need to get food on the table.  One of the ingredients my sister has taken from her more exotic veggie oriented approach is fish sauce.  'Coup de chance!'  A friend and fellow good centric blogger has recently come into a position that allows him access to some of the finest fish sauce in the world.
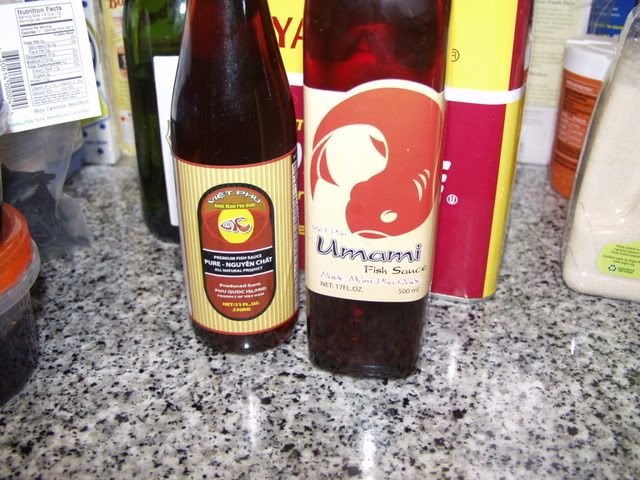
These two sauces made the trip with me.  They are both from Phu Quoc Island in Vietnam, the Umami is a brand that is not available in the U.S. the Viet Phu Brand, on the left, is the sauce my friend Rob is now involved in bringing to the market locally.  This found it's way into many of the dishes I cooked on this trip.  It adds an invaluable sense of Umami to many dishes, including BBQ sauce, BBQ slurries, salad dressings, dipping sauces and soups.  While unbelievably aromatic, in a fishy sort of way, when alone, or leaking in the fridge, it adds a wonderful complex touch to the aroma of foods as well.

Monday, December 20, 2010

Four Ingredient Challenge Flank Steak

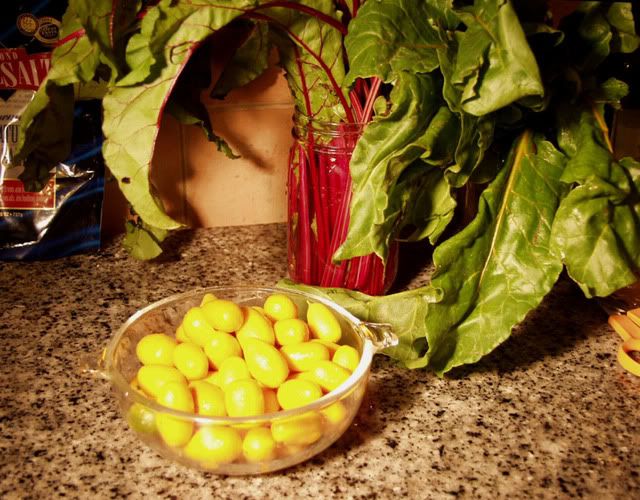
And this month's challengers, flank steak, beets, gnocchi and kumquats.  Who chooses this combination of ingredients?  Oh well, the interesting thing about the challenge this month is how to conceptualize a menu when ingredients are limited in curious ways.  I think this is even more interesting when you take a look at my fellow Blog writing compatriots this month.  Each of us brings a unique and varied experience to these ingredients and how we approach using them.  I am just going to throw an image in here, because I think it is pretty cool.
Those are the kumquats and the beet greens.  When I first got the list of ingredients, I knew that beets come with a bonus edible portion, as long as your grocer has fresh beets.  In my case, they had fresh baby beets, with nice looking greens, which I knew would work well with the gnocchi.  The kumqauts, not a familiar fruit for many, is a small (inconveniently tiny) citrus with almost no flesh to really speak of.  The rind however is a very tasty element that combines some strong citrus qualities with a subtle sweet and then bitter element.  It is often made into a marmalade or syrup.
And then there is the actual beet root and the potatoes, as you can see, the beet roots I was able to get where small, hence very tender and sweet.  The greens were well hydrated and crisp, I knew that I would be able to use both of these elements.  The potatoes were because I felt that potato gnocchi were going to be easier for me to handle, I am bad, BAAAD, with the more tender ricotta gnocchi.  I was able to get some local northern California potatoes as well, these were thin skinned, with some russeting, and quite heavy for their size.  By now, I am thinking the beet root is going to be a standalone element, their being so fresh and of good quality, I wanted to highlight them a bit more.  The greens, with a slight bitter and herbaceous taste would contract beautifully with the blander gnocchi and maybe some garlic.  Fresh produce wants little to make it really work.  Pantry elements would be limited to garlic, sweet barnea olive oil, AP flour and some shallots.

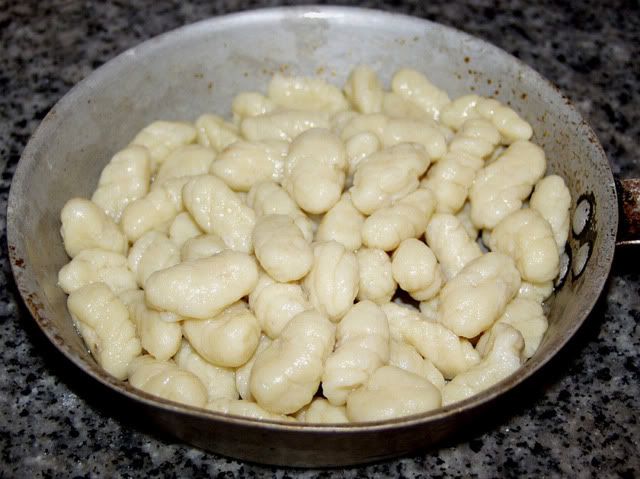
Beet roots and potatoes were roasted over an open flame of charcoal and oak chunks, I was hoping to impart some flavor, but, I can't say I got the flavor of smoke that I had hoped for.  I did get some very nicely roasted roots, with a nice texture and some sweetness that I had hoped for.  These were allowed to rest over night, peeled and prepared.  The beets only needed some heating and a little salt.  The potatoes were peeled and then grated through a medium textured microplane grater.  Gnocchi were made using a relatively simple recipe of egg, flour, potato, salt and a little nutmeg.
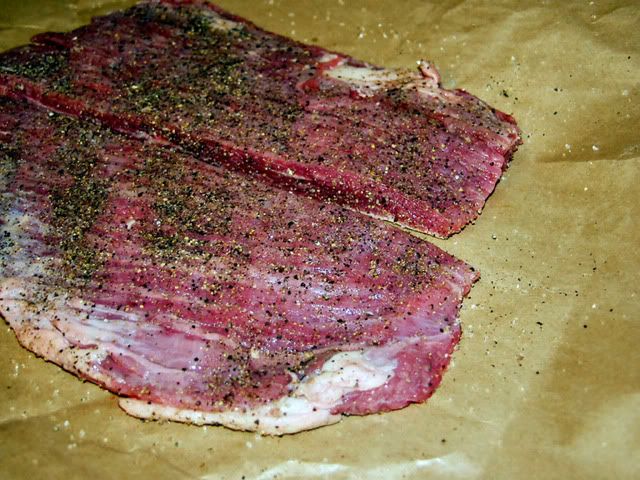
I know, impressive photo, la blanc mange!  I digress...  To the kumquats, what to do with them, well, they had a terrific aroma and testing one, I decided there was a definite bitter flavor on the finish, I could exploit this.  The beets would be sweet, the meat savory, the gnocchi savory and herbal, the bitterness could be used in a couple of elements, along with some sweetness, to add depth to the flavors on the plates.  Also, the rinds would add texture.  The flank steak came to mind as well, as I was going to go very simple with a good piece of meat, just some of my usual Top Rub mixture, then onto a very hot fire.  Cook a few minutes each side and done.  I was going to rely on the meaty, savory flavor of grilled meat to carry the main plate.
By now, I realize that I have a good main portion for my salad and meat dishes, along with a side that I know will work great.  This is the decision point of how to pick up the main flavors for each plate.  For the salad, with roasted beets, being primarily sweet (there should have been smoke I tells ya'!) I needed something more punchy, arugula is punchy, baby arugula looks good and is on sale. Done.  Now, I have decided to use the kumquats as an element for bitterness and sweetness, what I really want is something salty to balance it.  Feta is salty, and goes with arugula and with beets...There we go...

Warm Roasted Beet Salad with Arugula, Shaved Shallots, Feta Cheese and Kumquat Preserve, with a Chervil and Tarragon Vinaigrette.

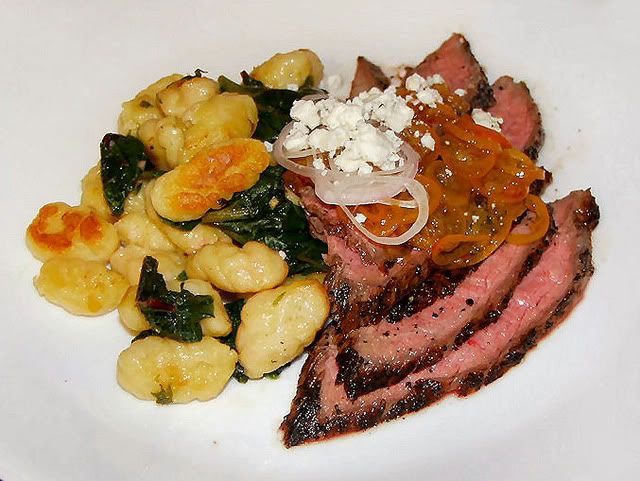
Then onto the main plate, what to do about the flank steak, I was confident that I could pull off the grilled flank steak to a nice medium rare. I knew I had the side dish worked out.  How to pop the flavors on the steak.  My initial thought was to go with chimichurri, but, that ignored the ingredients and materials I had already prepared.  And there were those kumquats.  Well, the meat will have a savory profile, some heat from the black pepper and I had some sweet and bitter I could add from the kumquats.  The idea of borrowing some of the flavors from the salad to carry to the main plate makes a lot of sense to me.  Hence, I worked with what I had already.  And thus...
Flank Steak with a Kumquat Preserve, Feta cheese and Shaved Shallots with a Chervil and Tarragon Vinaigrette along with Pan Seared Gnocchi with Beet Greens and Garlic.  This was an excellent dinner.  I have to thank the Four Ingredient Challenge creators for inviting me into their fold, I think the two meals I have cooked so far have been the best meals I have cooked on my kettle thus far.  I look forward to the next year of cooking with these folks.

I wish everyone a Merry Christmas and encourage you all to look at my fellow Four Ingredient bloggers.

Larry Gaian of The BBQ Grail - Entry Here
The BBQ Grail website was created in 2007, initially to document the author’s quest to find the perfect backyard BBQ experience. Since that time The BBQ Grail has become one of the more popular BBQ blogs on the internet and is listed on Alltop.com as one of the top BBQ blogs.
Paul Haight of No Excuses BBQ – Entry Here

The No Excuses BBQ website was started in January of 2009 as a way to record the author’s goal of cooking outdoors at least once a week throughout the year and showing the results to the world.  Somewhere along the way things got out of control…
Rob Bergstrom of In To The Flames- Entry Here
Rob launched Into The Flames in the summer of 2010 as a way to share his passion for cooking, eating, and exploring food.
Marc Van Der Wouw of Grill Adventures - Entry Here
Grilladventures by broadcastmarc is started on march of 2010.I started the BBQ thing when I was 30,before that we eat a lot outside.have fun,but when the kids came in our life We start serious cooking.Most of it is realy healthy I think;-)The grill has a special place in my heart,We love to do things outside..Everything I make is an adventure,and sometimes we use the books.We try to grill as much as we can year round.
Chris Grove of Nibble Me This- Entry Here
Nibble Me This is Chris Grove’s blog about his misadventures in live fire cooking. ”I have no culinary training….I’m just entertaining myself with fire and food”.

Thursday, December 2, 2010

Yakisoba-Fusion style

I made yakisoba for dinner tonight, but, it had to be at least partially cooked over a live fire.  What to do?

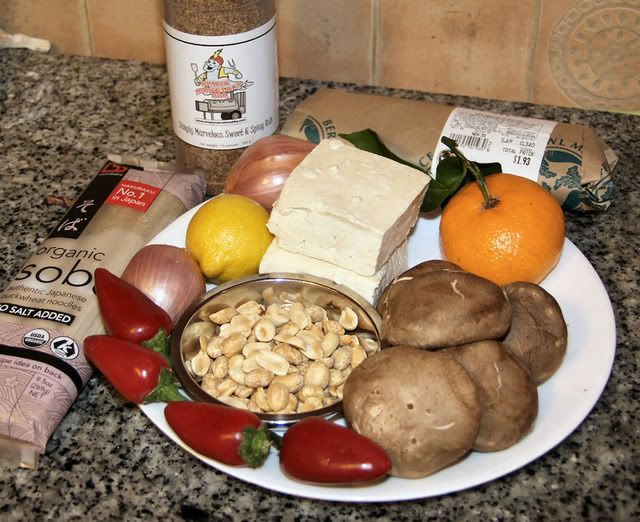
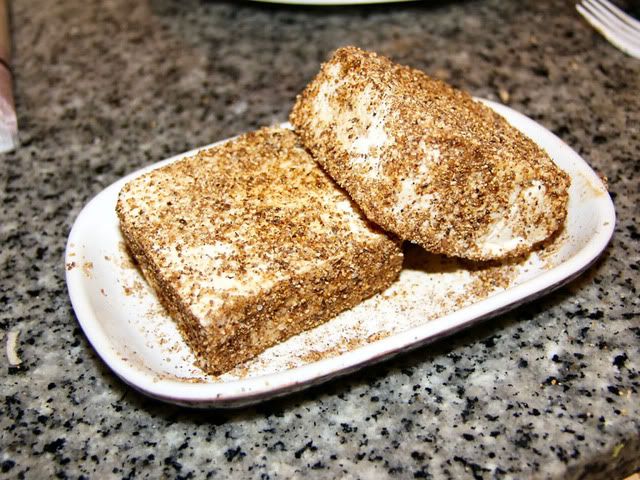
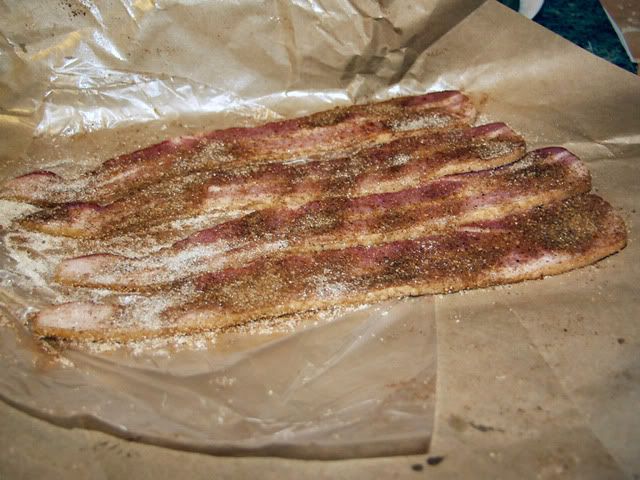
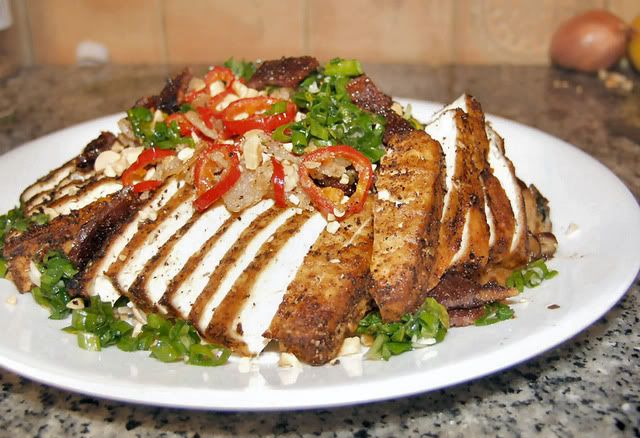
Well, I decided to go Fusion-style and grab a few different elements of flavor.  Tofu was crusted with a Simply Marvelous Sweet and Spicy rub crust, the bacon was made onto bacon candy, some nifty herbal work fusing pesto with Japanese herbs, and a few shiitake mushrooms and peppers.
The tofu is from a local tofu shop, I selected a firm style, as my preferred kinugoshi has a tendency to slip through the grate.  I used the lemon and satsuma skins for flavoring the soba water.  Just a little twist.  Bacon is bulk purchase from Berkeley Bowl West, I like the idea of buying bacon in bulk form, I get just what I need.

For the bacon candy, a standard amongst many BBQ enthusiasts snack recipes, I took thick cut bacon and liberally coated with a mix of Simply Marvelous Sweet and Spicy along with 5-Spice powder, cinnamon and some turbinado sugar.  This was smoked for an hour at 300F.  The tofu recieved a similar treatment with some added kosher salt. This went on with the bacon candy.
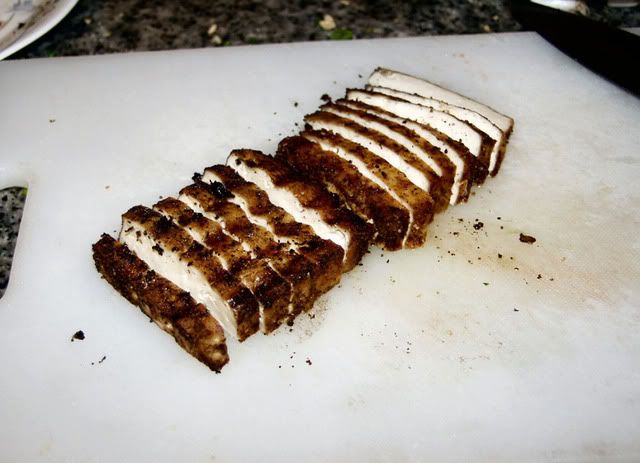
While these smoked, I prepared a pesto of mitsuba, spring onion, chives, perilla, freh garlic and a little bit of mint.  These were combined into a pesto with olive, sesame and neutral oils to create a herb oil.  This would be used for several different steps along the way.  I also fried the shallots with a light flour coating, then added the sliced Fresno peppers to the oil the shallots were fried in.  This seasoned oil was then partially drained then mixed with some herbal oil to fry the soba pancake.  Hot oil everywhere, no photos. Here is the tofu fresh off the grill and sliced.  I think this is looking good at this point.
From here it is just a matter of assembling the various elements into a finished plate.  The soba going down first, very similar to how chow mein was served when pan-fried.  Then the tofu and various aromatics and sauces were added to soak into the tofu and noodles.  Given a little time, the crusty, crunchy noodles soften slightly with the oil and liquids and the whole dish really comes together.

This dish had some pretty good punch, the borrowed elements of using fresh red peppers and raw garlic gave it some real heat on the tongue, and lips as well.  The tofu and mushrooms provided the savory counter balance to the heat along with the fatty sweetness of the bacon candy.  Each flavor distinct yet balanced, each bite changing with how the elements are combined on the fork.