Search This Blog

Sunday, August 4, 2013

Baby Back Ribs

Decided to test out a couple of ideas, and since I was going to be at home futzing around with a few repairs, I went with some ribs. Low cost, low time investment, low effort was my thinking. It is odd how this never works out.

The ribs ended up being the extra meaty ones, which I actually dislike, and then they were pricey, as the local grocery store didn't have the pork I like, so off to the butcher counter. Now I was spending more time and money than planned. Oh well...made up this stuff.

Ready for eating

The Rub: (total 1/3 cup)
3 parts kosher salt (I use Redmond Real Kosher Salt)
2 parts medium grind black pepper (Tellicherry from Oakland Spice Shop)
1-1/2 parts Maple sugar
1/2 part smoked Spanish paprika
1/4 part ground nutmeg

The Injection:
1/4 cup apple juice
1/4 cup white wine vinegar
3 tablespoons Red Boat fish sauce (brand matters, no MSG, no sugar, no wheat)
2 tablespoons of Yuzu hot sauce
1/2 teaspoon of the above rub

Combine all ingredients, load into injector

Pig Honey:
1/2 cup water
1/2 cup apple juice
4 tablespoons Red Boat fish sauce (brand matters, no MSG, no sugar, no wheat)
1/4 cup maple syrup

Heat all ingredients to combine, do not boil.

First off, I used a typical injector and injected each of the spaces between the ribs, as well as the top part of the extra thick ribs. You could see the meat plump with the liquid. The membrane was left on for this part of the cook. I wrapped the ribs up and let them sit for an hour in the fridge. Then they were removed and sat on the counter for a few minutes.

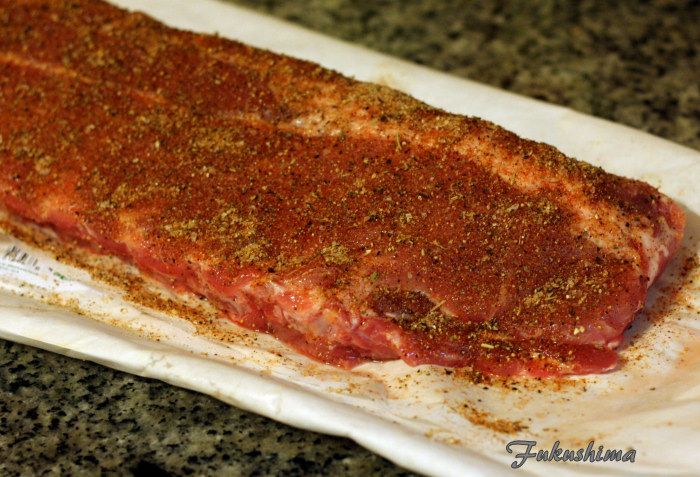
Step two of the process was to strip the membrane, I feel this makes for better bite through once the cooking is done. I apply the rub using a shaker bottle, trying to get a fairly even coating, although it doesn't matter all that much. I do manage to get it around all sides of the meat. I let it sit while I fire up the cooker.

Injected, Rubbed, Ready

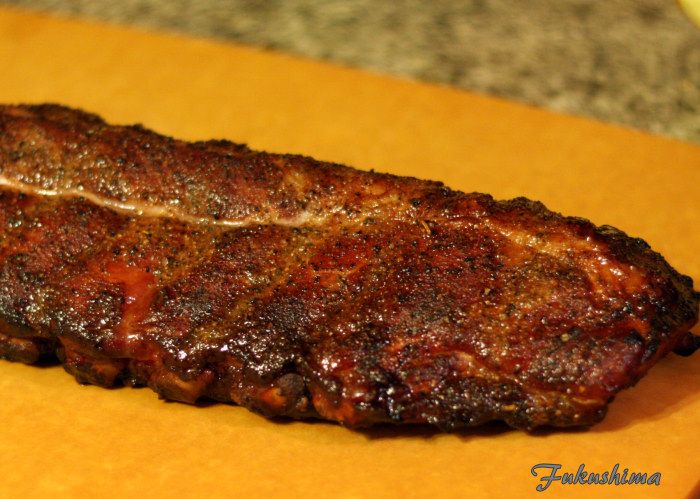
The UDS was fired, largely because I hadn't used it in a while. I loaded about half the basket with charcoal and chunks of apple wood. Set it on fire and let it ride up to 215F. Got the light, sweet, smoke I wanted, so put the ribs on and left two of the vents open. The UDS rode up to 300F and settled in, so I left the vents set and went about with doing other things. After 4 hours, I hit it with a dribble of the Pig Honey, and then again an hour later. By now, the cooker was almost out of fuel, temperatures were down around 225F, and the ribs were just about done. Took them off between 5 and 6 hours in, tented in foil for 20 minutes. This looked promising.

The ready to eat rack

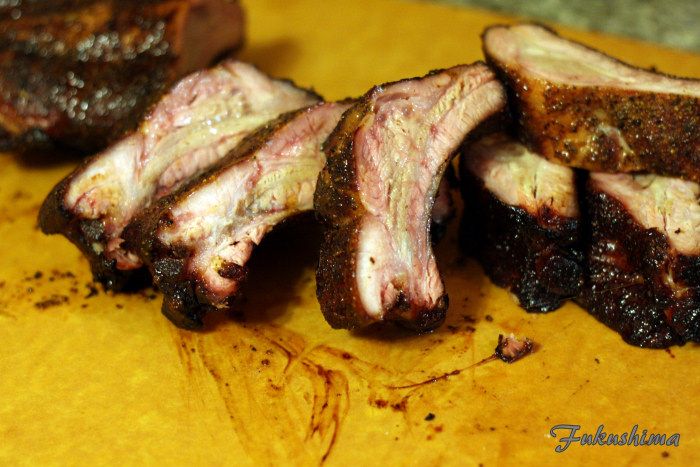
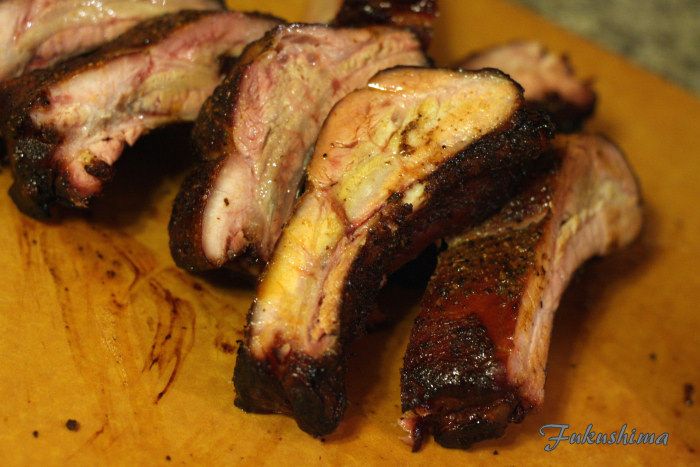
Sliced off a few bones, and was a little concerned about the texture, but, as I sliced more, things seemed to be alright. Very juicy and the knife slid right through.

Dinner

There was a slight smoke ring, the texture was terrific looking, there was a lot of juice and some fat, the yellow discoloration showing the fat that stayed in the meat. I find that this is common with the extra thick baby back ribs, there is a layer of fat in them, that renders and leaves that extra grease. It takes that extra hour to render them up right.

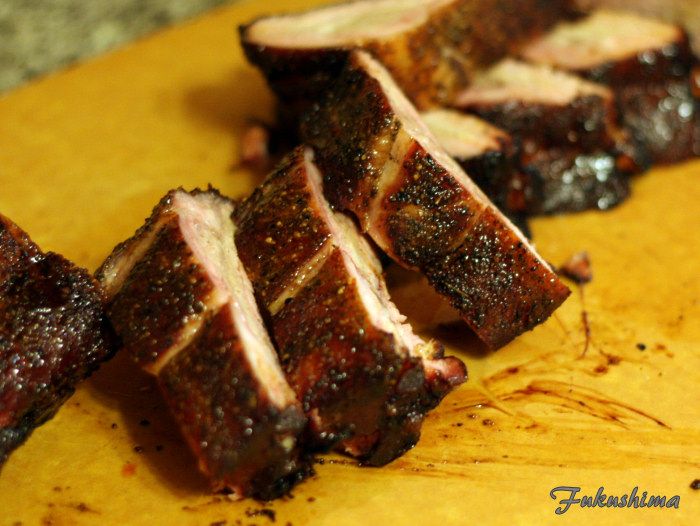
The Bark

I neither use, nor believe in the use of a slather. I have never seen the reason for it, as the rubs I use build up fine without it. This rack had beautiful color and the bark was just crisp, but, broke with just a slight bite. Texture of the meat was tender, with a little pull when you bit into it, but, leaving a clean bone. Once off the bone, the meat had great texture. And there was loads of juice. I need to try this with spares, as I was really happy with the cook.

Thursday, August 1, 2013

Porchetta on the Big Kettle

My friend Rob is moving from the temporary rental house he and his family have been living in for the past year and a half, after finally finding the next great home for them. And it was time to do a farewell cook to the patio that has hosted quite a few great cooks. It had to be epic. And it was up to me to do something special, enter the Live Fire Bucket List. The idea of digging a huge pit was not really a good idea, so it was to Item Two that we turned. Porchetta! To be more specific, a version of the real deal, we went with a pork belly wrapped around a tenderloin, and smoked, then roasted. A true Porchetta, still Item Two on the list, is a small pig, boned whole, and stuffed with herbs, then tied and roasted in a wood oven (this will happen). In any event...

Porchetta and Beef Ribs

How did we get there? Well...

Herbs

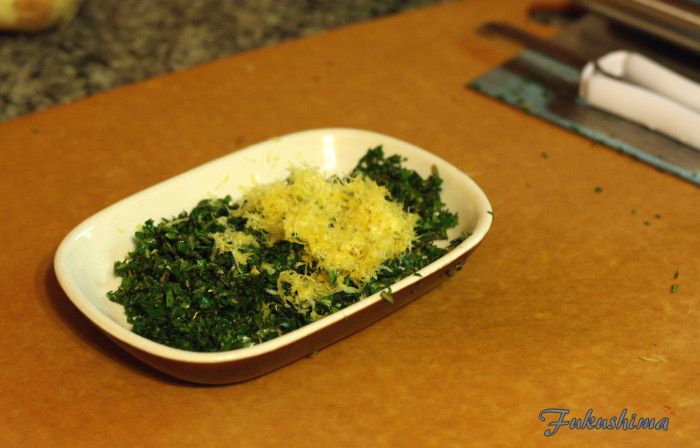
To start the process, I took some home grown sage, basil, thyme and store bought rosemary and flat leaf parsley, reduced this to a very fine chop. Added the zest from a lemon (for this use, organic lemon, as I want a clean rind) and mixed it all together. Three-fourths were to be used as herbs, the other fourth was ground into the salt and pepper, to make a spiced salt. This brings out more aromatics and integrates the flavors into the salt and pepper. I also toasted some fennel seeds and coriander seeds, these were powdered in the mortar and pestle.

Herbs and Zest

That may not look like a lot, but, it is plenty of herbs for this size roast. I also minced up three shallot bulbs and a dozen garlic bulbs were first minced then turned into a paste.

Pork Belly-untrimmed

And here is the pork belly, untrimmed. I needed to remove some silverskin and clean up some excess meat and fat. Although I am a huge fan of carbon steel and Japanese blades, when working with meat like this, I default to my Dexter-Russels, the handles remain secure in wet hands, and the blades have the right edge for me. I can make very precise cuts with these two knives. I should note, the skin side got a thorough scrubbing with kosher salt and vinegar, this was both to clean it, and make sure it had a coat of salt and acid.

Nice and trimmed

I went ahead and scored the meat at this point, about 1/2 the distance through the meat side and through the skin as well. This aids in getting the meat evenly cooked, and it getting the fat to render. It is pretty important, as if you don't do this, the meat folds and makes it harder to roll. It also enables more of the herbs and spices to penetrate the belly. I happened also butterflied two tenderloins.

Salt, Pepper, Fennel Seed and Coriander Seed

Shallots, Garlic, Herbs

At this point, I took the time to force the spices and herbs into the slices in the meat, and to work it around enough to get an even layer. Then the tenderloins.

Butterflied Tenderloins

And now, time to roll it up into a single roast. It is just for this reason, that I keep a roll of butcher twine handy. It actually ended up being quite easy to get a 10 pound pork belly to wrap around 3 pounds of tenderloin.

The small end

The large end

I was a little worried about the large end being open, but, there was no practical way at this point to get it closed. Ended up being a non-issue. That last two inches were sacrificed for beans anyway. You can see the slices in the skin at this point. Again, these will enable the fat to render and hopefully the skin will crisp.

And we're on the way...

At this point, I added a paste made of kosher salt, lemon juice and olive oil to the surface.

I want a rotisserie...

These are progress shots, I think the roast ended up staying on the cooker for at least another hour and a half. It was not quite as dark as it looks here, but, there was some singing. These areas did not taste at all bad though. Shortly after this shot, the end towards the camera as removed to add some pork and smoke to the fresh cranberry beans someone else was cooking.

And here we are

The first few slices, you can see the herbs, if only you could smell what I smelled when I cut into this. The entire kitchen and dining room filled with the fennel, coriander and herbs. The skin had some room for improvements, but, some parts of it were brilliant. Crunchy and salty. The pork was tender and moist, but, not as fatty as it would have seemed.

Chunks before chopping

Some chunks were served as a fine chop for sandwiches, I had bought some slider buns from Cakebox Bakery, a local bakery that makes the best burger buns. Other larger chunks/slices were served as they came off the roast. Some of the above pork may not have made it to the table.

The small end sliced

The small end stayed together quite nicely. You can see the skin didn't pop quite as well. Still, this shows how the salt and herbs worked with the meat. We ended up eating only about 1/3 of the roast for 6 people. It was very rich.

Leftovers

Yep, there were leftovers. I was sort of expecting more than 6, but, having leftovers like this, not a problem. Next time, I will start earlier and run a hotter fire earlier in the cook. I will also use a loin, not a tenderloin, as the meat in the center was so delicious, and I am certain a loin would have been even better. But, I was very happy with the flavor, texture and overall quality of the cook. Especially for a first time.