Search This Blog

Tuesday, December 27, 2011

Christmas Prime Rib

Yes, another prime rib post, yes, I went to Portland for a week and took zero photos, yes, I am a bad foodie. But, here is some information on a standing rib roast I cooked for Christmas. It started off as your standard Humbold Grass-fed rib roast, large end, untrimmed, or as untrimmed as I can get. I really hate when they overtrim, or relief cut the bone off of the roast and then tie it back on. No matter what else I am told, nor by whom, if you cut the bone from the roast, cut the deckle from the roast, tying it back on does not make it the same. How hard really, is it to cut slices from one of these roasts. Anyway, the star, unadorned...

The standing rib roast

A few supporting elements, a basic spice rub, kosher salt, medium grind multi-pepper blend, some dry mustard, paprika, ground clove and fresh ground nutmeg and a solid whack of garlic, actually only half of that went into the paste. Here are the spices...

Fresh garlic and some spices

And then  some herbs, in this case, fresh parsley, oregano and sage, were finely chopped, added to the garlic, which was grated, and all was muddled with some olive oil to create a slurry.

Fresh parsley, sage and oregano

Slurry, a beautiful culinary word, no?

 I will apply the dry rub, allow the roast to sit for 30 minutes, then apply the slurry. The idea, I hope is to get the rub to form into a pellicle of sorts, then apply the slurry over it. I often wonder if this matters as it all seems to blend together in the end. I could be making things more complex for no reason at all.

Rubbed and slurried (Sp?)

This whole mess was shoved into a kettle, with wildly fluctuating temperatures, in the rain, it ran somewhere between 400F and 200F for 5 hours. I also did not have a Maverick, which, due the the wildly flcutuations temperatures, meant I had to go out into the rain often to manually check the temperature. A note about grass fed and finished beef, it is quite lean, and does not take to overcooking at all well. My target temperature was 130F and I really felt anything over 135F to pull was going to be bad. Oddly, I hit 134F at 5 hours and pulled it. What a bothe, still, the steer died, all I did was get wet. Here it is, done and on the board after a 20 minute rest.

Rested and Ready

Next, there was slicing, always the moment of trurth, to see if the color looks right. If you will notice, there is a small yellow nub of what look like fat near the top of the roast, that is actually a tendon and needs to be removed. I like to take a thin bladed knife, run it along the top of the rib bone, then cut slices. The bones form a nice stable base for cutting.

Nice color

You will notice, this is lean meat, and we like the flavor, which is a little stronger than most beef you buy. It is largely unaged, maybe a few days in cryovac is all. This lean quality means you must not cook it past medium rare or it gets a little tougher. I think this shot really shows it taken right to where it wants to be.

Nice shot

I really like the color of these slices. The following shot was a mistake, for some reason, the red tablecloth made the color in this image horrible. Still, some nice slices on the table.

Horrible shot

Yum, purple meat! Geez, you just never know.

Sunday, December 4, 2011

brisket chili-sort of

Well, what to do with the less perfect parts of a less perfect cook of brisket and pork butt. Well, the traditional fallback for me is chili. Or, in this case, since I added some remnants of pulled pork, a chili-like substance suitable for use like chili. I have to say, there must be something other than cooking on my mind, I sort of blew this cook as well, as I ended up with a super smoking hot bowl of red, I ended up abandoning Texas Red to moderate the heat.

I started by preparing some aromatics, in this case, 2 yellow onions, 5 cloves of garlic, 1 Poblano chile and 2 red bells. I added the Poblano after fire roasting the skin off, which should give the chili a nice subtle fresh roasted chile background, the red bells recieved similar treatment, but, were added for sweetness. I used a neat trick to peel the garlic, which entails putting the unpeeled cloves into a metal container with a lid and shanking iy vigorously for a few minutes, peeled garlic is easy.

Aromatics

I also prepared some chile powder using fresh ground chile, I can easily access this since I live in a city with several nice Mexican groceries. I use Cayenne, California, de Arbol, Pasilla and sweet Paprika powders to make a blend, then use this along with my usual Phu Quoc black pepper and sea salt to season.

Home made Chile powder

I added the aromatics and 1 tablespoon of the chile powder to get the ball rolling, a little salt to help with wilting. Then into the pot went the brisket, some more chile powder and more heat. Finally, the pulled pork, which there was a lot of fat, I was not happy with the amount of fat in these butts. Then another tablespoon or so of chile powder and still more sauteeing. Once a fond formed, I added enough water to cover the mess, along with another tablespoon or so of chile powder and a healthy whack of salt.

Brisket added

Pulled Pork added

Cover on and cook for an hour at low heat simmer. Further testing indicated a little more flavor would be nice, so in went 1/2 cup of Red Boat Fish sauce. I will let this rest over night, and then continue to cook tomorrow. I like to let it rest partway through, since the meat is cooked and tender, it does not need hours to simmer and render. The rest allows for the flavors to combine and mellow.

Finished bowl of red chile...Spicy!

So, initial testing indicated that I was a little heavy handed with the home made untested chile powder and that some moderation was in order. I opted for the horrific idea of adding some tomato sauce and beans, along with more Red Boat and some palm syrup. This smooted things out, but, is not really my idea of what chili really is. Still, something had to be done.

Chili-like substance

Since I am a huge fan of rice, I think it has something to do with my Japanese heritage, at least in my case, I went with some leftover rice, with the chili-like substance spooned over. I had bought some other things, like cheese and onions to serve on top, but, the aroma and me recent workout argued for eating right away.

Bowl of chile-like stuff over rice, Tasty!

Oh, that brown stuff in the plastic bag? Mesquite flour, I am not sure what is going to happen to it, but, there it was.

Tuesday, November 29, 2011

Good Old Smoking Ribs

I decided to take the UDS that I received from the NorCal BBQ Brethren for a spin today, and loaded a few items of meat into smoke. I decided I was going to want some dinner and since I was running smoke, I went with some baby back ribs. This is a pretty unusual smoke for me, as there are no exotic ingredients, no unusual preparations or techniues, just unwrap meat, trim membranes and fat and rub.

Beautiful color and shine

Nothing fancy, I used some Simply Marvelous Cherry and Simply Marvelous Sweet and Spicy, let it sit while the UDS came to temperature. Onto the smoke at 3:30pm, off the smoke at 7:00pm. I used a mix of lump, Kingsfrod and Royal Oak briquettes, along with some apple and hickory for flavor.

Great color and texture

It all ran along at 235F per the lid thermo, I figure closer to 275F based upon cooking time. I went to bend them, the larger rack bent perfectly, the smaller rack split, woops, time to pull and eat.

I think I could compete with these

As can be seen, color was great, I went with some leftover Bart's Blazin' Q sauce from my friend Dave Bart, he is making a great sauce and it worked fantastic on the ribs. I loved the spicy and balanced flavor. This really reminded me of why I learned to cook over a live fire, there is no substitute for pulling these off the cooker and eating from the kitchen counter.

Saturday, November 26, 2011

More About Pies

So the last post got a little long winded (what? No, you long winded? Never!) So, here is what went into the crusts. In keeping with my tendency to not follow any instructions what so ever (yes, there were detailed instructions in the last post, I left off the detours for, um, the sake of brevity) I made these roughly based upon the written recipes on the black cover sheet of my copy of Joy of Cooking.

For the pumpkin pies, 4 organic free-range Sugar pie pumpkins were split, seeded, roasted in 1/2" of water, scooped out and mashed. I chose to do this by hand, a potato masher works too. For two pies the following was combined:

5 cups roased mashed pumpkin
2.5 cups evaporated milk
1 cups whole cream
1/4 cup XO cognac (it's all I had okay?)
1/2 cup brown sugar
3/4 cup unbleached organic fine turbinado sugar
1/2 teaspoon fine sea salt
2 teaspoons cinnamon
1 teaspoon ground ginger
1/2 teaspoon each nutmeg and mace
1/4 teaspoon ground cloves
5 eggs, slightly whipped

I vigouroulsy whip all of the ingredients to thoroughly blend. I use a stiff ballon whisk and a large bowl, really give it a beating. I then filter the custard through I medium fine sieve to remove any egg or solids that did not go smoothly into the custard batter. This is then refigerated while crusts are rolled. Chilled custard into a chilled crust set into a room temperature pie pan, do not put chilled glass into the oven.

For the apple pies, who knows how many pounds of fresh apples were processed for the two pies. I went and bought Granny Smiths, Fujis, Braeburns and one other variety which the name escapes me, there were 1 plastic bag of each, except for the Fujis, where there were two bags. All were peeled and cored, kept in acidulated water and then spiced as follows:

1 very large bowl of chopped apples
1/4 cup brown sugar
3/4 cup organic fine grind unbleached sugar
1/2 cup bourbon (single barrel small batch bourbon, it's all I had)
1 tablespoon Meyer lemon juice
1/2 teaspoon fine sea salt
1/2 teaspoon each nutmeg, allspice and mace
1 teaspoon ground cinnamon

All was mixed together and allowed to sit overnight. This was just to give me more time on Thanksgiving to get the pies rolled and baked.

All pies were baked initially at 425F for 10 minutes, then oven was lowered to 325F and remaining time ranged from 35 to 45 minutes until pies were done. For apple pies, I go by color, for pumpkin, I go by a clean knife test.

These pies were quite good, I really like spiking the pie fillings, it just adds one more layer of flavor to the filling.

Pies

For Thanksgiving, I was invited to my sister's in-laws for dinner, so no smoking turkey for me. I did decided to make some pies, in this case, two pumpkin and two apple pies for the dessert. I use an old recipe, I learned from my Uncle Roy, whose dad learned to make the crust while in a WW2 Concentration Camp for Japanese citizens and residents. The chef, according to family lore, had been a pastry chef at the Ritz-Carlton Hotel just before the war but had been repurposed in life as the head cook for the camp. He had no more idea to cook for hundreds of folks, than my uncle's father had to make pie, but, my uncles father had run a cafeteria in Fresno prior to the war, so agreements were made. And I can make a great pie crust.

Grandpa Sahara's pie crust:
12 cups AP flour
6 cups shortening (I use 3 cups each butter and shortening)
1/2 tablespoon fine salt (I use sea salt)
8 tablespoons sugar (I use fine organic unbleached sugar)
2 cups iced water (this measurement is wrong, by the way)

1. Cut shortening into small pieces, I actually like to use my hands and pinch it into flakes.

2. Place shortening in freezer to cool for 30 minutes to an hour.

3. Blend dry ingredients, I use a ballon whisk to make sure it blends thoroughly.

4, Pinch in the shortening into the flour. I use two spatulas to cut it in initially, then pinch the granular mix to create the final mixture. It needs to remain cold. Chilling everything, including tools, helps a lot. I am going for an appearance of fine gravel with some coarse sand texture.

5. Start adding small amount of water, folding or stirring with a silicon or wetted wood spoon. Eventually, there will be some gluten that develops, fear not, get it all moistened until it will form a crumbly ball. It should not hold to a ball shape.

Note: It often takes more than two cups, sometimes more than three cups. It matters how old your flour is, how dry it is, how much moisture is in the air etc... I chill three cups of water, add one cup to begin with drizzled over the entire mixture then add 1/4 cup at a time until I get the gravel appearance I want. Oh, I don't always do this in a bowl. If you have a large stone or concrete counter, it is a better surface.

I know divide the dough into 6 to 8 pieces, form them into disks using a sheet of plastic wrap for each piece, a flattened disk works best. If the dough seems dry, a spritz of water is not a bad idea. Wrap tightly, I double wrap. Then into the refrigerator for at least 2 hours. I then use a technique called 'frisage' to create large flakes of dough, which I then laminate back into a single dough disk, by combining, compressing back into disk form and back into parchment paper and into the fridge for several more hours, This creates streaks or layers of fat and flour, leading to a more flaky crust.

Frisage Flakes

Pre-compression

Wrapped for long rest

I did overnight this time, really great, as the dough moisture evens our, the flour hydrates, the glutens relax and you end up with silky, elastic dough to work with. Done right, this dough is a dream to work with, rarely sticks to the pin and never tears.

I prefer rolling dough out on a floured rolling cloth, I had to use baking parchment this year, as I ruined my cloth by using it to strain hash browns and it never got clean again. A little sprinkle of flour onto the cloth, onto the dough disk and onto the rolling pin. Roll, rotate, roll, rotate, you get a round circle for the pan.

Rolled and ready

Here is the reason I like the underlayment of a cloth of parchment paper, I can slide the pin under the underlayment and pick the dough up easily, it then drapes over the pie plate or filled pie shell easily. Actually, when I really get it right with this dough, I can handle it like pizza dough almost. I doubt you can see it in this photo, but, there are actual flakes of shortening visible in the rolled dough. In the following photo, you can see the drape and elasticity of the dough much better.

Dough in place

This post had gotten a tad long, but, this really makes a great forgiving dough, a flaky and tender crust and that is, for me, what pies are all about.

Tuesday, November 8, 2011

UDS and Pork

As mentioned in another post, this past weekend, I was cooking at a gathering called a Brethren Bash. As it happens, these fools actually trusted me to organize the Bash last year and this. Amazingly, it happened again and I think it worked out great. One of the great plusses and a real surprise was the gift to me of a custom UDS (ugly drum smoker) with beautiful wood handles from AML Woodart. Marty at AML Woodart makes some beautiful handles for various Weber and BGE products, has is also a master wood worker who I will eventually hire to make me a custom cutting board base. But, for now, here is my new UDS.
It actually has my name carved into the top handle and the phrase Itadakimasu in the handles. Many younger Japanese and non-Japanese who have been taught stateside think this phrase means let's eat. It actually mean 'I humbly receive'. And I can tell you, I am humbled that they gave me one of these, I consider these UDS cookers to be amazing for smoking meats, especially briskets. And the UDS was already seasoned, so I was good to go. I was planning on cooking three racks of baby backs and 2 pounds of pork steaks, so, I had meat and a cooker. Let's take her for a run. I loaded about 3 pounds of charcoal into the basket, fired up the coals with a weedburner and let it settle. Every UDS is a little different, the first fews cooks can be problematic, this one locked in at 235F and ran there for 5 hours.

I was trying a new rub out, with a goal of ultimately leveraging this rub into a completely different dish. The rub mix is based upon the spicing of Islamic Chinese traditions, except I used pork, which means this is more Turkish Chinese ribs. I used a variety of spices, including:

allspice berries

whole black peppercorns
whole white peppercorns
5-Spice (yes, I am lazy)
fennel seeds
cumin seeds
coriander seeds
cinnamon stick
cloves
Harissa mix
Kosher salt

Toast and grind to a powder. Coat the ribs, wrap tightly and allow to sit for an hour. Then recoat with Santa Maria rub and a second coat of the Spice rub.

These went onto the top rack for 3 hours, then the pork steaks went on and another two hours passed. I decided to go with Simpy Marvelous Sweet and Spicy rub for the pork steaks. This is one of my favorite rubs for making good BBQ with pork. It is truly my go to product. The meats came off at the same time, looking like this.
There were, oddly, no cut rib shots. But, the rubs is really what I was looking for. Ultimately, the rub will be used on lamb ribs for a brasied and smoked dish. For proof of concept though, these ribs had a great balance, complex spicing and a real kick on the finish from the Harissa and white pepper. Both meats did not disappoint for the first run on my new smoker.

Parking Lot Bread

Last weekend found me attending an event called The NorCal Brethren Bash, wherein a bunch of us who have met on a BBQ forum called The BBQ Brethren gather, meet each other face to face and cook and eat ridiculous amounts of food. One of the interesting things that happen at these events is that folks who might otherwise stick to regular meats and preparations start to experiment, learn new techniques or just get new insights to what other folks are doing. It also happens, that we end up cooking in a parking lot. I decided to make bread, sausage bread (the test run was posted here).

I started a week ahead of time, by making a simple poolish of commercial yeast, 1/2 cup honey pale ale, 1 cup warm water and 1/2 cup AP flour. This was allowed to sit on the counter for a week, lightly covered with plastic wrap to prevent flies and dust. I feed 2 tablespoons of flour to the poolsih every day, along with 1/4 cup chlorine free water. Something about cooking at remote sites when you are not organized or thorough, you forget things. Like yeast, measuring cups, spoons, scales and a pizza stone. No matter, who needs to measure?

So, I arrive and start to prepare the dough, realize I have only 2 cups of one week old poolish and loads of flour, a large bowl and some bottle water and kosher salt. I do have a recipe, but, of course, since I do not have a scale or cups, what does that matter. I start with what I think is 2 cups Bread flour, 1 cup AP flour, 1 bottle of water and the poolish. Mix until stiff, add a little water, little flour, more water, more flour, soon I have been mixing and kneading in the bowl (apparently the only piece of equipment I felt I needed, that and an oven pan). Eventually I end up with what looks like bread dough. Proof for 15 minutes. I retuen to see it is rising, time to really knead. I use a method that requires kneading for 5 minutes, resting for 2, repeat 4 times. Yes, 20 minutes of kneading, in a parking lot, on a folding table. I then let it rise, in a cool spot, covered in an oiled bowl for 4 hours.

Meanwhile, I started the smoking of 1 pound of Italian sausage. I also diced up a couple green and red bell peppers, a medium yellow onions and many cloves of garlic. These all went into the oven pan and got smoked for an hour. Low and slow veggies get so sweet and aromatic. I crumbled the smoked sausage and mixed with the vegetables.

After four hours of the second rise/proof, the bread dough was spread out, a healthy layer of stuffing and cheese were added and the dough was rolled onto a loaf. A stupidly large loaf that was nearly 3 feet long. It was beautiful, excpept it would not fit onto the cooker. Dang! I had to hack my perfect loaf in two.
It was cooked on a Big Green Egg Large, at 350Fish, since I am not really a baker, who cares about perfect temperature, it was somewhere around there for most of the cook. It did take a while, almost an hour until I got a couple of these off the cooker.
It sure looks like bread, it sure smelled like bread. I wonder...the biggest issues I have seen with stuffed breads is that the stuffings add a lot of moisture inside the loaf, which can affect the texture, often giving bread a sense of being undercooked. Not desirable. The particular process, even horribly mangled like I did this time, results in a very elastic texture, a crisp skin and a moist interior that seems to not be affected by the stuffing. I actually love this type of bread, it reminds me of the best San Francisco breads of my youth.
This bread was really a successful cook for me, despite rampant lack of organization, the bread was perfect in texture and had a wonderful flavor.

Monday, October 31, 2011

Bread Test Run

This weekend, I will be attending a gathering of fellow BBQ enthusiasts from around the Northern California and surrounding states. I offered to provide bread dough, which, means I had to get a biga started. I did that today, it will sit out for a few days, hopefully improving during that time. I started this one with commercial yeast, active powder type, two packages, along with one cup of honey pale ale and 1/2 cup warm water. I like to not use chlorinated water, but, I didn't plan well. Here is the active Biga after 3 hours.

I decided to take this and run a test, so I added 1 cup of it to 3 cups of flour, 2 cups of bread flour and one cup of AP flour. I also added 1 teaspoon of active dry yeast, since the Biga is very young. This was combined and mixed until tight. I then kneaded it in the bowl for 5 minutes, until it pulled from the sides cleanly.

Onto the granite, some light flouring, since I use a highly hydrated dough, I can use up to 1/2 cup flour during kneading. I need this. (get it? :-p) Anyways, I then decided to get lazy, stuffed it into the bowl of the Kitchenaid and put the dough hook on. Three 5 minutes bursts for kneading with 2 minute rests and the dough was ready for a final few minutes by hand. There is no substitute for this. The last 4 to 5 minutes must be by hand, as you can feel the dough become softer and silkier. This is how to tell when it is time to rest the dough. I was going to make 4 small rolls, which changed after I got home and saw the rise. Here are the little balls.

So, this decision resulted in my having rather poorly formed loaves. Oh well, a bad decision. I tried to recombine the balls into two loaves, which I spread with some garlic sauteed in olive oil, some fresh cracked Phu Quoc black pepper and some kosher salt. I get the black pepper from Rob at Red Boat Fish Sauce. It is a great spice. The loaves were cooked at 450F in the oven for 35 minutes, sort of. I checked it and pulled it when it hit 200F internal temperature. Here is what came out.

As you can see, not pretty loaves at all. But, lookie inside.

Since I make the dough without salt, which I believe gives a better texture, as salt is toxic to yeast. I add the kosher salt to the dough before I shape it, it gives a more capriocious saltiness, as the kosher salt doesn't dissolve that much during cooking. Each bite will be a bit different, the bread evolves with each bite. The idea of a salt-less dough may seem odd, but, it is not so unusual when you look at traditional beads, such as those made in Tuscany. At one time, salt was very expensice and bread was for the masses.

This bread had a fine crumb, a soft elastic tooth and a crisp crust. You could hear it cracking as it cooled. There was the expected richness of the garlic and olive oil, the punch of the black pepper and kosher salt varying with each bite. A very good loaf.

Monday, October 17, 2011

My Other Life

This past weekend, I got to visit an old project I worked on years ago in Benicia, California. Back in 1993, the firm I worked for got hired to administer and be the on-site representative for a project that would eventually become the Benicia Community Park. While the design landscape architect was another firm, I was on site daily to insure that the City's interests were protected. To that degree, I had the influence on several occasions to affect design of some site elements. One of the elements that required some 'site engineering' were these cooking grills. I made some 'tweeks' to make sure these units would last, were more functional and easily maintained. It was good to see that after 18 years of use, they function as well now as they did when new.
There are four of these units, each with the capacity to cook very large meals. The grates easily adjust up and down and will hold their adjustments perfectly. The actual mechanisms were designed and manufactured by a now defunct local company, what a great product that guy was making. I posted this at the BBQ Brethren forum and someone made a comment about all of the good food and good times shared around these. I am sure there have been many. But, this put in my mind, at this partucluar intesection of my two passions, cooking and landscape architecture, why I am still, after 30 years, passionate about what I do for a living. I have designed and worked on multi-million dollar residential estates, fabulous corporate campuses and some very interesting one-off buildings. But, my passion has always been park, school and playground design.
As cool as these grills are, and as cool as all the food I have cooked, and as much as I love when folks tell me that they love my food, it all pales to when I walk onto a park I worked on or designed and I see a dozen kids playing and laughing.

In fact, far beyond the food from these pits and all of the families that might have enjoyed them. I am a landscape architect whose passion has been designing parks, playgrounds and ballfields for public use. I have hated nearly every fabulous corporate campus or high end residential as a necessary evil to satisfy my need for earning a living. But, when I work on a park project, I know that for the next 20 to 30 years, and maybe even more, thousands of children will pass through each of them, laughing and playing, maybe making their first team, scoring their first goal or maybe just getting away from a real world that holds nothing but sadness for them.

I was recently asked why I have no passion for the 'art' of landscape architecture and I gave a useless answer. But, in truth, I have little use for the high end of design just for the sake of art, I am happy to leave that to other people. I have done probably close to 250 parks, schools and playgrounds over the last 30 years, multiply that by even just a 1000 kids per park (and that is probably a very low number) and I have fed the soul and joy of over a 300,000 children and they have fed my soul back everytime I go to any park and think about it all.

Yeah, I like these grills and they are terrific to cook on, but, they are all about fun for me. They are just a small part of a larger whole that has meant far more to me. When I took these photos, my nephew was with me, he wasn't even born when I did this work. He was quite taken and my nephew thought the whole park, especially the baseball fields, were amazing. My work never fails to enrich me in ways money has never done.

My name is Bob, I am a landscape architect and I make places were children laugh and play.

Monday, September 26, 2011

Four Ingredient Challenge

It's that time of the month again, The Four Ingredient Challenge, wherein, I cook a meal using ingredients that I would never use together to make a meal. This month the ingredients are:

Tofu
Melon
Peas
Potatoes

I was not really sure where I was going to take all of this, but, I recently had gone out on a fabulous night to a restaurant named Millenium, in San Francisco, which featured smoked tofu that had a texture and flavor I have not been personally able to recreate, thinking it might be the tofu itself, I decided to buy a Vegan tofu product that was presmoked, one that is common to the type of folks that might eat at a luxurious Vegan restuarant.
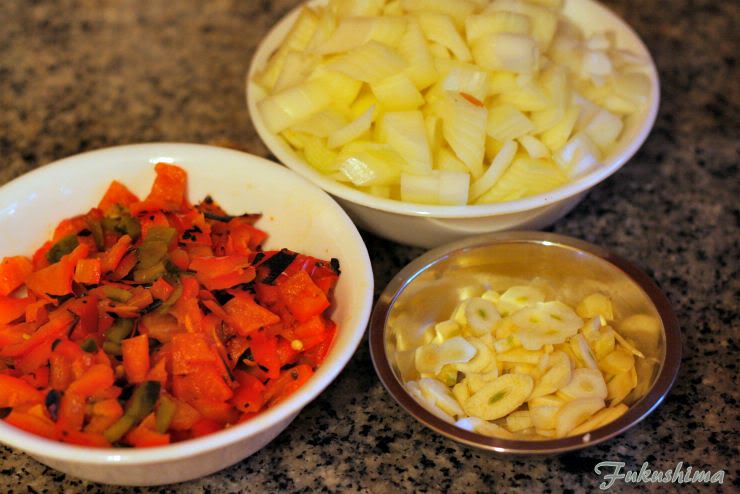
Since we are talking ingredients, here are the main players, I found a terrific smelling cantaloupe, which I hope means ripe and sweet, some Organic Yukon Gold potatoes, organic onion and garlic, the aforementioned smoked tofu, frozen peas and a few supporting players, as usual, the Red Boat fish sauce will be along for the ride.
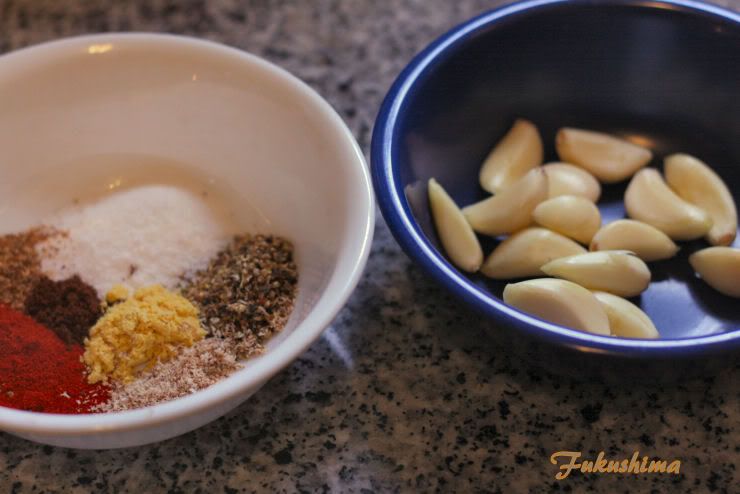
I made two spice blends, both based on a blend of Madras curry powder and a version of Japanese curry powder. In light of the melon and peas, I think a the Japanese curry powder will support the sweet flavors a little more. There is lime powder, dry mustard and chile powder in both, with the potato spice also receiving some dried thyme, which goes great with potatoes. I will also add some of the curry spice mix to the peas.
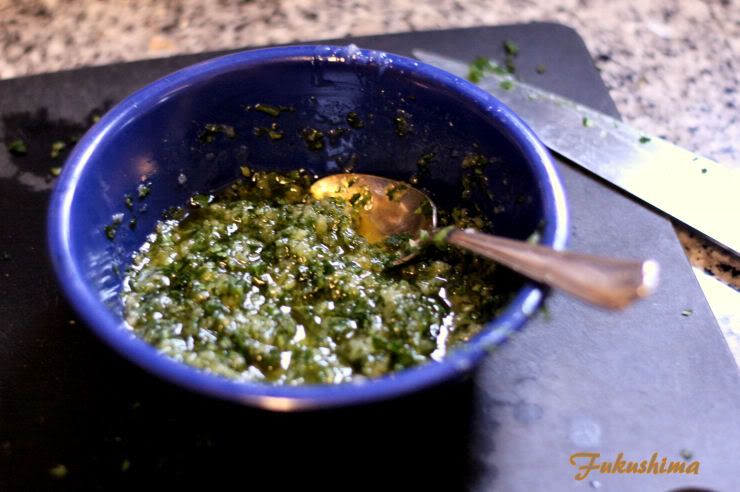
As to the peas, they were dresses with 1/8 cup of Arbequina olive oil, a splash of cider vinegar and a drizzle of palm syrup. Then one clove of garlic split, kosher salt and some water was added. These were then allowed to sit as the peas thawed. Then a little puree and strain action, and pea sauce is achieved.
Potatoes were sliced, coated with olive oil and spice blend, salted with kosher salt and given a drizzle of fish sauce. Sliced onion and a little bit of fresh garlic was added to bridge some of the flavors. This was all done in a hobo pack to get some cooking and caramelization on the kettle.
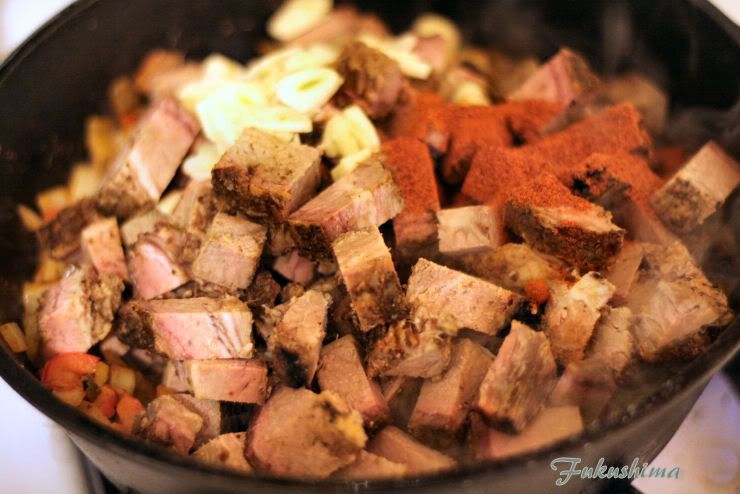
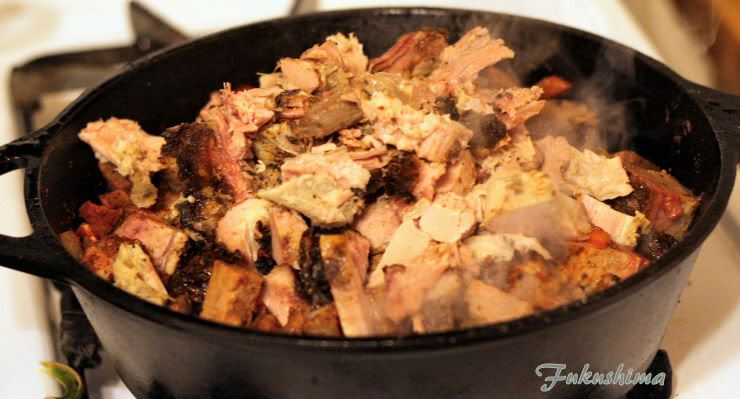
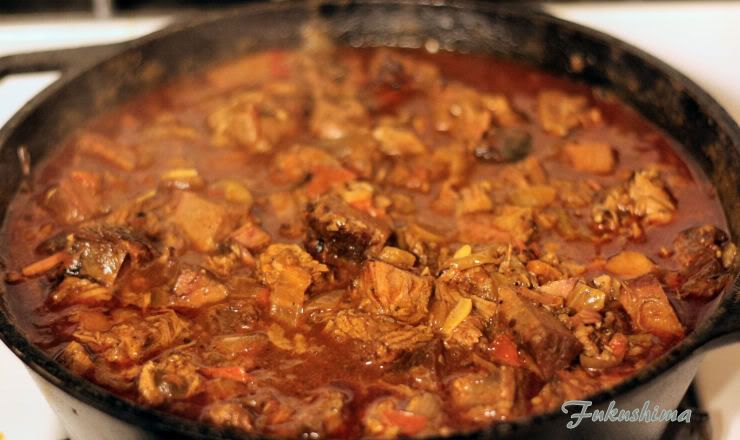
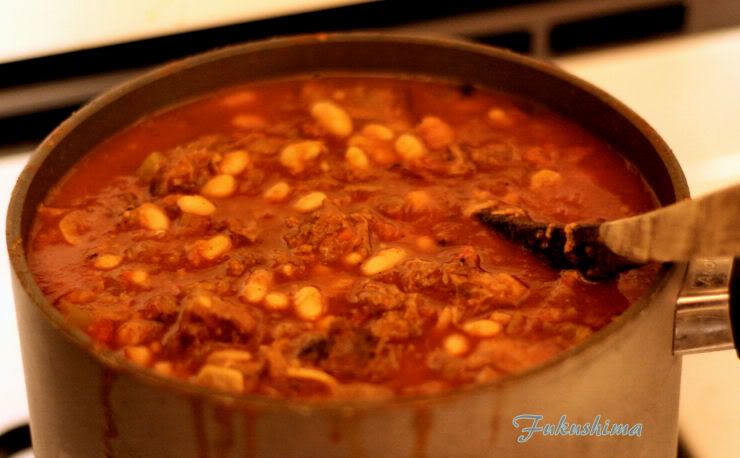
I think one of the things I liked about the Millenium dish was the texure of the tofu in small dice, it almost took on a feel of ham chunks. A sort of hobo ragout was my solution. A mixture of carrots, fresh cranberry beans, zuchinni, shiitake, onions, garlic and a drizzle of the olive oil, a splash or two of Red Boat fish sauce and some Phu Quoc black pepper along with the curry seasoning. Since there was to be something of a potato galette to serve over, there didn't seem to be a need for any starch in the 'ragout'.

On to the melon, I could just serve this as melon, or grill it and call it done, but, I really like the idea for these challenges to be integrating the elements in some manner that makes them truly interesting. And I could have gone the savory Asian melon route, but, too easy for me to do that. So, integrating a sweet fragrant melon into a smoked and curried dish it shall be. I decided on a brandied melon 'relish'; essentially heating up 1/2 cup of brandy, adding in some finely diced onion and then cooling it. I added the diced melon and gave it a vigorous stir to combine and then chilled while the hobo packs cook.

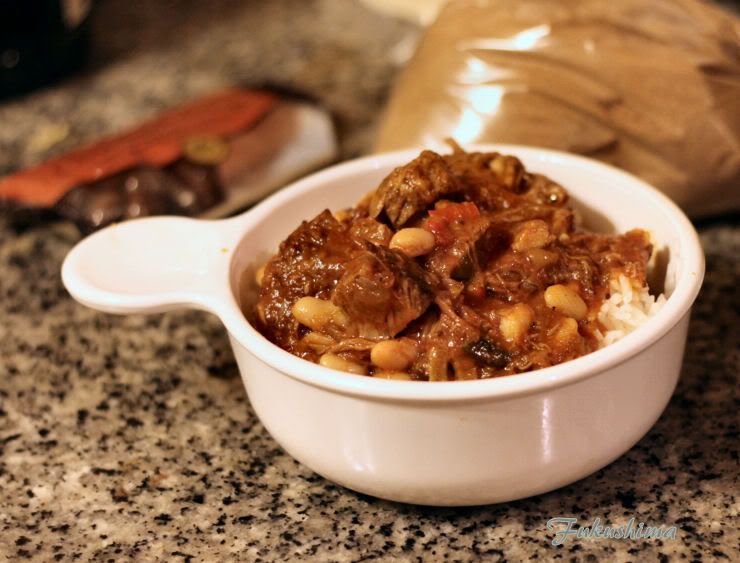
I really need to stop plating stuff and just dump it on the plate, I swear it would look better if I just did that. It looked a lot better before I messed around with the pea oil sauce. The brandied melons really worked great with the slightly herbal pea sauce and the smoked tofu ragout was just the right texture and flavor. Here is the better shot...note the lack of plate...
In this shot, you can see the olive oil and pea oil sauce a little more clearly, I really like the cold melon in contrast with the ragout. There are some crunchy beautifully caramlized potatoes in there as well. This is defintely going to be done again.

Larry Gaian of The BBQ Grail - Entry Here
The BBQ Grail website was created in 2007, initially to document the author’s quest to find the perfect backyard BBQ experience. Since that time The BBQ Grail has become one of the more popular BBQ blogs on the internet and is listed on Alltop.com as one of the top BBQ blogs.

Paul Haight of No Excuses BBQEntry Here
The No Excuses BBQ website was started in January of 2009 as a way to record the author’s goal of cooking outdoors at least once a week throughout the year and showing the results to the world. Somewhere along the way things got out of control…

Chris Grove of Nibble Me This - Entry Here
Nibble Me This is Chris Grove’s blog about his misadventures in live fire cooking. ”I have no culinary training….I’m just entertaining myself with fire and food”.

Marc Van Der Wouw of Grill Adventures - Entry Here
Grilladventures by broadcastmarc is started on march of 2010.I started the BBQ thing when I was 30,before that we eat a lot outside.have fun,but when the kids came in our life We start serious cooking.Most of it is realy healthy I think;-)The grill has a special place in my heart,We love to do things outside..Everything I make is an adventure,and sometimes we use the books.We try to grill as much as we can year round.

Jerry Russel of Cooking by the Seat of my Pants - Entry Here
Cooking by the seat of my Pants began life as a way to document our culinary misadventures. Since then it has become our way to encourage people to cook without boundaries or recipes. To just get in the kitchen and cook something from the heart.

Better Recipes “The Daily Dish” - Entry Here
Kristina has been writing “The Daily Dish” for www.BetterRecipes.com for the past two years. The blog covers a wide variety of recipes, but firing up the grill truly lights up her passion for food! She was named “America’s Next Pork Personality” by Guy Fieri for one of her grilled pork dishes, won the outdoor grilling division of the National Beef Cook-Off, and her winning grilled lamb-burger took her all the way to the land Down Under with Meat and Livestock Australia. The “4-Ingredient Challenge” is a fun and exciting way to get creative on the grill!

Curt McAdams of Livefire - Entry Here
Livefire cooking is about taking ordinary cooking and adding the flavor of fire to it, whether in high heat grilling, low heat smoking or indirect heat for baking. It’s about taking the primitive element of fire and harnessing it to make great food.