Search This Blog

Monday, March 11, 2013

You basic ribs cook

Sunday found me at my friend Rob's house, firing up his 26" kettle to get some ribs on. We manage to get together like this from time to time, just to dial back the intensity and keep our hand in the smoking world. In this case, we would end up smoking 9 racks of St. Louis-style racks, and a random Wagyu Tri-tip that found it's way into our shopping basket, when we were supposed to be buying some Swiss Chard. I decided to throw down with a few things that I have not discussed with anyone before, a maple sugar rub, a smoked paprika rub and a gastrique-based BBQ sauce. Some of the basics...

Maple Sugar Rub:
60ml medium grind black pepper
40 ml kosher salt
40 ml maple sugar
20 ml harissa powder
7 ml fresh ground nutmeg
5ml powdered mustard

Combine all ingredients into a shaker. It is best to make this rub just before use. Any time storing it and the maple flavor takes over.

Smoke Paprika Rub:
80 ml medum grind black pepper
60 ml kosher salt
20 ml dry palm sugar
20 ml dried brown sugar
25 ml harissa powder
30 ml bourbon smoked sweet Spanish paprika
5ml each fresh ground nutmeg, ground allspice

Combine all ingredients into a shaker. The smoked paprika is nice, but, what is important is that it is fresh Spanish Sweet Paprika.

Bourbon Peach 'Gastrique' Sauce:
12 ounces peach nectar or juice
12 ounces cider vinegar
2 tablespoons rub (a simple run is fine, it could be salt and pepper)
2-3 ounces (weight) of smoked, barky, meat (I use brisket trimmings)
3 tablespoons of olive oil, rendered bacon lard or other oil
3 tablespoons chopped onion
8-12 ounces pan dripping from kettle
1 teaspoon Red Boat fish sauce
bourbon until it tastes right

1. Make the gastrique. Combine the vinegar, peach nectar, 1T of the rub and the barky meat in a sauce pan and simmer to reduce to 6 ounces total volume.

2. Add chopped onions, oil and pan drippings, simmer to reduce to 12 to 15 ounces.
3. Strain and return to sauce pan, add fish sauce and heat until smell of fish sauce is dissipated.
4. Add bourbon while sauce is simmering, keep adding and reducing through simmer until taste if correct.
5. Makes about 12 ounces of sauce. Note that this sauce is on the thin side, it is not meant to be a covering sauce.

The ribs were cut and trimmed to be St. Louis-style racks. The trimmings and such were also cooked and snacked on. The kettle was settled in at 285F or so. Cooking fuel was lump and natural briquettes, wood was red oak and apple.

Half of the racks

foreground-Paprika rubbed, background-Maple rubbed

Not the proper way to load a kettle

There was some crowding on the 26" kettle, it required some extra moving of ribs through the cook, handling partially cooked ribs without gloves, yay, not. Incidentally, for those who love to fuss, Rob and I took off for lunch, and left the kettle to run unattended except for one check by phone. We asked Rob's wife to give us a report after about 40 minutes. After we returned, I shuffled ribs, then our friend Michael arrived, so we took off to go shopping, so the kettle was left unattended. Upon our return, a Wagyu tri-tip had been procured. It was so nice looking, so it was added to the kettle.

Wagyu Tri-tip, marbled

Since the kettle was going I decided to just throw this baby on top of the coal stack. Yes, I just went for it. And it was fine. I did find out that Wagyu tri-tip behaves differently than my usual Choice and Angus tri-tips, it came up very slowly to 110F, then seemed to just jump to 130F in seconds. Next time, I will know. This learning curve did not cost us at the table though, as the next images will show.

Hmm, looks okay

Yep, that will work

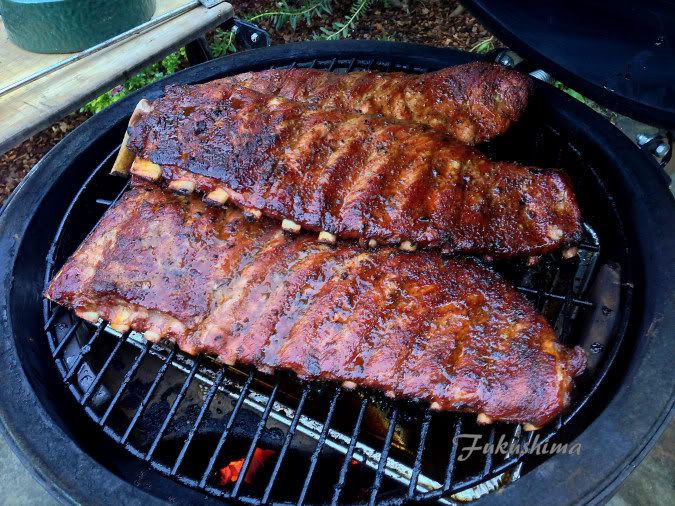
And back to the ribs, which we cooked using our technique of benign neglect, this is what we ended up with.

Too much meat? Noooo...

I think nine racks and a tri-tip are just fine for 6 adults. These looked pretty fine sitting there. And for those that care, no foil, no wrapping, no spritzing, heck, I spend at least 3 hours of the cook more than 5 miles away from the pit.

I really like the top rack in this shot, perfect in every way

This was also a meet and great as there was a BBQ Brethren in town, Jeff Jenkins was in from Ohio, so we had him swing by for some ale and BBQ. The beer of the table was from Almanac Brewing, a seasonal fennel ale that was the right thing for the ribs and tri-tip.

The Tableau

This meal did not suck, several other Belgians died that afternoon, so we were all happy campers by the end of the meal. The beans were a riff on the beans made by Paul Height from No Excuses BBQ, cooked under the ribs. There was a great salad as well, a nothing fancy meal of BBQ and ale.

Tuesday, March 5, 2013

Pizza on the Kettle

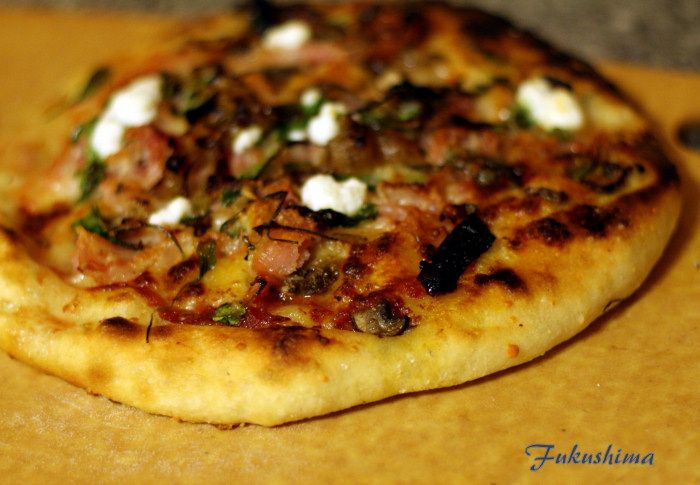
I have been pondering my lack of a wood stove or dedicated pizza cooker for some time, and have been playing around with different configurations for making pizza. I have tried fires on the bottom of the kettle, offset, in the middle, and decided I would try building the fire on the back side of the cooking grill, to see if that worked. It did not work well enough, the pizza stone, in this case a cast iron version, never got hot enough to cook the crust as I would like. But the overall pizzas were still pretty good.

The Dough:
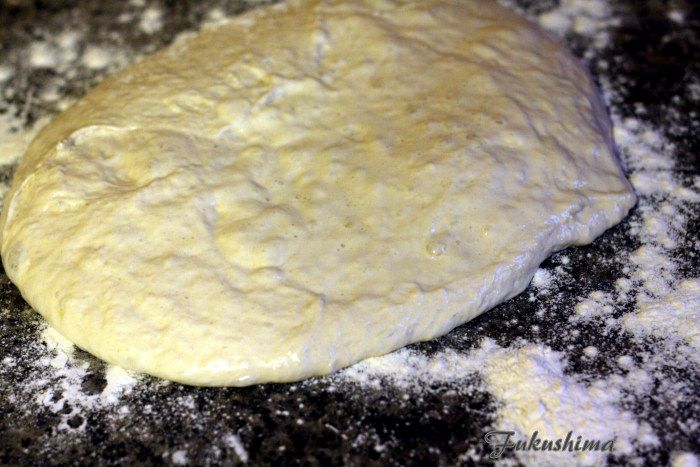
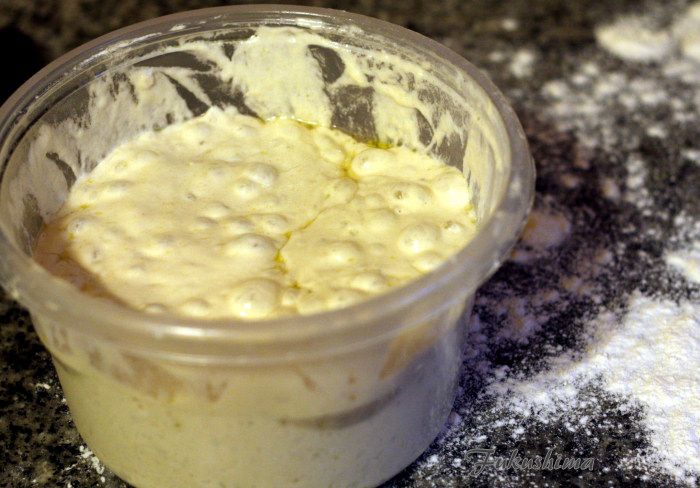
To start off with, I had planned to do this cook on Saturday, then Sunday, but, plans kept evolving, so I ended up with cooking on Monday. The Biga, basically a packet of Red Star dry yeast, 1.5 cups warm water, 2 tablespoons olive oil and 1 cup of flour was started on Thrusday afternoon, and was refreshed with water and flour on Saturday and Sunday. By Monday afternoon, it looked like this.

Biga at room temperature

By Monday, the Biga was bubbled up nicely and upon turning out, I could see that the overall texture was that of, well, batter. But, this was encouraging, as the gluten had clearly matured during the long rest, witnessed by the bubbles and gasses entrained throughout the battery Biga.

Batter Biga Baby

To this, I added another 1-1/4 cups of Antimo Caputo 00 flour and worked the dough lightly to incorporate the flour. Although cooking by feel, I was still shooting for a ratio of water to flour of 70% to 80% water versus total amount of flour. Once the dough was well incorporated, I gave it a few minutes of kneading to 'wake up' the gluten. I was hoping for a very soft dough. I think this was the most successful part of the cook.

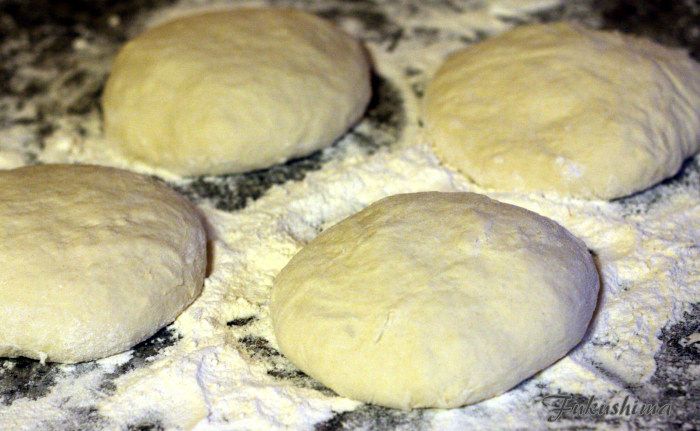
Dough Balls

As you can see, the dough balls were quite soft, spreading just a bit when just formed. I did a quick proof under a kitchen towel, the dough actually went through a soft rise to about, gaining about 50% more volume. These four dough balls would eventually be enough for four 9"-10" pizzas. In terms of toppings, the basic list.

Toppings Available:
Ricotta Cream, fresh ricotta whipped with whey liquid
Fresh Bufalo Mozzarella, shredded by hand
Wild Arugula, tossed with a little olive oil
Curly Kale, salt wilted and well rinsed
Sliced Mushrooms
Melted Onion
Pancetta
Sliced scallions
Tuscan Olive Oil
Pomi Tomato Sauce

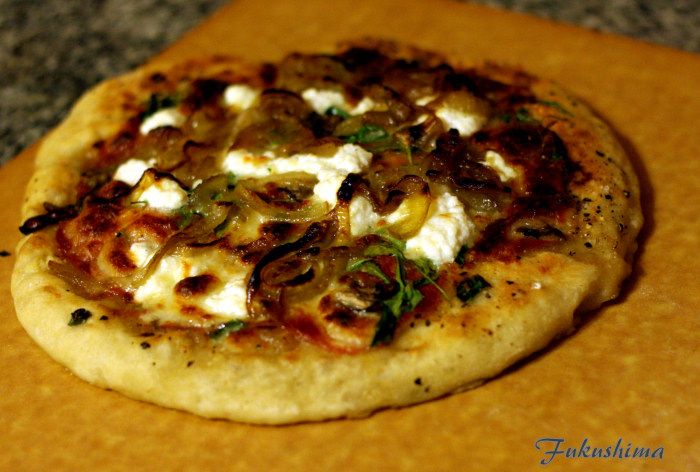
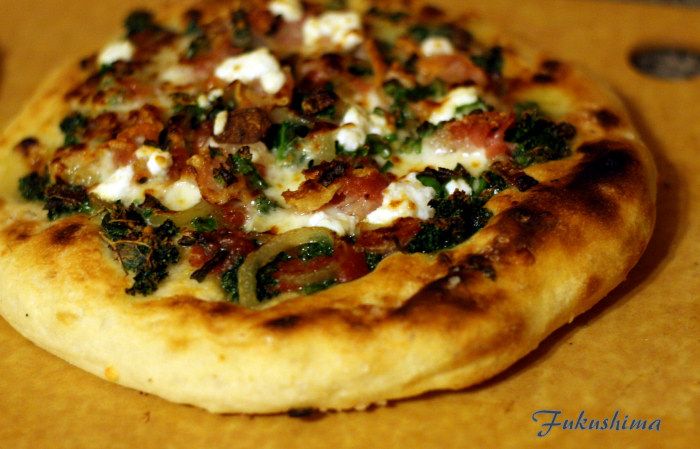
Basically, all things were tossed onto the pizza crusts before shoving into the kettle. The higher fire, as you will see, got some of the toppings and crusts done nicely, but, the bottoms were too soft. The cool stone complicated and lengthened cooking times. Here are the pies.

Arugula and Pancetta

Arugula, Melted Onion, Scallion 

Kale, Pancetta, Melted Onion

Pancetta, Melted Onion, Mushroom

All of these were delicious, although I found the Arugula was a little too bitter for my taste. I have to say, the idea of some Meyer lemon juice or a Meyer lemon preserve drizzle might have helped. I would have eaten all of these, but, by the time I was done, I really just wanted a bit of each.

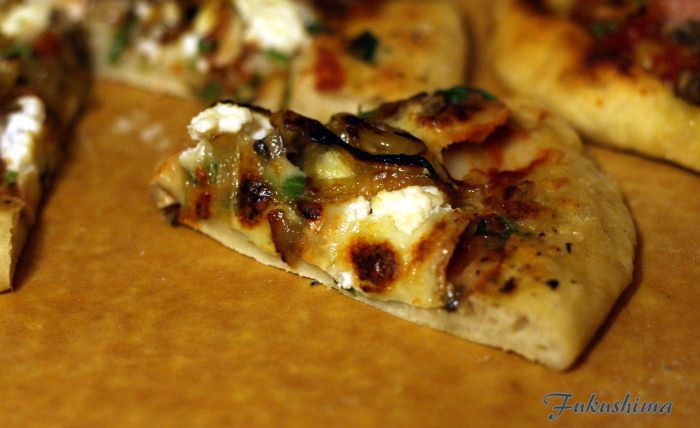
Piece of the Arugula

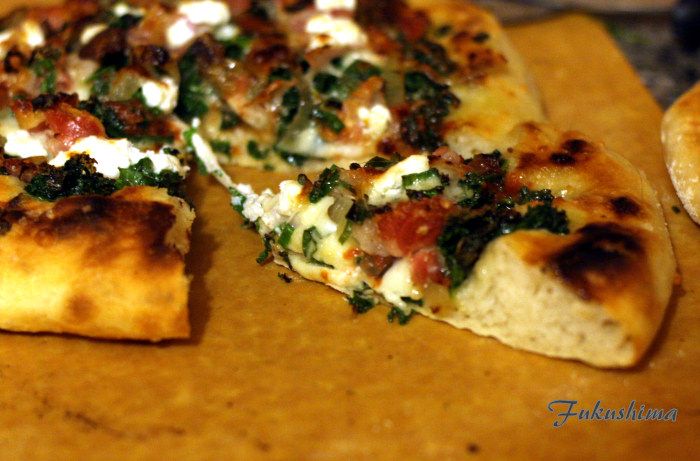
Piece of the Kale

The sliced pictures show the crust texture, which was amazing. A crisp crackle on the top side, a springy, tender interior, a thin but resistant bottom (which, if the stone had gotten hot would have been even better). I did brush the crusts with a high quality extra virgin Tuscan olive oil and a random sprinkling of kosher salt, which made the crusts the best part of these pies.

As for the kettle experiment, it continues...

Monday, February 18, 2013

Tri-tip Sliders and I can cook again

Well, the move of my cookers is complete and the two test runs has resulted in the smoke not drifting into my neighbors house. I hope this continues, as obviously I do not want to be a nuisance to the older gent living next door. I did have to do a couple of burn-outs to get the kettle and UDS smelling sweet, letting smokers sit can leave a sour aroma that will taint food. Since they are now good to go, time to cook.

The Tri-Tip:
I decided a nice short cook was in order and tri-tip is always the right answer. Two nice Harris Ranch tri-tips (no-roll, which is to say un-graded, as is the norm for Harris Ranch) were trimmed up and washed. I tend to wash my meat, what can I say, old habits...

Nice Tri-tips ready to go

From here, the rub was prepared, it is somewhat similar to a Santa Maria style of rub, you can see it is pepper and salt heavy, with additions of fine ground herb mix, chile powder, powdered lime, and granulated onion/garlic, all mixed up. I ended up adding just a little fine grind Turbinado sugar, about 1/16 of a teaspoon. This is on a dessert plate, and most of this was used.

Aye, there's the Rub

I applied the rub twice, a heavy coating which was then wrapped in butcher paper and placed in the refrigerator for one hour. This allows the rub to melt into the meat. During this process, the sugar and salt aids in the drawing of proteins to the surface of the meat. You can see why in this next photo.

Tied and Ready

You can see a couple of things in the above photo, one is that I tied the tail of the tri-tip back, this aids in not burning the long tail of the tri-tip. You can also see the color and sheen, that is the formation of a pellicle, I seek to get this on all of my cooks, I believe it aids in moisture and surface texture. From here, there was a little extra rub applied. Here they are on the cooker.

Yeah, yeah, white balance, blah, blah

The Slaw:
I wanted to have a nice vegetable component to the slider, I know, not traditional, if you have been following my cooks, you don't even expect that anymore. The slaw was a simple affair, hand cut cabbage, red bell pepper, carrots and green onions. These were salted for 15 minutes and then thoroughly washed and spun dry. The salting removes excess moisture and makes for a better texture. This step will prevent the slaw from getting watery when stored, a very traditional Japanese technique for a quick pickle. I dressed this with a vinaigrette. Simple affair, the vinaigrette was a very high quality olive oil, cider vinegar, prepared mustard, agave syrup and hot sauce (I used Lucky Dog, Red Label, which I consider to be the best hot sauce out there). Essentially, 2 tablespoons of the olive oil, cider vinegar and agave syrup, a squirt of mustard and a dash of the hot sauce (it isn't there for heat, it is there for easy complexity).

All about the slaw color

The Sliced Meat:
I splurged this month and bought a new slicing knife for myself, this has been a gap in my knife collection for some time now, a good large slicer for roasts and brisket. I addressed this with a Wusthof Custom that is exclusive to the Mid-Atlantic Barbeque Association. Love this knife. Here you can see that the sliced tri-tip was cooked perfectly to a medium rare. I have no idea what internal temperature was, as I cooked it pretty much by feel.

Look at those clean slice and thin!

The thicker slices were needed to test the slicer for brisket, I ended up testing those slices, melting tender texture. The thinner slices were hand cut, without a carving fork, just a quick push and pull, the slices came so nice and even. I will end up messing with this knife edge, adding a little more polish to the edge, but, the feel, heft, balance, and cut, perfect knife. On to the sandwiches then...

Plate of sliders

As you can see, the buns were actually King's Hawaiian Rolls, nice, soft and a little sweet. These make a nice complement to the smoke and slight pepper bite that the rub brought to the sandwich. 

Yum, din-din

You can see a hint of the horseradish mayo I ended up drizzling over the sandwich to finish them. It was simply 2 teaspoons of mayonnaise and horseradish, a teaspoon of cider vinegar and some black pepper and dry mustard whisked together to taste. These were really quite good, a strong showing out of my old neglected (no more) kettle.

Oh, one last thing...

Gratuitous Photo of tri-tip

Well. I had the photo and wanted to use it. Some details, the kettle was brought up to 350F to complete the burn-out. Once it smelled sweet, I shut the vents down, top and bottom to bring the temperature down to 255F, from here, the meat was added. I cook indirect, at this temperature for 45 minutes. When I feel it, I am feeling for easy give, the meat should feel soft, like pressing into a Jello cup. I spread the coals and let the meat color up a bit. Total cook time is around 1 hour, and the heat is never higher than 255F or so. 

What, you say, that isn't Santa Maria? Well, not if you learned to cook Santa Maria in the last 30 years, no it isn't. This technique is designed to mimic the old ways on a kettle. If you haven't tried it, you do not know just how good a tri-tip or for that matter, a rib roast can be.

Tuesday, December 11, 2012

Kale and Pork

Today was the day to use up a couple of things in the refrigerator, namely some leftover smoked pork loin and some kale salad. I also had some red fingerling potatoes that needed to be used. I also found some chicken wings that had been smoked. These would make a great base for the stock I wanted to incorporate.

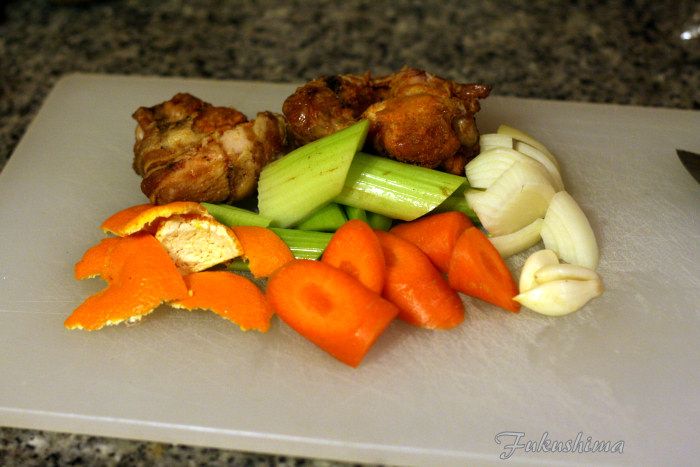
Aromatics and chicken wings


So, into a pot went some onions, celery, garlic, mandarin peels and the chicken wings. Covered with water and seasoned with a couple of pinches of sea salt, a piece of konbu, a star anise, 6 peppercorns and 4 whole cloves. These were covered with water and simmered for 2 hours. Then the broth the was strained of the solids, then filtered to clear the broth. I use coffee filters for this. The stock was then reduced from roughly 1.5 cups of stock, a splash of white port and black currant Balsamic vinegar, which was reduced to 1/2 cup. This would be the glaze.

The potatoes were roasted with onions, celery and garlic until tender. The potatoes were cooled and sliced, then tossed into a hot pan to sear. Then the kale was tossed on top to wilt. A little kosher salt and fresh ground pepper, to season. It is important to remove some of the larger stalks of the kale, as they remain a little tough when you are just wilting the kale.

Plated and Drizzled

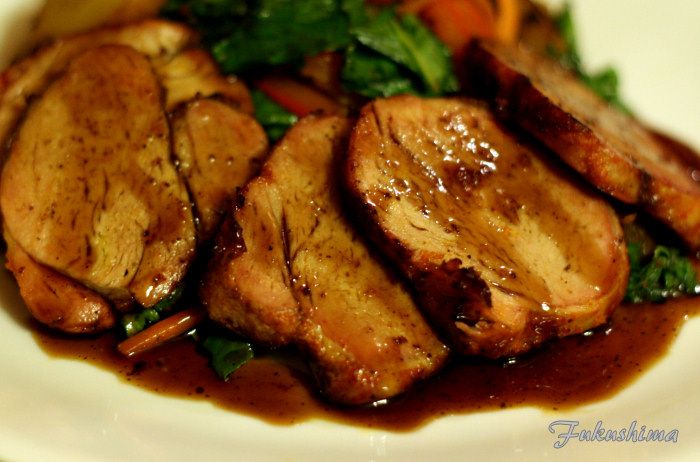
The pork was left over from earlier, on the weekend. It was smoked at Phat Matts. It originally had bacon in it, but, that was not going to work. So, I removed the bacon, seared the outside in the hot pan with a little oil from the potatoes. Then I sliced it, and seared the slices. From there, everything was tossed onto the plate and the meat was drizzled with the reduction.

Meat Texture

And the texture of the meat held up well to reheating, it remained tender. The reduction nicely complemented the smoked pork as well as the kale. It was lightly sweet with a bitter counter-point from the mandarin peels.

Friday, December 7, 2012

Gumbo, Quickish-style

With the onset of cooler weather, the desire for warming comfort food really kicks into gear. I happen to love gumbo, the traditional stew of the southern United States. Most often associated with Louisiana, it is actually a common dish in a lot of the southern coastal area. With as many variations as there are cooks. The most common characteristics associated with gumbo are roux, okra and filé. I decided, largely due to the okra looking bad at the market and being out of filé, to do a simplified version.

The Veggies

First step was to prepare the aromatics for the building of the stock. I went with a medium yellow onion, a small red bell pepper and three stalks of celery, along with a bunch of green onions. This is a fair amount of vegetables, but, it will all cook down and integrate into the stock. I prefer a dice on the small side for this dish.

Fried Chicken

Borrowing a technique from an old friend, I had the chance to befriend a cook that had worked at several restaurants in the Louisiana area and later in Oakland, she had a theory that roux is the fundamental carrier of color and flavor in a gumbo, and that the fat should reflect that philosophy. I learned from her, that by giving the chicken a very flavorful coating and frying it, you can jumpstart your roux. These chicken thighs were given a coating of 'red flour', a blend of salt, chile powder (I make my own, very similar to Harissa) and cayenne. Once fried to color, the oil will have a deep red color. I used a couple of strips of bacon to build the oil to fry the chicken. Yes, it is not healthy.

The Roux

For the roux, I used 1/2 cup of the 'red oil' and 1/2 cup of AP flour, and started toasting it up. Now, roux can be a lot of different things, depending on the technique and style of cooking you are doing. This is not about thickening the stock. It is about building the color and creating a toasted flavor to the stock base. The picture above is about halfway to where I wanted it to be. You can do this in the oven, but, I like to smell the roux as it is cooking. I took the color about to a brick red, but, what I really wanted was to get to the point that the roux becomes aromatic. There is a point where the roux smell will change from fat and flour to a very aromatic aroma that jumps from the pan, and yes, this is moments before it burns. I have the vegetables and 3 cups of stock, or water, ready to dump in. Just in case.

Veggies in the pool

The shot above shows the vegetables dumped into the roux, this effectively stops the cooking of the roux and allows you to control that very moment when the color is right. I was a little light on the color, no matter, the flavor was there. I also topped up with a couple of pinches of salt. I used fine sea salt for this, it just helps with the vegetables sweat a little better. After a few minutes, dump in the stock or water and let it cook for an hour or so. At this stage, as simple as it seems, there are amazing flavors that have developed, the red bells contribute sweet notes, the green onions and celery add vegetal flavors and aroma, the onion is, well, onion. The roux aroma and flavor really come through at this point, the toast adding a nice bottom note to the dish. As crazy as it might sound, water is a reasonable addition, it has solvent properties that pull the flavors together very well. After the first hour, I added the chicken thighs in and cooked them until tender, then the sausage was added, in this case a nice smoked linguica. Moments before serving, some shrimp were added.

Look at that color

The color worked out fine, and the choice of steamed Basmati rice was a sound decision. A note about the meat and ingredients. All of the vegetables were organic, I have taken to using organics for root and stem vegetables. I feel they seem to cook better and I like that I can feel comfortable about the food I am eating. The meat was pastured chicken, locally made sausage and wild caught USA shrimp, as I feel the texture and flavor is just a lot better than the farmed stuff. It does cost more, I just eat a little less.

This did not suck

Yes, this type of cooking required that I pay attention for short periods of time over a three hour length of time, and it is nice to be able to work at home to pull off a cook like this. However, there is no way you can find something like this in the store. And three hours or so, not so bad for a pot full of wonderful complex eating. The okra and File were not missed.

Wednesday, November 7, 2012

Pig Candy BLT

It comes to the end of the season that I can get reliable, organic, field grown tomatoes from local sources, and I wanted to send out the last of the decent tomatoes with a fitting meal. That would be the ultimate use of a good tomato, the BLT. But, wanted to dress up the sandwich a little, so I bought some bacon and made Pig Candy.

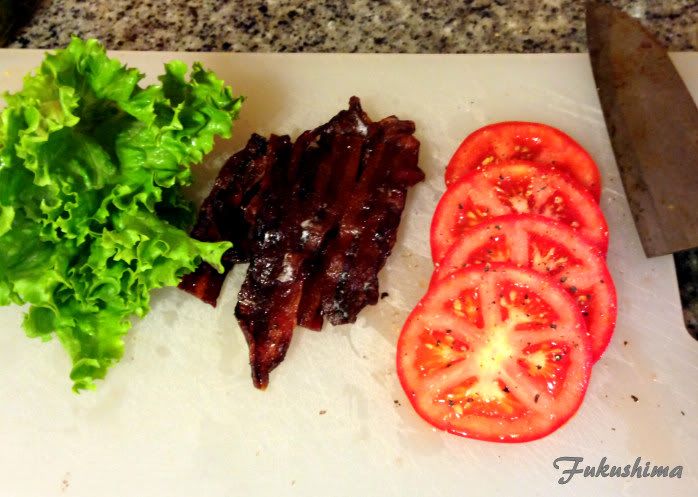
For those not familiar with Pig Candy, it is simply bacon that is coated with spices and sugar, sometimes some chopped nuts, and then smoked or roasted until the sugar caramelizes and the bacon crisps up. I used an uncured bacon product (less sodium), thin cut and figured three slices would do for each sandwich. I wiped a little maple syrup onto the bacon, then a light coating of cinnamon, allspice, nutmeg, chile de arbol powder and a little brown sugar. I prefer a more savory and less sugared version of Pig Candy than most folks, I really want the bacon to shine with the sugar just behind it.
 
Green Leaf Lettuce, Pig Candy, Tomatoes

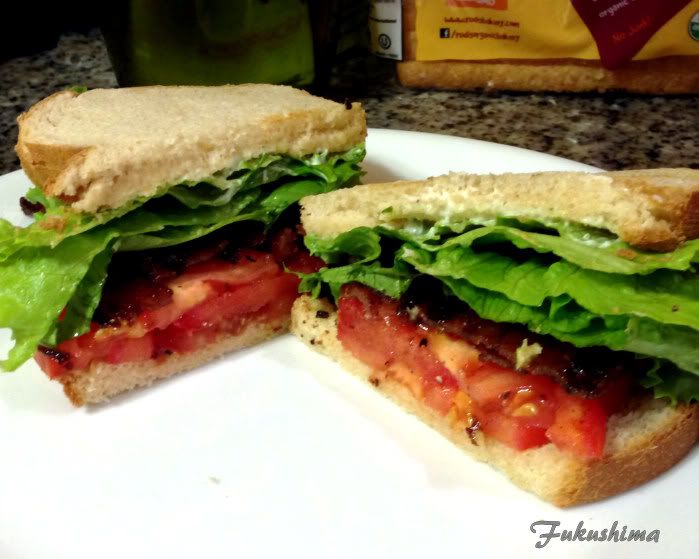
This was piled onto a couple or warmed slices of Rudi's Soft White, which is not really soft, or really white either, as they are an organic bakery that uses whole grain normally. I just could not bring myself to buy the Wonder Bread.A swipe of two of mayonnaise on the bread and assembly, simple as making a sandwich.

The Sandwich

I am gonna miss fresh tomatoes that do not have a skin like vinyl and a core made of balsa wood. Winter is the time for canned tomatoes anyways. I would like to say I only ate one, that would be lying. The Pig Candy provided the textural and fatty character of bacon, along with a nice sweetness and spice that added to the sandwich nicely. I won't do this often, but, it was a nice upgrade.

Monday, November 5, 2012

Ribs and Brisket

A Tale of Two Cooks...

I was tasked with cooking two briskets, one for eating, one for leftovers. Seemed simple enough, yet, when I checked out, a cryo of spare ribs had jumped onto my cart. No matter, I would have a 26" Weber kettle and a Medium Big Green Egg to cook on, I could handle this.

Cook 1: St. Louis-style Spare Ribs
1. Clean and trim ribs, wash thoroughly, scrape meat and dry.

2. Rub was my one of a kind, Leftover Blended Rub, where in Simply Marvelous Cherry and Simply Marvelous Spicy Apple rubs end up blended with the remnants of my Brisket Rub, no proportions are available.

3. Run is applied to each rack, then the racks are stacked and wrapped in plastic wrap, wrap tightly and let sit at room temperature for two hours. The ribs must be wrapped and must be let to sit for at least two hours, and not more than three hours.

4. Fire cooker (Wicked Good and apple wood) and get set to around 285F, apply a second coat of same rub to ribs and place on cooker as soon as it is stable. Allow to cook for at least 3 hours, then test for bend. They won't be really ready, but, close, you are looking for the point where they bend about 45 degrees when held on one end. Then move on to step 5.

5. Apply Pig Honey, in this case, I used version 4+, this is squirted from a soda bottle with a couple of holes punched in the cap. You don't want to use a spray bottle, it needs to soak the meat.

Pig Honey Version 4:
3 cups water
handful of trimmings from previous brisket and butt cooks (needs to be smoked barky parts)
1/4 cup Red Boat Fish Sauce (Worcestershire sauce or Coconut Aminoes work too)
1/2 cup Agave syrup
1 tablespoon rub
1 teaspoon hot sauce

Simmer everything until color is that of a dark broth. Taste should be complex sweet, finishing clean.

Apply the Pig Honey three times during the last 45 minutes of cooking, soaking the meat each time, with the last application no more than 5 minutes before pulling. No foiling or paper.

6. Remove from heat when racks bend 90 degrees, or twisting of bone is acceptable. Place in an oven pan and cover with foil for 10 minutes or so. The ribs should slice easily at this point, with a durable sweet/spicy flavor at first bite.

Just before pulling from cooker
This cook ran at around 300F, and about 4 hours. I do not monitor cook temperature once I put the meat on. I listen for the meat sizzling on the drip pan, as long as I hear sizzling, I make no adjustments. Once it hits the 285F, I don't make any more adjustments, but, when I finished, I wanted to move some more meat onto the BGE and I found it was right at 300F.

The Brisket:
1. The brisket was washed, scraped and dried, and moved to a dry service tub.
2. The brisket received a simple version of my Mother Rub. This rub is focused on providing a complementary seasoning to the meat.

Brisket Mother Rub:
3 parts Redmond Real Kosher Salt
2 part fresh ground black pepper, medium grain
1 part ground chile powder (not chile powder from store, this is just Chile de Arbol powder)
1/4 part lime powder
1/4 part fine Turbinado sugar

3. Apply rub generously to brisket, let sit while cooker is started and brought to temperature, around 30 minutes to an hour.

4. Put meat on pit, fat cap and point towards heat source. In this case, it was a kettle, so the points faced the offset fire, the cap was down. I let the meat run.

5. The kettle was kept at a minimum of 280F and a maximum of 325F, I didn't fuss too much, kept an eye on the Maverick, since I have not cooked on this kettle before. Fired with Wicked Good lump, Natural briquettes and apple.

6. At three hours, opened the cooker, looked for color, it seemed okay, so I wrapped them in butcher paper, two layers, and splashed a little jus that I had made onto the paper before wrapping up. Back into cooker. Here is where things went oddly.

7. At five hours into the cook, I expected it all to be done, not even close. I picked up the first brisket and could tell by feel it was still in the stall. Same case for second brisket. At seven hours into the cook, I could tell the points were done, but, the flats were not. I separated the flats, put them on the BGE at 300F, took the points in and let them rest in a 175F oven. The smaller flat got done after another hour, the larger flat took another 2 hours. Fortunately, the smaller flat and point were done for dinner.

Plated
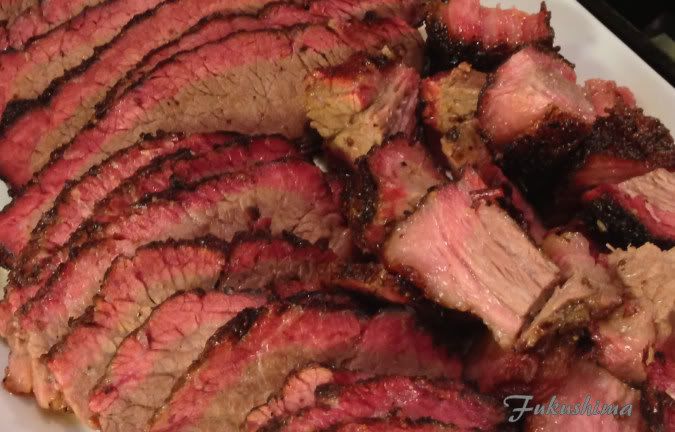
 There were flat slices, point slices and what I consider to be burnt ends, which is to say the parts of the point that I carve off the ends, which I cut into chunks. Not one piece of meat was sauced. The chunks of burned edges were meltingly tender and required no sauce or additional cooking. The sliced flat was tender and had just enough moisture, truly some of the best flat I have had in a very long time. All of the slices were dipped into a jus I made while things were cooking.

Brisket Jus - Platy style:
4 cups water
2 cups chopped fat and meat from brisket trimmings
1 cup chopped cooked brisket trimmings from previous cook
2 tablespoons rub
1 teaspoon Agave syrup
Bring to simmer and hold until liquid takes on a dark brown color and fat render. Filter and reduce by 1/4. Use to dip meat after slicing.

Here is a close-up, hopefully the texture of the meat shows in this shot.

Sliced flat, point and burnt ends

You'll notice that there is no mention of internal temperatures throughout the brisket cook. I am not hiding anything, I did not check the internal temperature of the meat, and did not use any timing to determine completion of the cook. I relied upon the heat to get the meat done, opened at times when I felt is smelled right, or when I felt the meat should be close. To determine time to pull, I relied initially on feeling, squeezing the flat and point through the butcher paper, soft means ready to check with a probe. Hard means stall, sort of gives means I should pay attention in another 30 minutes.