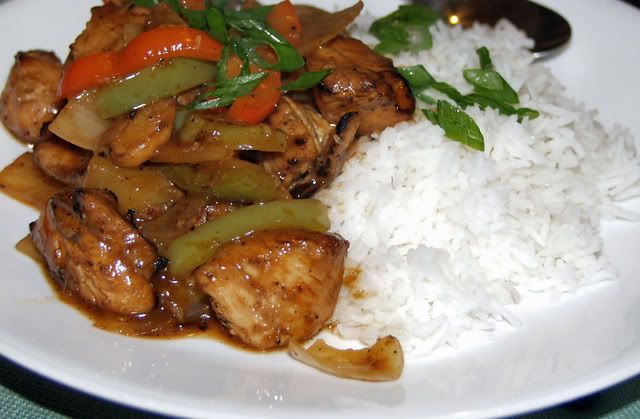
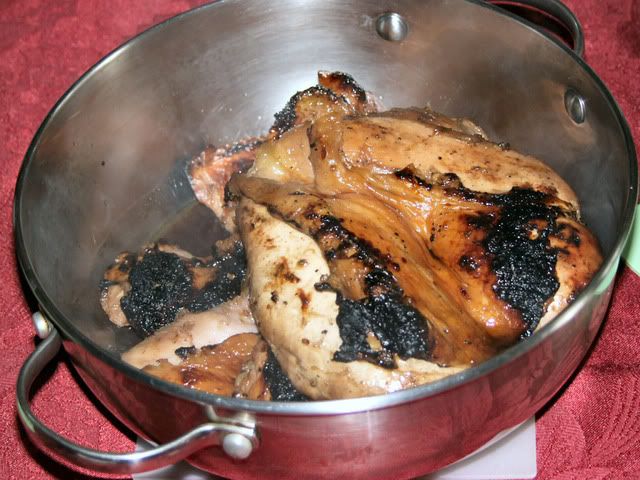
I made Sweet and Sour chicken tonight, something of a variation since I used smoked and grilled chicken and grilled pineapple. I also make a less sweet version of sweet and sour sauce that is more to my liking and closer to the Cantonese food I came to know when eating in Oakland, CA when I was a kid. It is not shocking red or sickeningly sweet. It also goes really good on fried rock cod.
Sweet and Sour Chicken Recipe
Ingredients
Chicken
* 1-1/2 pound of boneless and skinless chicken breasts, cut into 1" chunks
* 3 tablespoons Bob's Asian Rub
* 1 teaspoon cornstarch
Sauce Ingredients
* 1/4 cup juice from the canned pineapple
* 1/4 cup white vinegar
* 1/8 cup ketchup
* 2-3 tablespoons brown sugar
* 1 tablespoon shoyu
* 1 tablespoon hoisin
* 5 large slices of ginger
* 2 tablespoon grated garlic
Veggies and Fruit
* 1 10-ounce can pineapple slices (reserve juice)
* 1 red bell pepper, cut into 1 inch chunks
* 1 yellow bell pepper, cut into 1 inch chunks
* 1 teaspoon grated fresh ginger
Bob's Asian Rub
* 3 parts 5 Spice powder
* 2 parts Black Pepper
* 2 parts Kosher Salt
* 1/2 part Nutmeg
* 1/2 part granulated garlic
* 1/2 part dried orange peel
Method
1 In a bowl, combine the chicken with the corn starch and rub, allow to marinade for 20 minutes.. Also rub pineapple slices.
2 Place chicken on skewers or in grilling basket, place in smoker for 15 minutes at 225F. Remove and stoke fire up to 400F and grill chicken over high heat until cooked.
3 Place pineapple slices onto grill until nicely marked. Remove and set aside along with chicken.
4 In the meantime, whisk together the sauce ingredients. Reserve 1/8 cup sauce and mix with cornstarch.
5 Heat a large wok over high heat (normal stove) until a bead of water instantly sizzles and evaporates. Pour in the 1 tablespoon of cooking oil and swirl to coat. It's important that the pan is very hot.
6 Add the bell pepper chunks and ginger. Fry for 1 minute. Add the pineapple chunks and the sweet and sour sauce. Turn the heat to high and when the sauce is simmering, add the chicken pieces back in. Let simmer for 1-2 minutes, until the chicken is heated.
7 Add the reserved 1/8 cup of sauce and allow to thicken over medium heat. Sauce will turn translucent when ready.
Search This Blog
Sunday, January 31, 2010
Friday, January 29, 2010
BBQ Stew
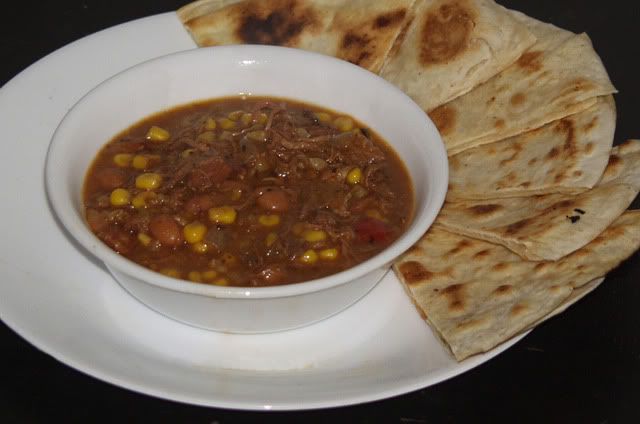
Yep, I decided to make a stew from some leftover pulled pork. The pulled pork was a very good product to begin with and had a terrific aroma of smoke and spice. After hearing so much about Brunswick Stew from some of the BBQ Brethren, I decided to try my hand at making something similar. I took a large onion, sauteed it with some Portuguese sausage,added 1Tablespoon of Todd's Dirt seasoning, then added some corn, a can of tomato and some leftover brown rice, then added the pulled pork. I then added 1/4 cup of BBQ sauce and 1/8 cup prepared mustard. After letting this mixture come to temperature, 4 cups of water, another dosing of BBQ sauce and mustard and 1tablespoon each of chile powder and Todd's Dirt and a can of pinto beans. This was simmered for 1 hour. Dinner!
This was joined by a simple quesadilla and a can of beer celebrating my dad's memory. It has been three years and I felt a can of beer was just the right thing to hoist to the old man.
This was joined by a simple quesadilla and a can of beer celebrating my dad's memory. It has been three years and I felt a can of beer was just the right thing to hoist to the old man.
Saturday, January 23, 2010
Pulled Pork again
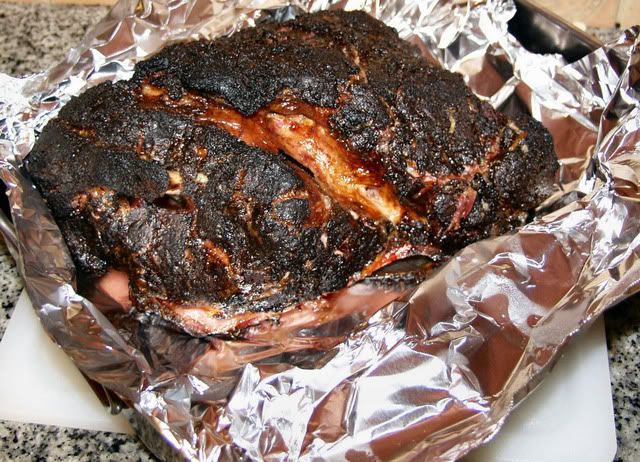
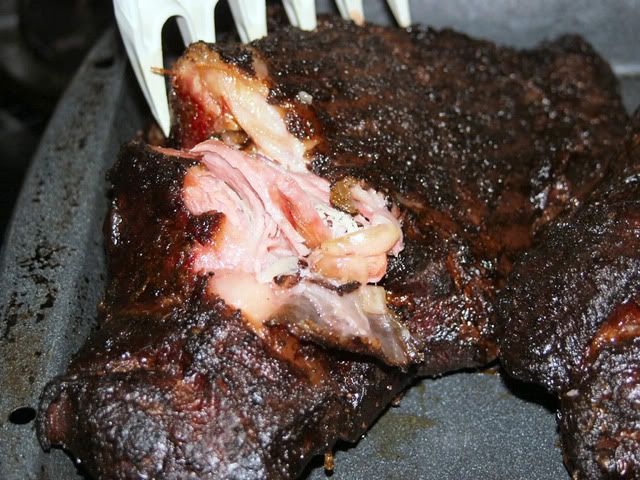
While shopping at the local grocery store, I ran across a good deal on pork shoulder, well, this was too good. I had to grab an 8 pounder. This went on the kettle per my usual process, except I used up a bunch of small remnants for the rub instead of using a known and repeatable rub. This was a very tasty cook. Here is the pork shoulder done, it is almost wanting to pull itself. Thankfully I have new bear paws that helped it along.
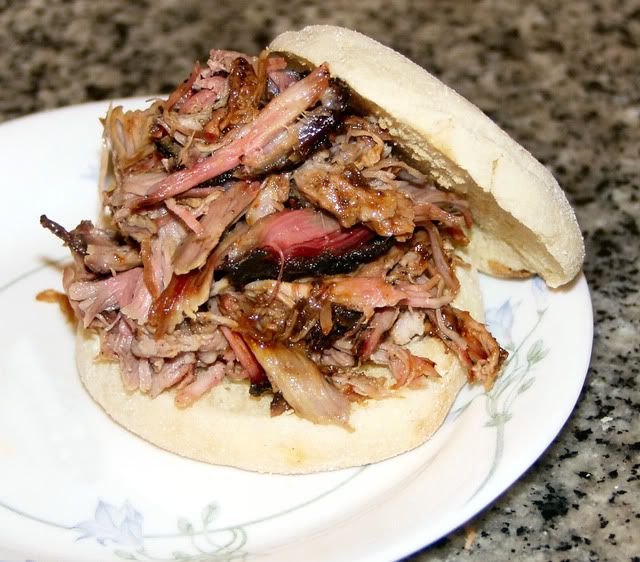
First off the line was a pulled pork sandwich, on an English muffin and a little Larrupin' Cafe Red Sauce, although this pork was so moist and flavorful, it certainly did not need it, witness the rampant sampling that occurred.
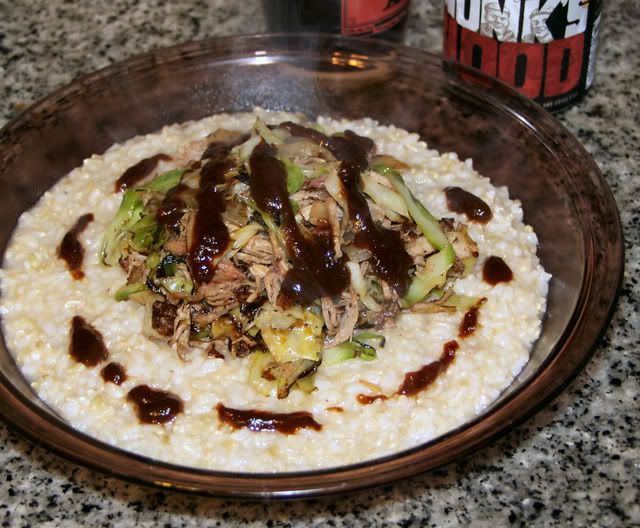
Then it made an appearance in the center of a brown rice risotto made with Amontillado sherry sauce, the pulled pork was added to a mix of sauteed cabbage and melted onions. I threw a little BBQ sauce over the top just to make it look good for the camera, although it certainly added a layer of flavor as well.
High in fiber and cruciferous veggies, who says BBQ is not healthy. Ignore the beer in the background.
Thursday, January 21, 2010
Breakfast Sandwiches
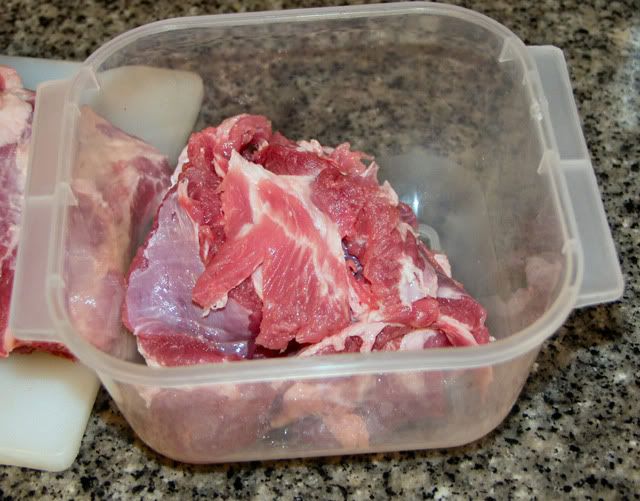
When I make ribs using a St. Louis trim, there are chunks of meat that are removed from the rib rack that I do not use for the cook. I like to use the trimmings from the rib racks to make sausage, the meat already has a favorable lean to fat ratio and has that rib taste. My favorite use is to make chorizo with the trimmings,a s I believe the flavor of the meat and fat is best complemented by the spices used for chorizo. Here are the trimmings, this is about one pound of flap and skirt trimmings.
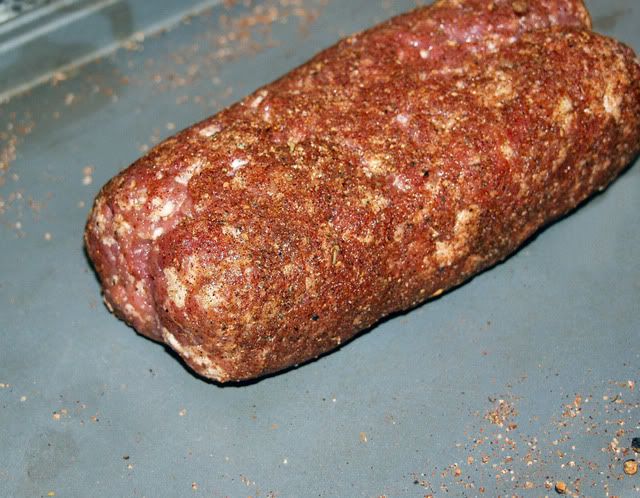
I season the meat and let it sit overnight to allow the spices to 'melt' into the meat and get a good seasoning on the surfaces. When I grind the meat I get a better distribution of the spices throughout the meat. If I was going to stuff the sausage into casings, I would add some moisture by mixing the spices with liquid prior to adding them to the meat. For bulk sausage, I do not like to make the meat too wet. Here is the meat formed into a 'fattie'.
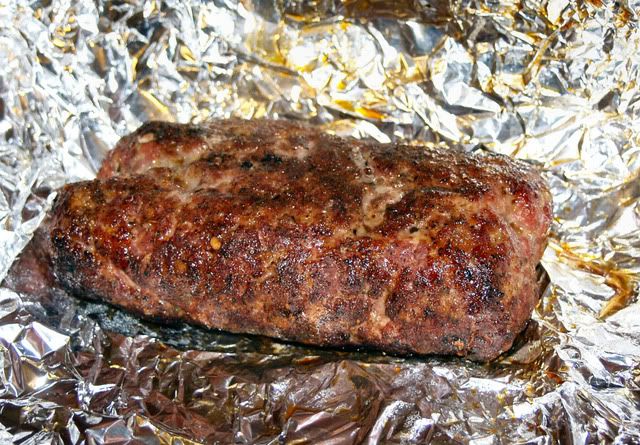
The 'fattie' was dusted with some of my pork rub, then allowed to sit and come to room temperature while I fired up the kettle. The kettle was running with the last of my emergency Kingsford Blue along with a handful of cherry shards. I really need to hit the store. I ran the kettle at 300F and had the 'fattie' in the smoke for 45 minutes, then wrapped and rested for 15 minutes.
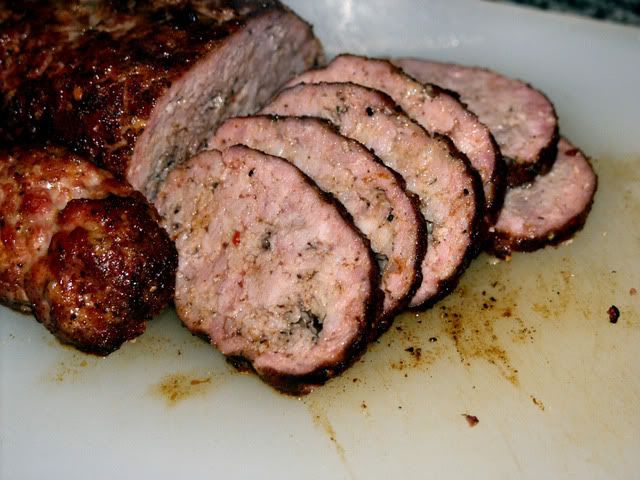
Here is the sliced 'fattie' showing a very nice distribution of fat and lean, along with a little smoke ring and a nice crusty surface.
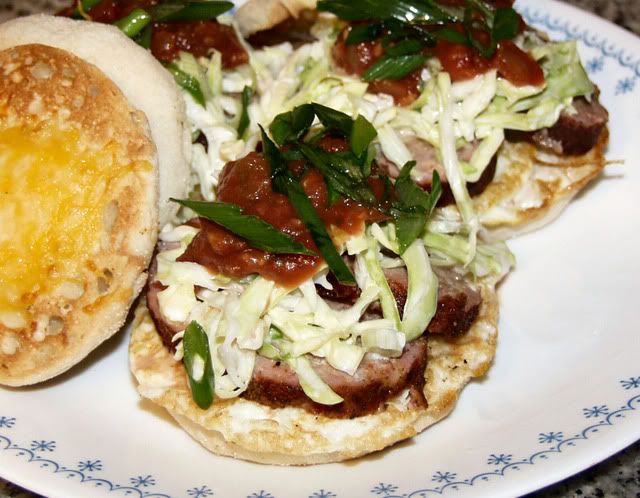
These were headed for sandwiches, my version of Sausage Egg McMuffins, but, with a nice cabbage and green onion slaw, salsa and some melted cheese. These were very good with a nice bite, but, not crazy hot. The 'fattie' was still quite juicy and you could definitely taste the pork rib flavor.
No beers died in the making of this post, it is a breakfast item after all.
Tuesday, January 19, 2010
Char-siu Ribs
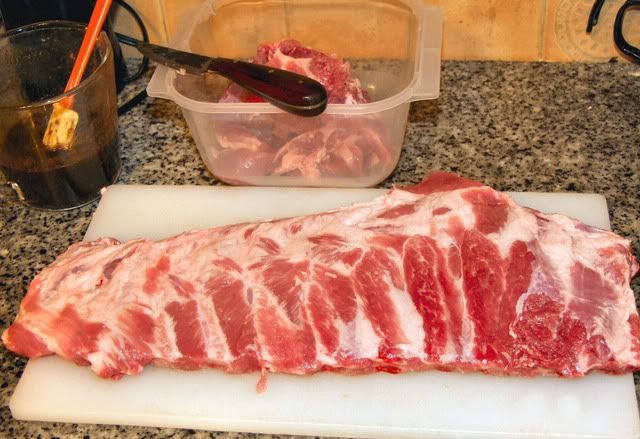
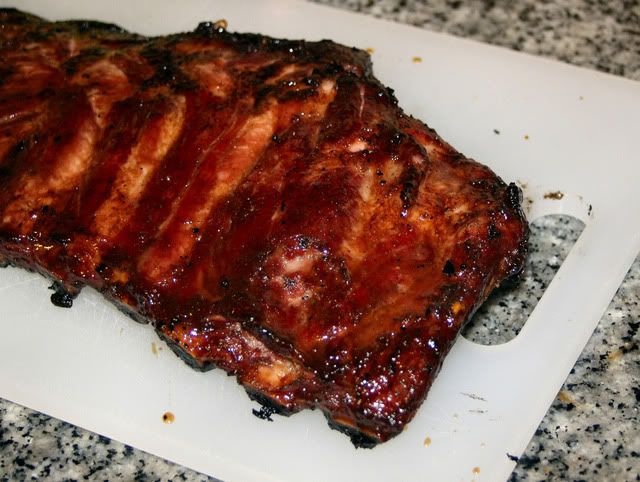
Today, I decided to try something I have seen in Chinese meat shops, but, that I have never tried. So I prepared some char-siu marinade and prepared a rack of ribs for the kettle. I started with an untrimmed, natural rack of spareribs, trimmed the flap, removed the membrane and trimmed the excesss meat and fat, the goal being what I know as a modified St. Louis rack. I left the rib tips on, as I did not intend to share this rack, so no need to create the rib tips for a cook's sampler. Here is the rack.
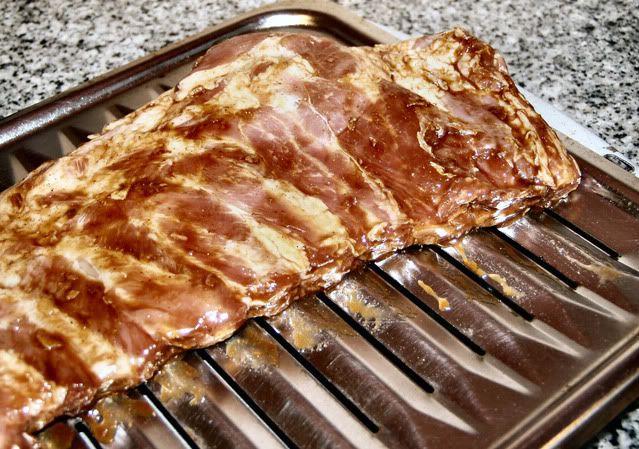
You can see the shape of the modified St. Louis cut and the spoils which will become chorizo soon. I prepared the marinade per the recipe here (Linky) with the modification that I did not have ketchup, so I went with some BBQ sauce. The ribs were allowed to marinate for 4 hours, I would have like to let it go longer, but, I did not have my act together early this morning. Here is the rack fresh from the zipper sealing bag.
Meanwhile, I fired up the kettle and got a fire going, charcoal and a couple small hunks of cherry wood for smoke. I got the kettle up to 300F, put the ribs in and adjusted everything to get it to smoke along at 300F, shortly after placing the ribs, the rain really came on and the temps settled in at a nice 250F within 30 minutes of the ribs going on. The ribs were allowed to cook for 3 hours unmolested, the temps held steady during that time. At the 3 hour mark, I gave the ribs a brush top and bottom with some glaze, essentially the same recipe as the marinade, but with some honey added. This was allowed to go another 30 minutes, glazed again and allowed to finish at 4 hours. Here is the rack fresh from the smoker.
There was not a lot of pull-back, but, the ribs looked terrific and the meat was soft to the probe and the correct temperature, so off it came, a quick 10 minute rest and time to chop and eat.
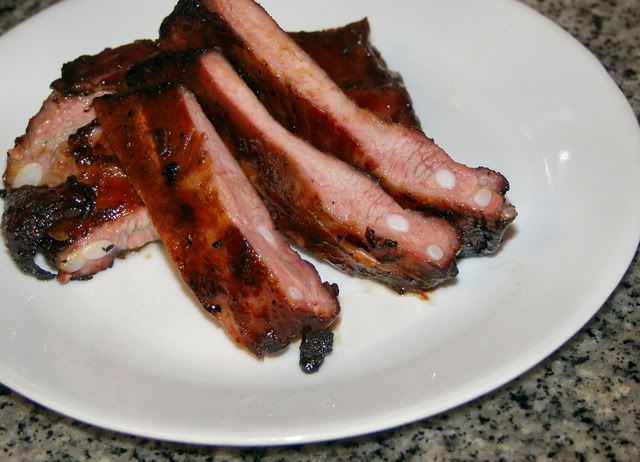
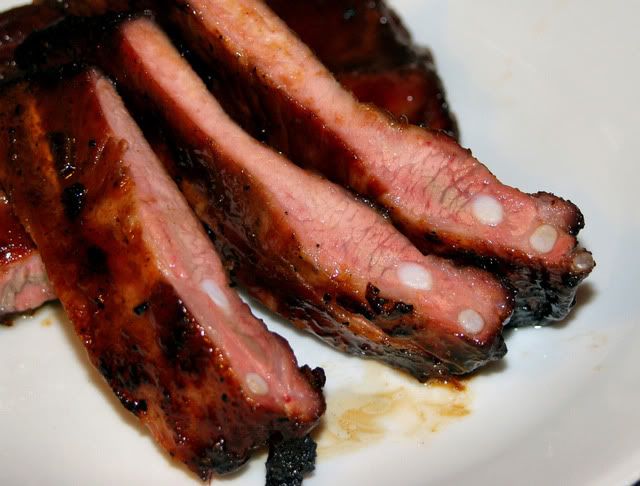
And ready for it's close-up, look at them shiny juicy ribs. The pink color tells me that the marinade time was adequate, there is no really visible smoke ring, I chalk that up to the marinade penetration and color. The ribs were juicy and tender, with a great char-siu flavor that I was hoping for. The one thing I think I would do differently is up the smoke wood, as it was too subtle for this recipe.
Tonight's beverage which was quaffed prior to eating, the cook had to have something to tide him over, was a can of Monk's Blood Belgian Abbey style ale. This was a very nice, somewhat more subtle flavored version of a Belgian Abbey than I am used to, but, was a nice snack prior to dinner.
Sunday, January 10, 2010
Fried Chicken a' la Simply Marvelous
Tonight, it was fried chicken, it was supposed to be BBQ chicken, but, I just didn't feel like firing up the kettle. Well, there is also the issue that I forgot to get some lump charcoal, heh heh, who needs a shopping list. Anyway, I had a couple of tablespoons of Simply Marvelous Sweet and Spicy rub, from my friend Steph, who operates a catering company in Ventura, California. I took the 2 tbs. of rub and added it to a cup of 50% a.p. flour and corn flour. Thw chicken was brined for 1 hour in a brine spiced with black pepper, bay leaf and whole clove.
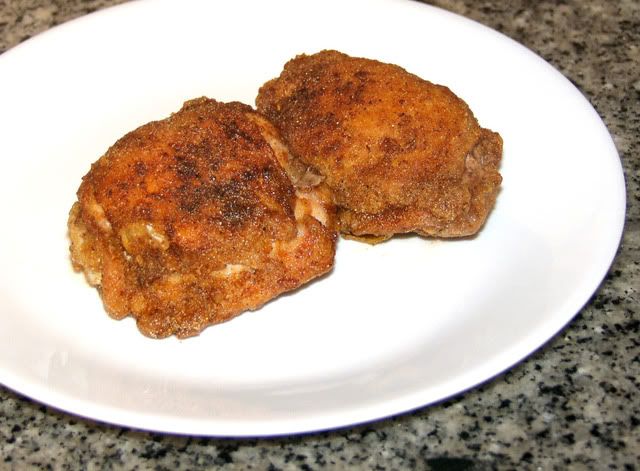
I made sure the oil was bubbling moderately, not too hot, and let each side cook at least 15 minutes. I really do not want to start flipping the chicken, it needs to cook through one side first. It is very important to monitor the heat to prevent burning. Here they are done and drained.
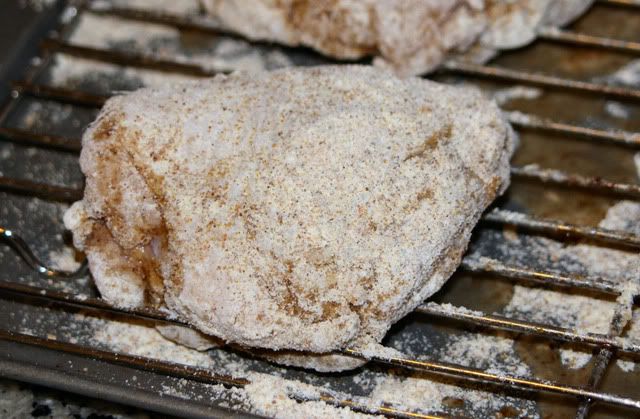
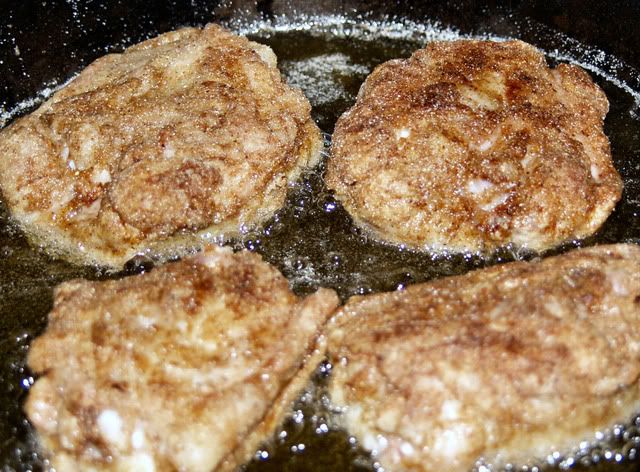
As you should be able to see, the seasoning added a touch of color to the flour. The chicken was allowed to sit for another hour to cure the coating. I used my cast iron frying pan, cause that is what you are supposed to use for frying chicken, and corn/canola oil about 1" deep to fry them up. I use an unusual method for checking oil temperature, I dip the end of a bamboo hashi (chopstick) and look for bubbles, a moderate amount of bubbling means it is ready. Here they are in the pan.
I made sure the oil was bubbling moderately, not too hot, and let each side cook at least 15 minutes. I really do not want to start flipping the chicken, it needs to cook through one side first. It is very important to monitor the heat to prevent burning. Here they are done and drained.
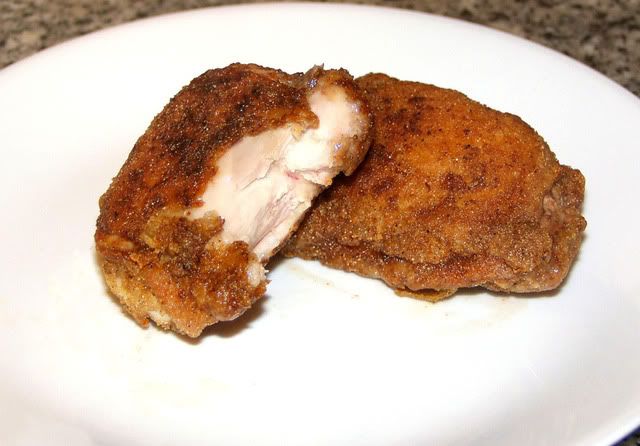
I really want the chicken to get that slightly darker pan scorching, it makes the skin that much more flavorful. The other thing I look for is skin that is tender, not chewy or impossible to bite through. I got it right tonight, crisp, crunchy and bite through all at once.
The rub definitely adds a flavor punch to the coating that makes the dish, I think the seasoning worked out perfectly for this application.
Friday, January 8, 2010
Pecan-rubbed Pork Chops
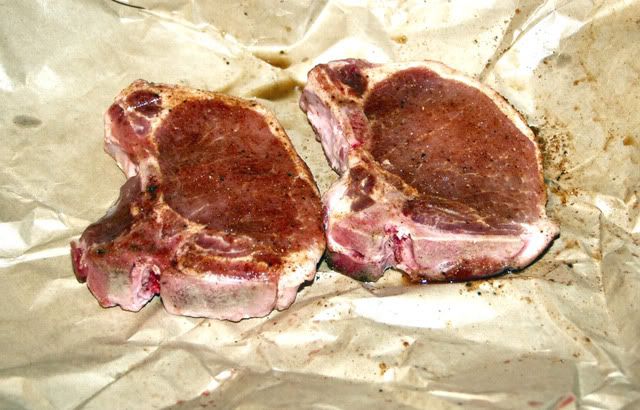
Tonight, the idea was to test out a new super-secret pecan rub from a friend that is looking to bring a new product to market. Test subjects were to be some center cut, bone in pork chops. I gave them a rub with the new rub, wrapped them uptight for 3 hours, resting in the refrigerator. Here they are just before I hit them with a second layer of rub.
I do this is the belief that it gives me a little better penetration of the rubs flavor into the meat. Fired up the kettle, running at 300F, using Kingsford briqs and some hunks of cherry wood. The pork chops hit the grill and ran for 1 hour, until done to touch. Here is the next shot.
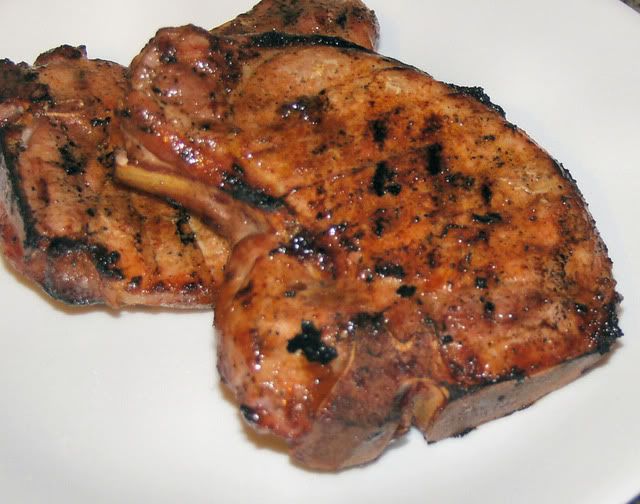
These were excellent looking, the rub being influential, I believe, in the golden brown color. The one I ate for dinner was excellent with a nice sweet edge, you could smell the pecan both before and after cooking. The meat was juicy and, sadly, not properly photographed. I really enjoyed this combination, however, I need to get over to my friends place with all the pecan prunings.
Tuesday, January 5, 2010
New Year Pulled Pork
One of the less traditional dishes we had for New Years, a nice pulled pork butt done low and slow over alder and cherry wood. Well, maybe it is traditional, I mean, the Japanese might have slow smoked pork shoulder over a cherry fire, it could have happened.We had the pork on some Sonoran style tortillas and a tsunemono-style cole slaw. Some people felt additional BBQ sauce was necessary, I was vaguely insulted by this. There are worse places than this to 'que.
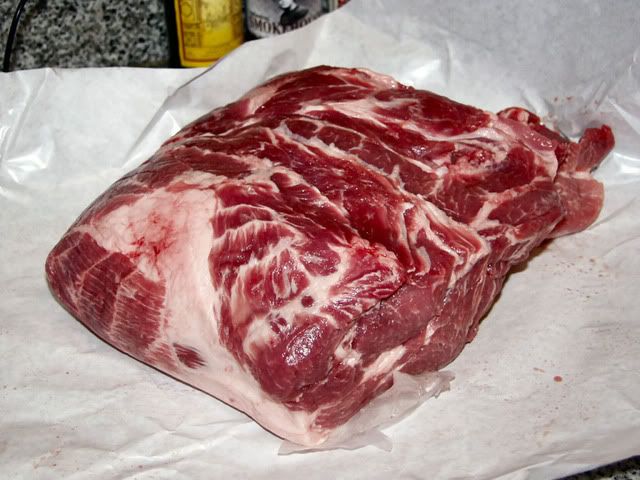
I procured a 10.5 lb pork butt, locally produced in Humboldt County, the butt was boneless, unfortunately, and was quite fresh. I washed and dried the meat.
I coated the meat liberally with Plowboy's Yardbird, wrappped it tightly in plastic wrap for 4 hours. I think this would have been better with some herbs, next time I will add in some Todd's Dirt as well. Then re-rubbed with a medium textured top rub I have started playing with. This consists of medium grind black pepper, kosher salt, dry mustard, garlic and onion granules and dried orange peel. This was allowed to sit while the fire was started.
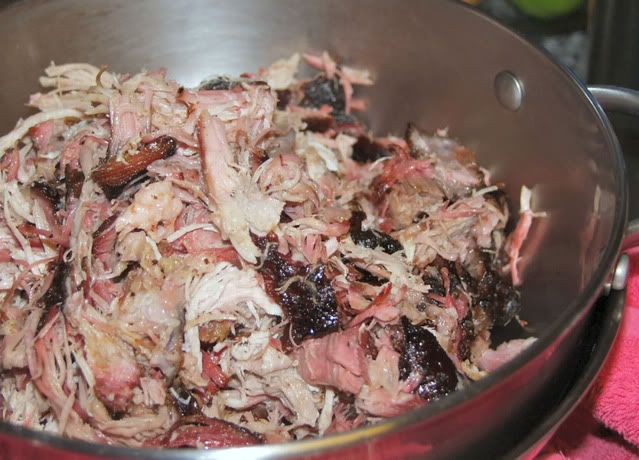
The meat had a beautiful dark surface, there was a nice smoke ring despite the higher temperature cook. See my new Bear Claws? The meat pulled beautifully, yielding a perfectly textured pulled pork.
I added some BBQ sauce mixed with a little Kahlua, I mix 2 tbs of Kahlua to 1 cup of BBQ sauce to give a bottled sauce a bit of complexity, I like the flavor of coffee with the pork. Now, back to that ancient kettle, the flavors of the pork were somewhat muted compared to what I get at home, I can't help but think the old worn out air control on the kettle, and the much smaller size, somehow influenced the flow of air in the cooking chamber.
I procured a 10.5 lb pork butt, locally produced in Humboldt County, the butt was boneless, unfortunately, and was quite fresh. I washed and dried the meat.
I coated the meat liberally with Plowboy's Yardbird, wrappped it tightly in plastic wrap for 4 hours. I think this would have been better with some herbs, next time I will add in some Todd's Dirt as well. Then re-rubbed with a medium textured top rub I have started playing with. This consists of medium grind black pepper, kosher salt, dry mustard, garlic and onion granules and dried orange peel. This was allowed to sit while the fire was started.
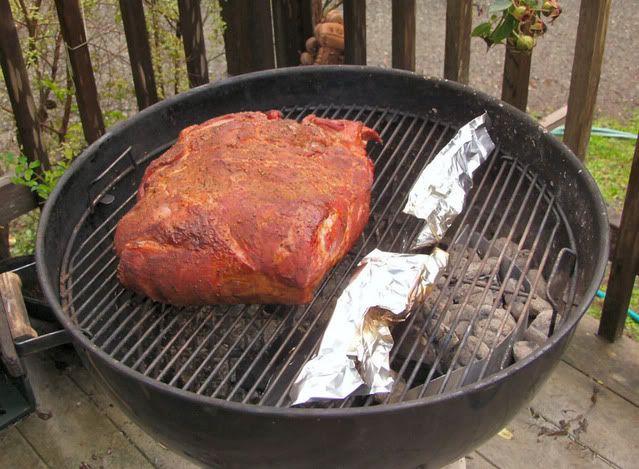
I put the pork onto my brother-in-laws ancient 18" kettle (we will get back to that in a bit) started with Kingsford with cherry and alder wood chunks. The cook stats were 300F for 7 hours, the pull temperature was 200F, probe was like butter.
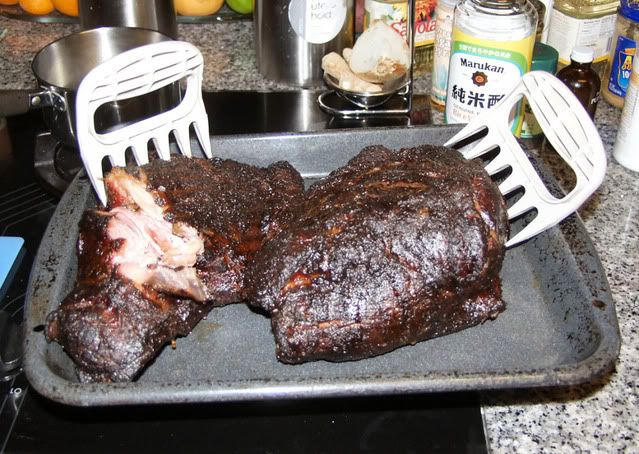
The meat had a beautiful dark surface, there was a nice smoke ring despite the higher temperature cook. See my new Bear Claws? The meat pulled beautifully, yielding a perfectly textured pulled pork.
I added some BBQ sauce mixed with a little Kahlua, I mix 2 tbs of Kahlua to 1 cup of BBQ sauce to give a bottled sauce a bit of complexity, I like the flavor of coffee with the pork. Now, back to that ancient kettle, the flavors of the pork were somewhat muted compared to what I get at home, I can't help but think the old worn out air control on the kettle, and the much smaller size, somehow influenced the flow of air in the cooking chamber.
Monday, January 4, 2010
Teriyaki Chicken
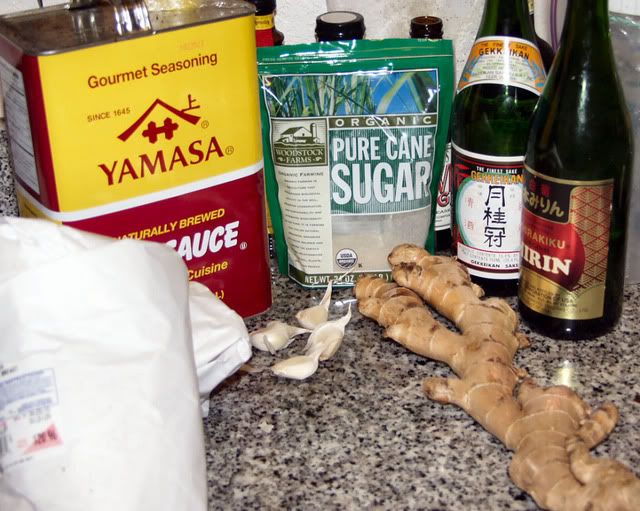
Anther staple of our New Year celebration is teriyaki chicken. We have a family recipe that I have been tweaking for the past 30 years since it was handed to me once I got a feel for the taste. When I make this at home, I use apple or cherry wood, when I am up north, I often use alder as there is a giant pile of it in my sister's backyard. The basic recipe is shoyu, mirin, sake, ginger, garlic, sugar.
Teriyaki Chicken Marinade:
3 cups shoyu
1-1/2 cups sugar
1/4 cup sake
1/8 cup mirin
4 large cloves garlic, grated
1/2" piece ginger, grated
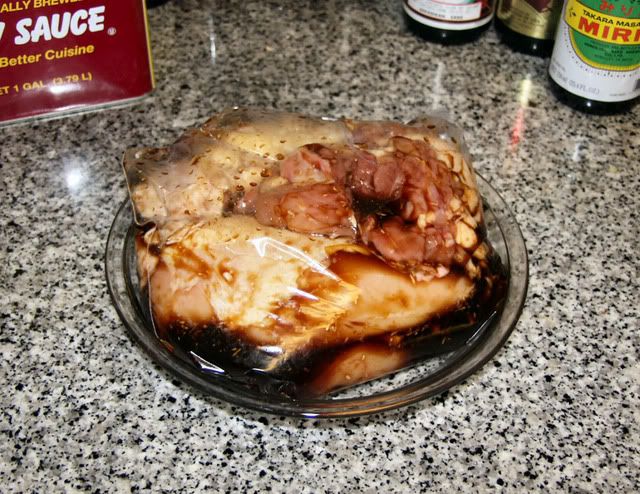
Mix all ingredients. Allow to sit until sugar dissolves and pour over chicken pieces in seal-able container. Allow to marinate for at least 8 hours. If I am using whole, split, spatched or quartered chickens, I will go 12 hours. The purpose of the marinade is to both introduce flavor and function as a brine as well.
After allowing the chicken the marinade, I will place it on a low fire until the chicken is cooked through, once the chicken is cooked, I will move the chicken over a hot fire to get some color and rendering on the skin. If I am going to use the chicken for a presentation type of dinner, I then glaze with this marinade, which gives a very shiny finish and supports the flavor of the chicken.
Teriyaki Chicken Glaze:
1 cups shoyu
1 cups sugar
1/2 cup honey
1/8 cup mirin
1 clove garlic, pressed, no pulp
1/8 tsp. ginger juice
This year, we used boneless pieces and sliced or portioned for lunch. The picture is not the loveliest, there seems to have been some malfunction with the photographer and this is the only cooked photo. Beer may or may not have been involved. I can't remember.
Sunday, January 3, 2010
New Years Post One
The first of a few posts about New Year's. As a person of both American and Japanese heritage, there has been a fusion of the celebration that we choose for celebrating the New Year. In the Japanese culture, New Years is of great importance in affirming the communal connections of family and friends, both from the past and for the upcoming year. It is also a time when we take some extra time for food and drink.
Although we eat fish cake throughout the year, this is the one time of the year we break out the home made version. For many year's we used the store made 'surimi' based products, but, about five year's ago, my sister and I started making a traditional recipe. I can remember the first year, it literally brought tears to my dad's eyes, as it took him back to his long ago gone mother's table. Simply put, it is just white mild fish ground to a paste and combined with potato or arrowroot starch, seasoned and boiled carrots and burdock root. We then form the paste into patties and deep-fry.
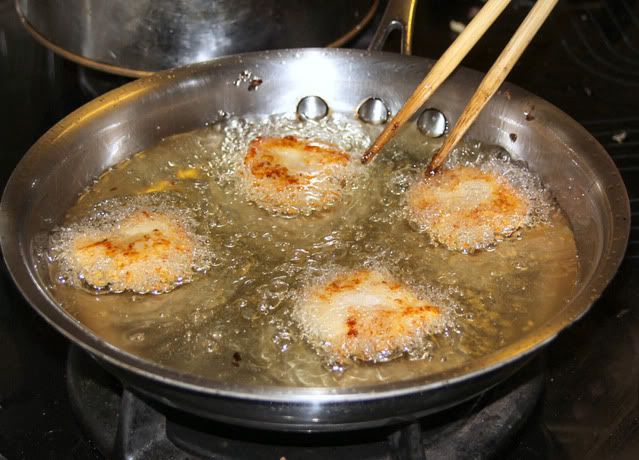
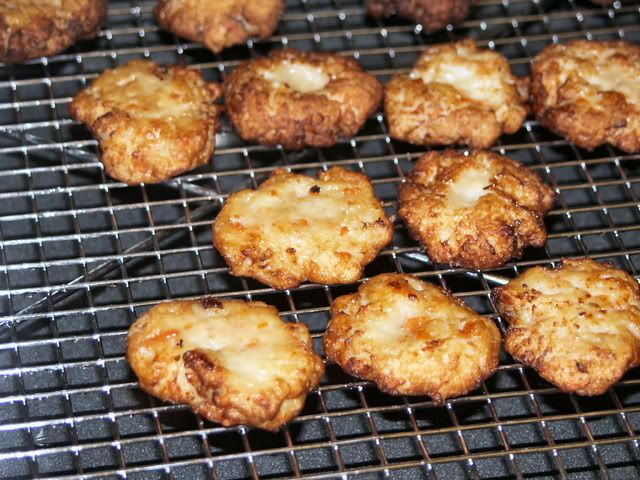
Here we are deep-frying in a mix of soybean and safflower oil, other oils that work well would be peanut and canola if blended with one of the other three mentioned. Roughly 2" in diameter and 3/4" thick, they are fried to a golden brown. Drained we end up with this
These can be used whole or sliced in soups, stews or eaten plain with maybe a shoyu and sesame oil dipping sauce. I also like them in a sandwich with some slaw and a little BBQ sauce. Back to the 'old man', like I said, the first time we made them, he had tears in his eyes, that year, we spoke a little more about grandma, about the family and how we had moved away from those times. It is the greatest thing about food and how it transcends time, it allows us to smell and taste those times we can never return to. My dad is gone now, but, this dish has earned it's spot, it is now, new and yet, once again, a tradition of my family.
Satsuma Age Kamaboko
11 ounces mild white fish (cod, sea bass, pollock)
2 ounces burdock root (coarsely shredded then chopped)
2 ounces carrots (coarsely shredded then chopped)
1/4 cup dashi (bonito broth)
2 Tbs vegetable oil
1 tsp sugar
2 tsp soy sauce (shoyu)
1 tsp sake
1 large egg white
5 tbs potato starch
2 tsp a.p. flour
1. Saute burdock root and carrots in 2T oil, add broth and sugar saute until all liquid is absorbed. Add soy sauce and continue saute until fluid is absorbed. Allow to cool.
2. Finely chop fish into small chunks then add to suribashi (grinding bowl) or food processor and grind to fine paste. This should be a slightly coarse paste. Incorporate sake thoroughly, then incorporate egg white thoroughly.
3. Sift potato starch and flour together. Add to fish paste 1 tablespoon at a time, combine by kneading into fish paste. Thoroughly incorporate one tablespoon at a time. Fold in veggie mix last.
4. Form into small patties, approximately 2 to 3 inches in diameter, 3/4 inch thick and deep fry or pan fry until crispy and golden.
Subscribe to:
Comments (Atom)

