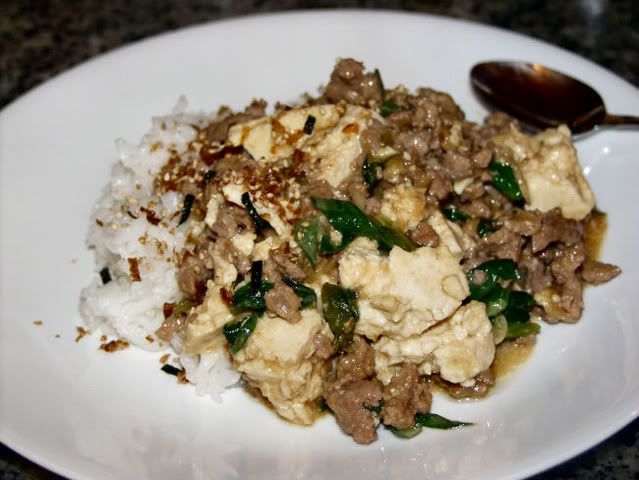
Tonight was another Japanese food night. It is funny how, as I have gotten older, these foods have become more of a part of my diet and how much more comforting they have become. I do not consider myself Japanese, I have very little connection to the land of my ancestors, yet the flavors and aromas still feel good to me. This was a standard of my family life when I was a kid, my mom and dad loved this dish. Butadofu literally means 'pork tofu'. And like many dishes, it really does look more like a home dish than something you would get at a restaurant. Here it is, donburi-style, as it should be.
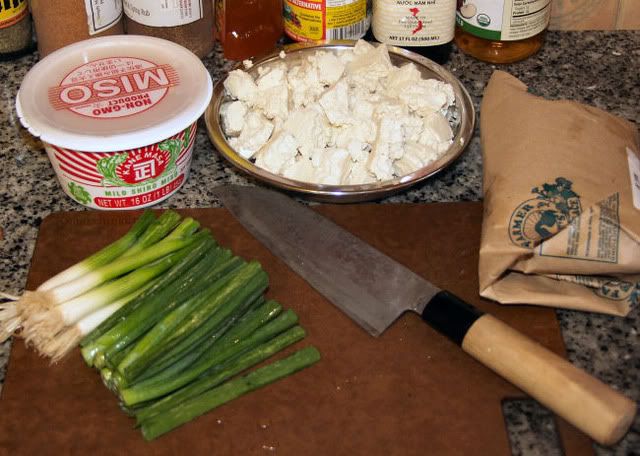
I started off with the main ingredients, shiro miso, ground pork, tofu (in this case firm tofu) and green onions. Now, my mom made this with both shiromiso (white or light fermented bean paste) and akamiso (red or dark fermented bean paste) for more depth of flavor, as it happens, I did not have any akamiso. So be it.
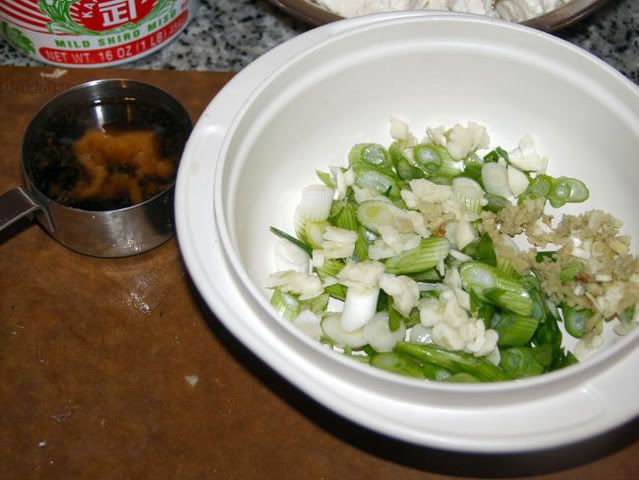
The green onions were prepared by separating the white and green parts and chopping for use. The tofu, again, firm this time, was crumbled. I chose firm as I was able to get some fresh firm tofu. My preference would have been silken tofu, but, the stuff at the store was not visible in the package. I don't like to buy tofu I can't see first. Anyways, here are the aromatics, some garlic finely chopped and some ginger finely minced, the cup holds 2 tablespoons each of Red Boat fish sauce and tamari along with 1 teaspoon cider vinegar and 1 tablespoon of Lucky Dog hot sauce.
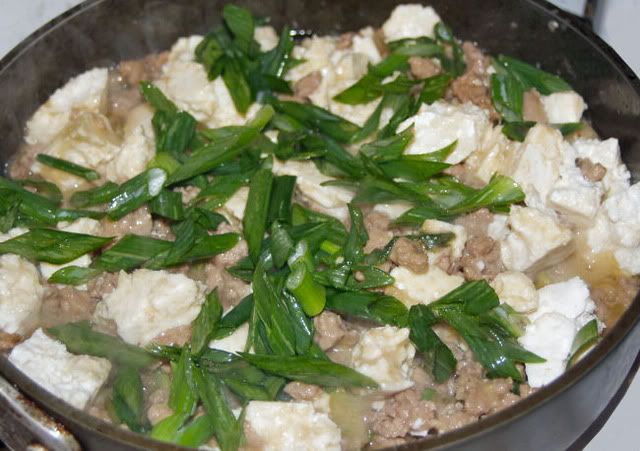
The pork was sauteed in a little bit of oil, then the aromatics were added and heated until the mixture was translucent and aromatic, then the sauce was added and cooked until color showed. Then I added 1/2 cup of the miso along with 1/2 cup of water to create a sauce. The green onion was added at the last minute to layer even more flavor. This was served as soon as the green onions wilted and darkened.
I continue to be amazed how much my palate and sense really enjoys this kind of cooking, the aromas and flavors of our childhood can have such an impact on us, we revisit these tastes and aromas and find a connection to who we are, even as we think we have moved too far down the road to remember. I get a lot of kidding about the tofu from my BBQ friends, but, I continue to understand the role that food plays, and for me, tofu on the plate, it is like the smell of roses and wet concrete, it reminds me of home, a home long gone but, as close as a bite and sniff.
Search This Blog
Thursday, March 24, 2011
Wednesday, March 23, 2011
Picanha
I learned something new today, I went to Phat Matt's and met my buddy Rob from Red Boat there to talk about offal and black pepper. We had a new cut of meat that was being featured there, called Picanha. Apparently this is a cut most popular and well known in Argentina and Brazil. In fact, it is easily identifiable as the steak that is often pictured on the churrasco swords so closely linked to Argentinian BBQ.
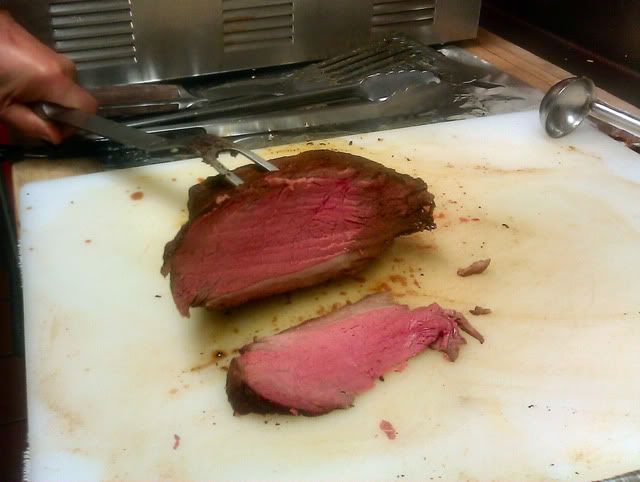
This particular version was smoked over a low fire with a little hickory smoke as Matt does with all of his meats. It was incredible, lean, beefy, tender and flavorful. The closest cut I can relate it to in the U.S. is the Eye of Rib primal in terms of taste and appearance, yet more tender. This made a spectacular sandwich with a little horseradish. Just goes to show, you can learn a little something at any moment, even if you think you have had every part of the steer.
Thursday, March 17, 2011
Corned Beef
For my special On Our Grills Four Ingredient Challenge for St Patrick's Day, I decided to get hammered on some Smithwick's and post a load of jibberish. Well, actually here is what I did in the interest of liver preservation...
Instead, I bought this lovely tri-tip and decided to marinate it for a few days. Why this and not corned beef? Well, I have been trying for some time to get corned beef dialed in with a lower sodium profile and I just cannot get there. So, why not make my own marinated beef with a lower salt content. Corned tri-tip here we go.
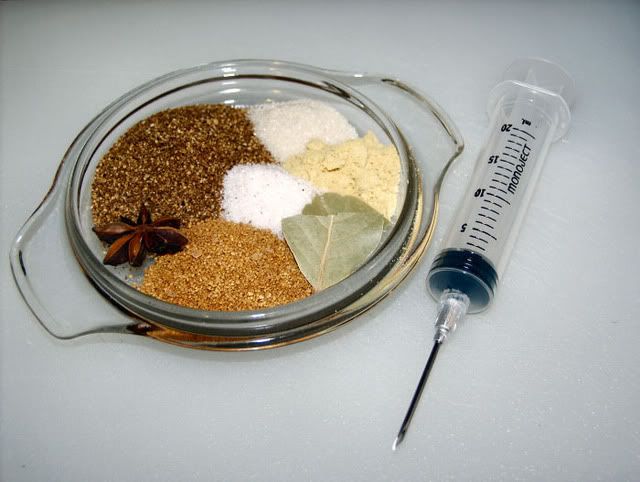
I also did away with the curing salts, as I believe once I smoke this up, there will be enough color in the meat. I did make up a brine that consisted of a variety of spices to help in the curing of the meat. The marinade is as follows:
Test Marinade One:
2 tablespoons Simply Marvelous Sweet and Spicy BBQ Rub
1 tablespoon Simply Marvelous Cherry BBQ Rub
1 teaspoon powdered mustard
1 teaspoon salt
1 teaspoon turbinado sugar
1 bay leaf cracked
1 star anise
1.5 cups water
8 medium ice cubes
1 cup water
Combine all spices and add to simmering water until all spices are dissolved. Remove from heat and cool with ice cubes. Add remaining water to bring marinade to the proper concentration. This produces a salty liquid, although it is not quite a brine. It does look a little murky.
From here, the marinade is loaded into the syringe and then injected into the tri-tip, this was to increase the penetration of the marinade into the meat and to aid in curing speed. There was a lot of injecting. The meat was placed in a large plastic bag which was sealed and placed in the refrigerator for 48 hours.
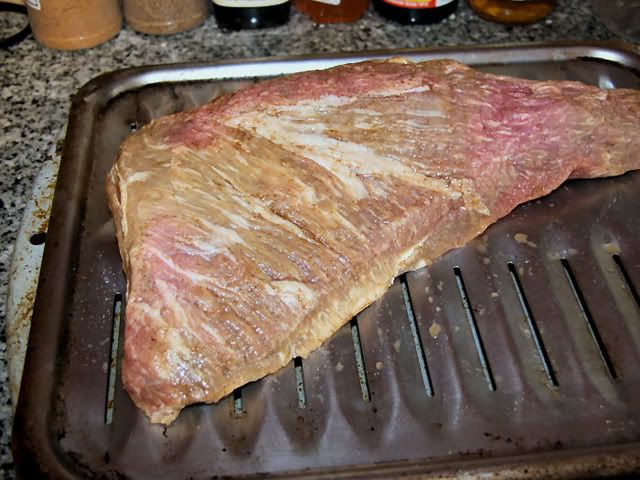
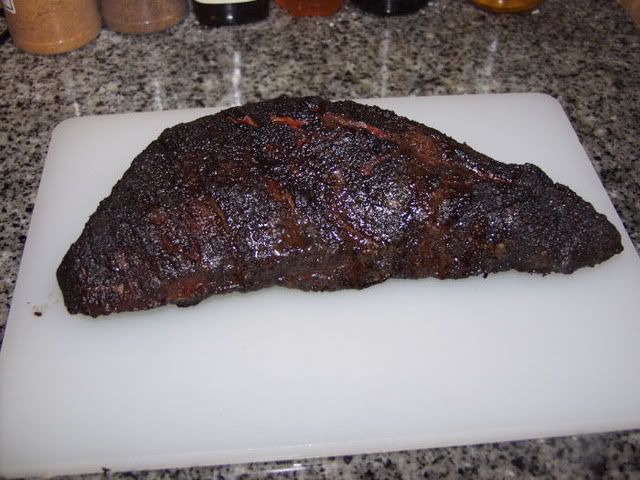
And that is what a tri-tip looks like when brined for 48 hours. From here, it was on to the kettle, cooking along at 250F with a little more smoke than I had hoped. I ran out of charcoal, had maybe 10 briquettes and had to do a wood burning smoke, which is a little tougher in the kettle. Plus side, the smoke flavor was outstanding. Here is the tri-tip finished with Phase 1, smoked to fork tender.
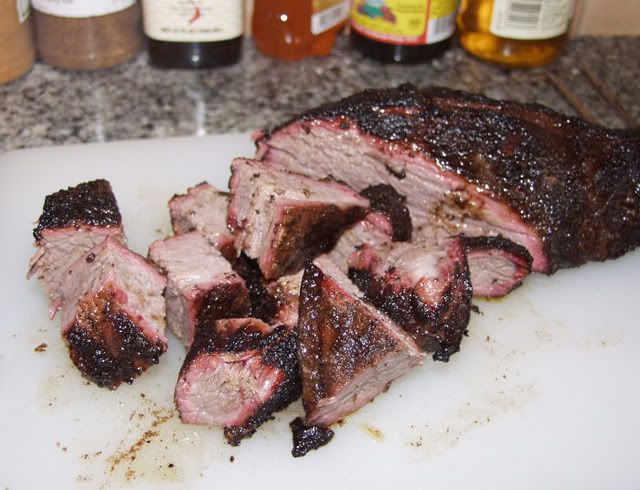
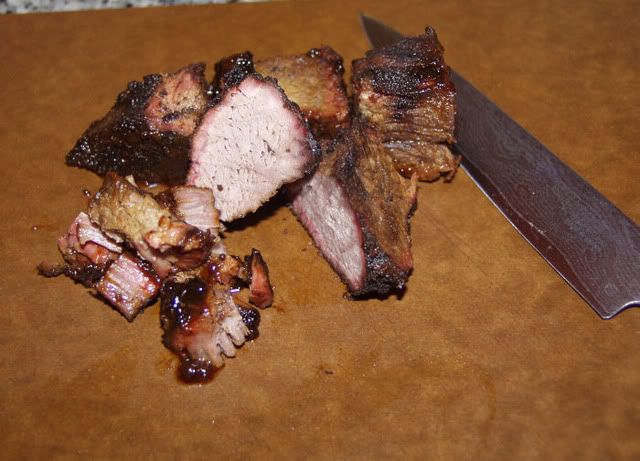
And chopped into coarse chunks...at this point, it was all I could do to not just start eating. It had the texture and flavor of a very mild corned beef, nowhere near the salt of a commercial corned beef. There was also no pink, as no curing salts were used.
These chunks were returned to a foil packet and a mixture of prepared mustard, cider vinegar, fish sauce, apple juice and honey was added. This was sealed up and put back on the kettle for 2 hours to braise. This made the meat so tender, it was hard to cut, but, shredded perfectly for the next step.
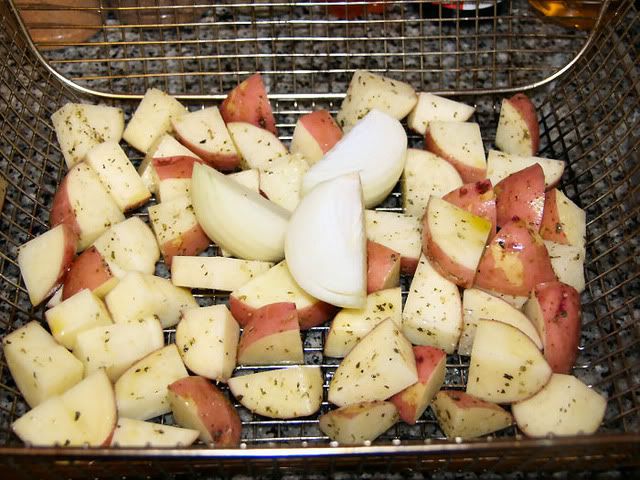
This would involve some Trash Bag Taters made famous by No Excuses BBQ, these were red potatoes though, with a coating of olive oil and some Todd's Dirt Herbal rub added to the mix, These were smoked on the kettle for 1 hour and then added to a pan with some aromatics, slowly browned.
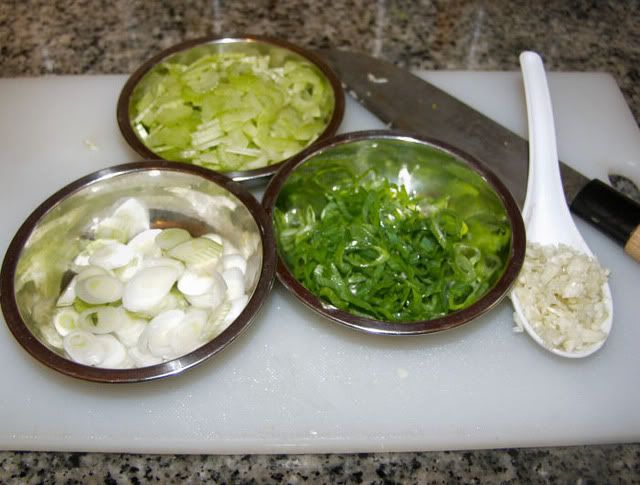
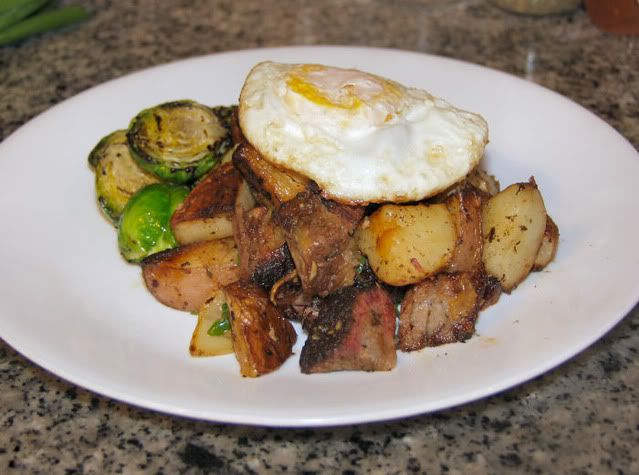
Then the tri-tip was added and allowed to cook into the hash for a few minutes, topped with chopped green onions and then a fried egg. I decided some grilled brussels sprouts with some olive oil and salt was a good addition to the plate. Here it is without the egg being cracked.
This cook worked out just as I had hoped, with a good strong resemblance to corned beef, minus the salt content, a great texture and a lovely balance of flavors in all elements of the plate. The egg was gratuitous I suppose.
Here are the links to the other 4-Ingredient Challenge bloggers for this special seasonal challenge.
Instead, I bought this lovely tri-tip and decided to marinate it for a few days. Why this and not corned beef? Well, I have been trying for some time to get corned beef dialed in with a lower sodium profile and I just cannot get there. So, why not make my own marinated beef with a lower salt content. Corned tri-tip here we go.
I also did away with the curing salts, as I believe once I smoke this up, there will be enough color in the meat. I did make up a brine that consisted of a variety of spices to help in the curing of the meat. The marinade is as follows:
Test Marinade One:
2 tablespoons Simply Marvelous Sweet and Spicy BBQ Rub
1 tablespoon Simply Marvelous Cherry BBQ Rub
1 teaspoon powdered mustard
1 teaspoon salt
1 teaspoon turbinado sugar
1 bay leaf cracked
1 star anise
1.5 cups water
8 medium ice cubes
1 cup water
Combine all spices and add to simmering water until all spices are dissolved. Remove from heat and cool with ice cubes. Add remaining water to bring marinade to the proper concentration. This produces a salty liquid, although it is not quite a brine. It does look a little murky.
From here, the marinade is loaded into the syringe and then injected into the tri-tip, this was to increase the penetration of the marinade into the meat and to aid in curing speed. There was a lot of injecting. The meat was placed in a large plastic bag which was sealed and placed in the refrigerator for 48 hours.
And that is what a tri-tip looks like when brined for 48 hours. From here, it was on to the kettle, cooking along at 250F with a little more smoke than I had hoped. I ran out of charcoal, had maybe 10 briquettes and had to do a wood burning smoke, which is a little tougher in the kettle. Plus side, the smoke flavor was outstanding. Here is the tri-tip finished with Phase 1, smoked to fork tender.
And chopped into coarse chunks...at this point, it was all I could do to not just start eating. It had the texture and flavor of a very mild corned beef, nowhere near the salt of a commercial corned beef. There was also no pink, as no curing salts were used.
These chunks were returned to a foil packet and a mixture of prepared mustard, cider vinegar, fish sauce, apple juice and honey was added. This was sealed up and put back on the kettle for 2 hours to braise. This made the meat so tender, it was hard to cut, but, shredded perfectly for the next step.
This would involve some Trash Bag Taters made famous by No Excuses BBQ, these were red potatoes though, with a coating of olive oil and some Todd's Dirt Herbal rub added to the mix, These were smoked on the kettle for 1 hour and then added to a pan with some aromatics, slowly browned.
Then the tri-tip was added and allowed to cook into the hash for a few minutes, topped with chopped green onions and then a fried egg. I decided some grilled brussels sprouts with some olive oil and salt was a good addition to the plate. Here it is without the egg being cracked.
This cook worked out just as I had hoped, with a good strong resemblance to corned beef, minus the salt content, a great texture and a lovely balance of flavors in all elements of the plate. The egg was gratuitous I suppose.
Here are the links to the other 4-Ingredient Challenge bloggers for this special seasonal challenge.
Larry Gaian of The BBQ Grail - Entry Here
The BBQ Grail website was created in 2007, initially to document the author’s quest to find the perfect backyard BBQ experience. Since that time The BBQ Grail has become one of the more popular BBQ blogs on the internet and is listed on Alltop.com as one of the top BBQ blogs.
The No Excuses BBQ website was started in January of 2009 as a way to record the author’s goal of cooking outdoors at least once a week throughout the year and showing the results to the world. Somewhere along the way things got out of control…
The BBQ Grail website was created in 2007, initially to document the author’s quest to find the perfect backyard BBQ experience. Since that time The BBQ Grail has become one of the more popular BBQ blogs on the internet and is listed on Alltop.com as one of the top BBQ blogs.
Wednesday, March 16, 2011
Pig Honey Chicken
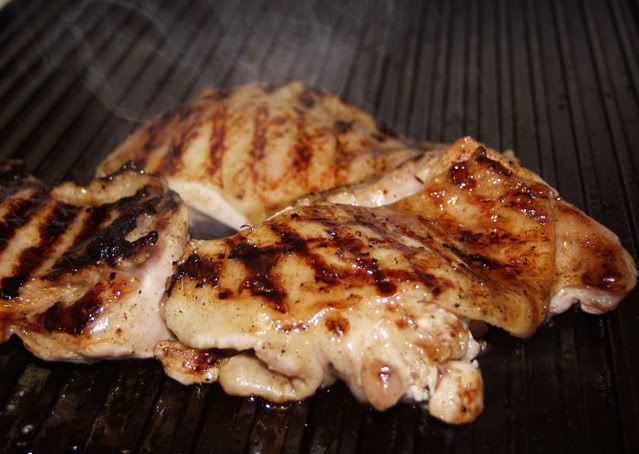
An interesting thing happened on the way to making Pig Honey BBQ Sauce a reality, the formula was tasted and found to have an incredible balance of flavors and aromas, well beyond just being a way to make ribs shiny. I immediately thought of street vendor style chicken, grilled or roasted, to really set off the flavors even more. So I marinated the chicken with every intention of later grinding or chunking them and making them into yakitori over the kettle. But, deadlines and such being what they are, I ended up simply grilling them.
As you can see, this worked out great. Anyone who has followed my cooking understands that for me, fusion in terms of food really means taking from one cuisine and adding to another, not just in terms of moving one ethnic flavor to another, but, in the freedom to use a variety of technqiues, such as haute cuisine applied to BBQ. In this case, it was street food made indoors on a pan.
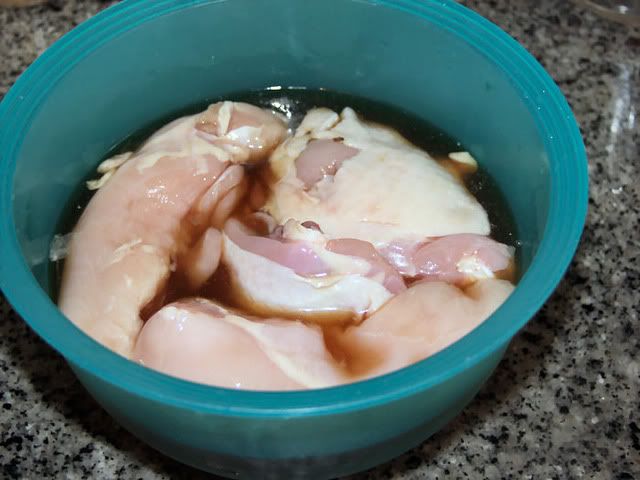
The chicken was marinated in Pig Honey Sauce, which, if you remember was to be a ribs specific sauce, for 48 hours. It was then boned and grilled on a very hot grill plate on the stove. This was to take just a few minutes on each side on a searing hot hunk of metal. The results above speak for themselves. In the image below, you can see whole thighs and skinless breasts. The breasts ended up as torikatsu.
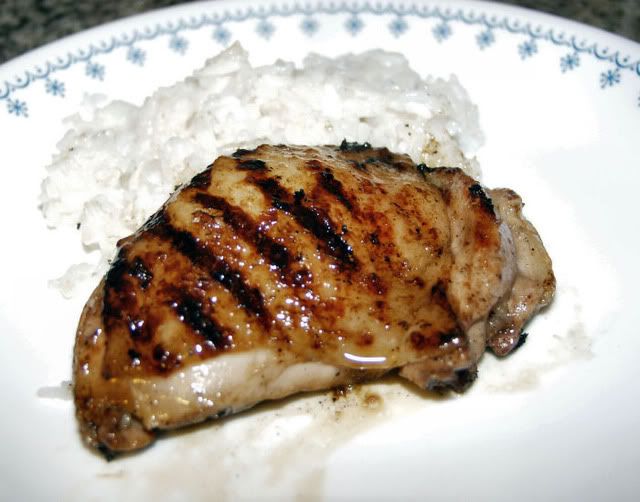
Once grilled, these were served with steamed Japanese rice as a simple plate. The beauty of using the grill pan was not only the nice marks, but, the chicken fat was allowed to drain away. I have found that a reversible skillet is an invaluable tool in the kitchen, it not only allows for chicken like this, but, when flipped to it's smooth size, I can use it as a low heat option for heating and warming sauces, toasting bread and distributing heat, essentially giving me three burners where my stove has only two. Back to the chicken, plated and whole, just another grilled thigh.
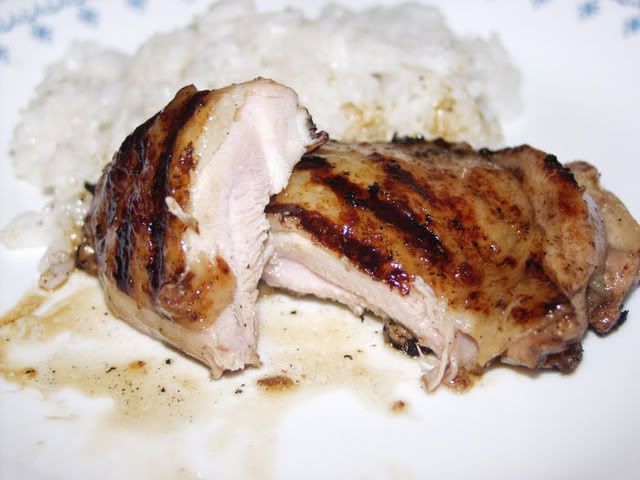
But, once plated and sliced, you can see that there was an amazing amount of moisture and the texture of the chicken was perfect. The flavor was intense and very complex.
I have no doubt that when I do get it made into yakitori, it will be a very tender, juicy stick of meat. In truth, there was no sauce needed once the cooking started, as the marination process insured a lot of moisture in the meat. One recipe of the Pig Honey was plenty for this, I would have even had enough for a spray bottle to mist the chicken on the grill. Here is that recipe again.
Pig Honey Sauce
1 cup apple juice
1/4 cup Red Boat Fish Sauce
1/4 cup Braggs Amino Acids
1/8 cup Honey
1 Tablespoon turbinado sugar
Combine all ingredients and bring to just short of a boil, maintain heat until sugar is dissolved.
Here is the sauce in the dribble bottle, a spray bottle would have been better, but, I don't own one of those yet.
As you can see, this worked out great. Anyone who has followed my cooking understands that for me, fusion in terms of food really means taking from one cuisine and adding to another, not just in terms of moving one ethnic flavor to another, but, in the freedom to use a variety of technqiues, such as haute cuisine applied to BBQ. In this case, it was street food made indoors on a pan.
The chicken was marinated in Pig Honey Sauce, which, if you remember was to be a ribs specific sauce, for 48 hours. It was then boned and grilled on a very hot grill plate on the stove. This was to take just a few minutes on each side on a searing hot hunk of metal. The results above speak for themselves. In the image below, you can see whole thighs and skinless breasts. The breasts ended up as torikatsu.
Once grilled, these were served with steamed Japanese rice as a simple plate. The beauty of using the grill pan was not only the nice marks, but, the chicken fat was allowed to drain away. I have found that a reversible skillet is an invaluable tool in the kitchen, it not only allows for chicken like this, but, when flipped to it's smooth size, I can use it as a low heat option for heating and warming sauces, toasting bread and distributing heat, essentially giving me three burners where my stove has only two. Back to the chicken, plated and whole, just another grilled thigh.
But, once plated and sliced, you can see that there was an amazing amount of moisture and the texture of the chicken was perfect. The flavor was intense and very complex.
I have no doubt that when I do get it made into yakitori, it will be a very tender, juicy stick of meat. In truth, there was no sauce needed once the cooking started, as the marination process insured a lot of moisture in the meat. One recipe of the Pig Honey was plenty for this, I would have even had enough for a spray bottle to mist the chicken on the grill. Here is that recipe again.
Pig Honey Sauce
1 cup apple juice
1/4 cup Red Boat Fish Sauce
1/4 cup Braggs Amino Acids
1/8 cup Honey
1 Tablespoon turbinado sugar
Combine all ingredients and bring to just short of a boil, maintain heat until sugar is dissolved.
Here is the sauce in the dribble bottle, a spray bottle would have been better, but, I don't own one of those yet.
Sunday, March 13, 2011
Torikatsu...chicken cutlets
As in my previous post, this weekend felt like a rice and Japanese taste weekend. I was going to be off of red meat anyway, it had to happen. So, I made this...
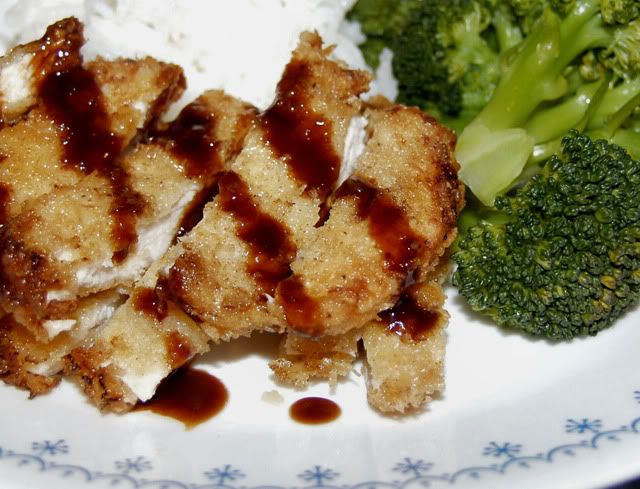
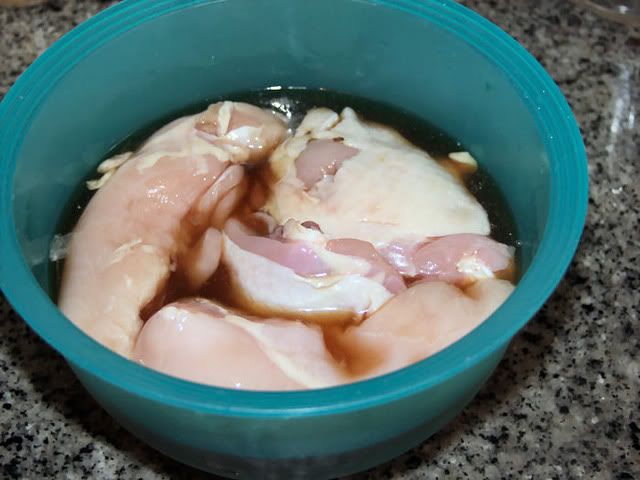
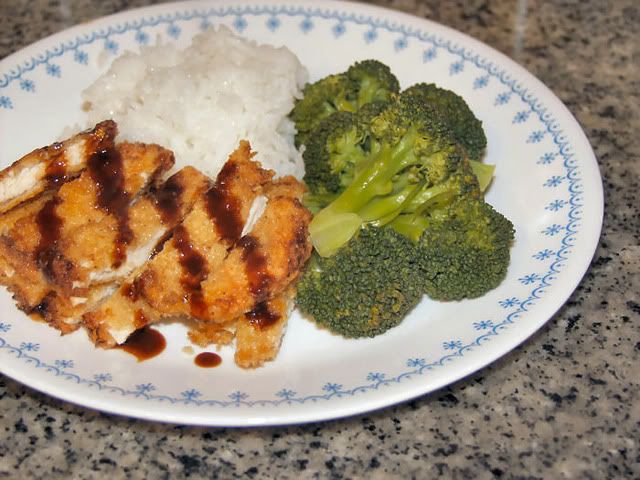
Pan-fried chicken cutlets with Tonkatsu sauce, broccoli and rice. This is my idea of comfort food, with Tonkatsu sauce being one of my favorite condiments, lending a fruity/salty flavor profile which is a more savory combination than say ketchup or gravy. But, this chicken was a little different, as I chose to use my new experimental Pig Honey, which was covered in a previous post here. I marinated the chicken breast in the Pig Honey to help with moisture and to add another layer of flavor.
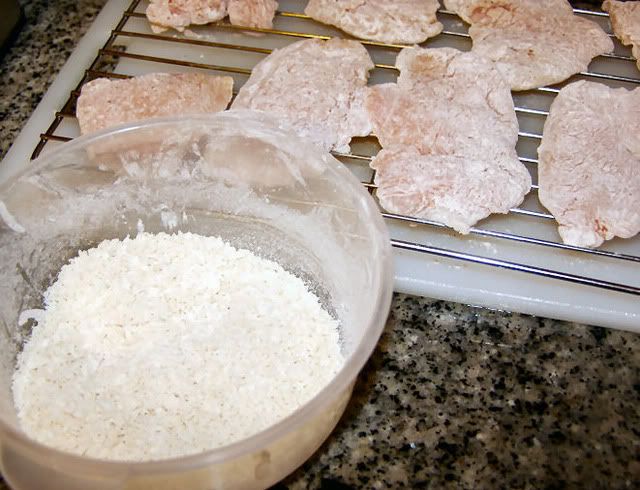
The thighs and one of the breasts are destined for another cook. One of these breasts was removed from the marinade after 3 hours, sliced into cutlets and then worked over with a serrated face meat mallet into paillards. These were floured and allowed to cure for 20 minutes. This allows the flour to form a dry layer on the wet chicken surface.
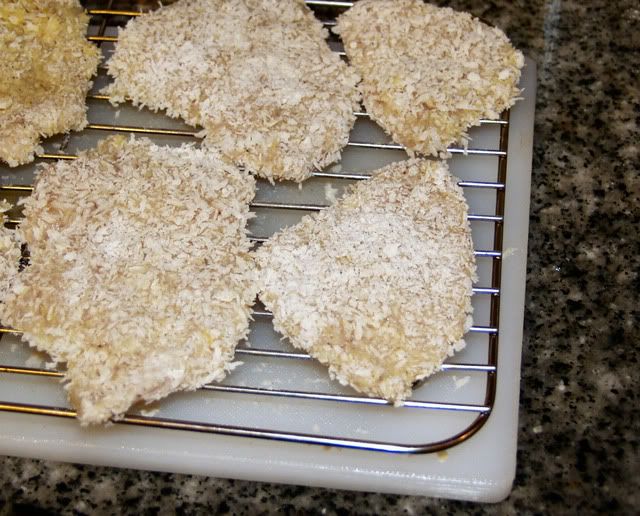
You can see the cured chicken paillards, along with the panko (Japanese bread crumbs) which I mix with a little flour also. This aids in creating a coating that sticks to the chicken. Once the curing period is done, I dip the chicken into a loose egg wash, equal parts egg and water (or milk). Then into the panko mix and onto the rack to cure for another 15 minutes. These are then ready to fry.
From there, it is simple to shallow fry the chicken in about 1/2" of oil. It is difficult to measure the heat of the oil in that shallow of a depth, what I do is dip the end of a bamboo hashi (chopstick) into the oil and if it bubbles actively, but, not vigorously, then I know the oil is ready. Add three pieces to the pan, do not crowd or over-fill the pan as the oil must remain hot. These are thin and need to cook only 3 to 4 minutes per side and until light golden brown. Like these...
Pan-fried chicken cutlets with Tonkatsu sauce, broccoli and rice. This is my idea of comfort food, with Tonkatsu sauce being one of my favorite condiments, lending a fruity/salty flavor profile which is a more savory combination than say ketchup or gravy. But, this chicken was a little different, as I chose to use my new experimental Pig Honey, which was covered in a previous post here. I marinated the chicken breast in the Pig Honey to help with moisture and to add another layer of flavor.
The thighs and one of the breasts are destined for another cook. One of these breasts was removed from the marinade after 3 hours, sliced into cutlets and then worked over with a serrated face meat mallet into paillards. These were floured and allowed to cure for 20 minutes. This allows the flour to form a dry layer on the wet chicken surface.
You can see the cured chicken paillards, along with the panko (Japanese bread crumbs) which I mix with a little flour also. This aids in creating a coating that sticks to the chicken. Once the curing period is done, I dip the chicken into a loose egg wash, equal parts egg and water (or milk). Then into the panko mix and onto the rack to cure for another 15 minutes. These are then ready to fry.
From there, it is simple to shallow fry the chicken in about 1/2" of oil. It is difficult to measure the heat of the oil in that shallow of a depth, what I do is dip the end of a bamboo hashi (chopstick) into the oil and if it bubbles actively, but, not vigorously, then I know the oil is ready. Add three pieces to the pan, do not crowd or over-fill the pan as the oil must remain hot. These are thin and need to cook only 3 to 4 minutes per side and until light golden brown. Like these...
I felt like rice
and since I was going to have rice, I thought I would have some torikatsu, chicken cutlet for those who are wondering. This would be a break from the ridiculous amount of red meat I ate last week. I do a mean katsu. I really learned a lot about preparing tonkatsu (pork cutlet) while working at Kobe Restaurant in El Cerrito, where Mieko Pollard showed me a few tricks. Along the way, I picked up a few more and this is what comes out.
First off, the rice, as the rice is the most crucial thing, a note about what I consider to be the perfect rice. I prefer my heritage rice, the short grained glutinous rice common throughout the modern Japanese table, I like it to be a little on the moist side with a clean translucent surface. This is my process for excellent sushi rice. And I can see no reason, if I can make rice good enough for sushi preparation that I should not do it right. First off, I like the use the best rice I can afford. It makes a difference. The newer hybrids like koshihikari are really great.
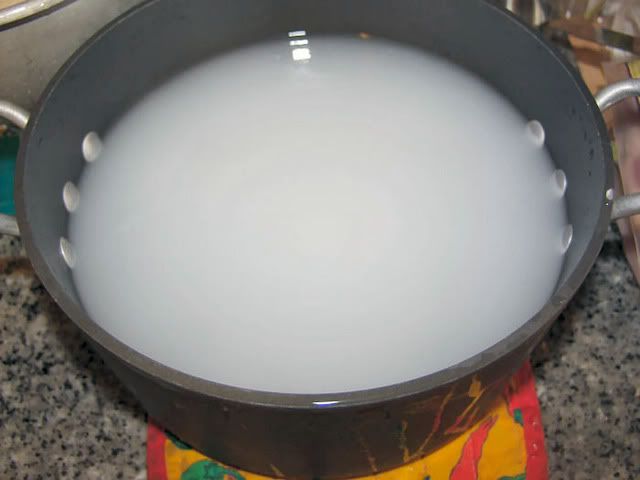
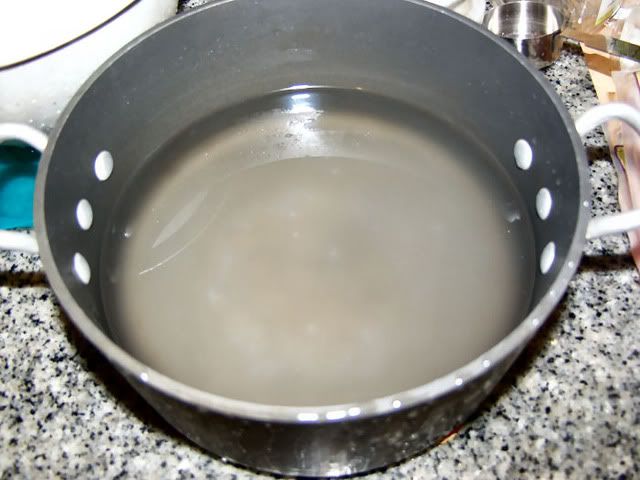
I wash the rice thoroughly and through several washes. Below, you can see the difference between the first wash and the fifth wash in terms of the water clarity. This is important as a lot of this is starch, either added to insure the rice stays separate and dry, or worn from the grain. Leave this stuff in, and you cannot avoid gummy steamed rice.
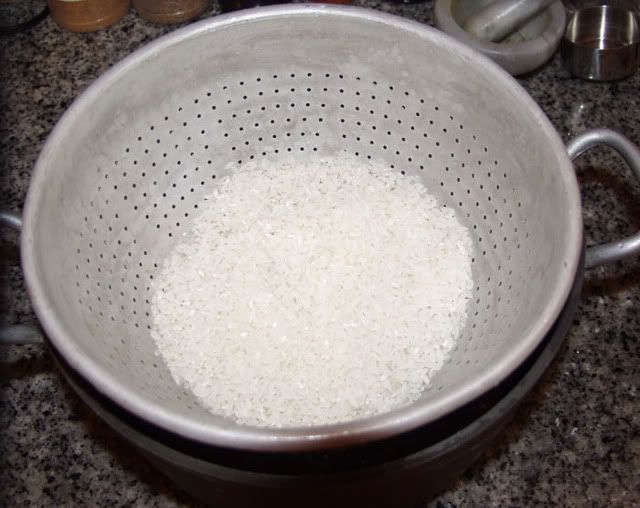
As is clear here, the difference between washed and unwashed is clear. In truth, it is not just washing, when the water is placed in a bowl with water, it is agitated pretty thoroughly and with purpose. It is not just swished about, you are trying to use the water and friction between the grains to polish the rice and complete the bran removal process. You hands should be soft and silky after doing the rice. Here the rice is, draining in the colander after the last rinse, if I had thought of it, I would have backlit the shot to show how translucent the rice is at this stage.
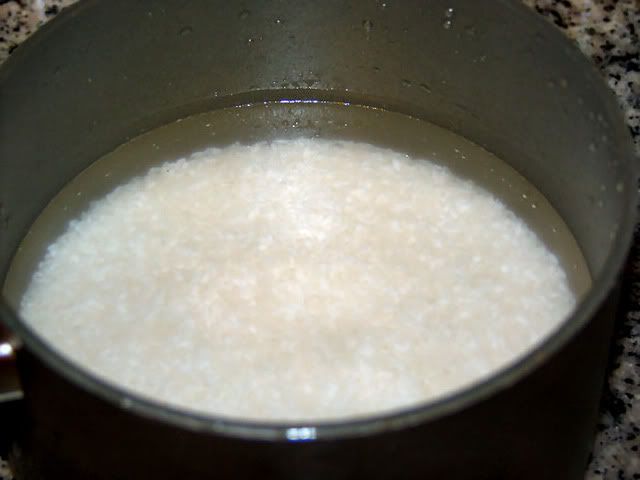
From here, the rice is soaked in clean water for 1 hour if it is new rice, and up to 6 hours if it is old rice. I do not suggest old rice, it just does not taste as good. How to get good rice...well, I find that shopping at stores carry a lot of rice and have a regular clientele will have the best rice, and I buy small packages, to insure turnover at home. Here is the rice ready in the pot.
(On Edit) Doh! I left off how much water to cook the rice in. The way I do it is to put the rice into the pot I am going to cook it in (Doh! I left that off too, more on the pot in a minute) anyways, I put the rice in the cooking pot, level it out and add water until it is covered by one inch of water for 2 measuring cups of rice. Another way to do this is to use the rule of equal parts water to rice, plus 1/2 part water for the pot. I simply always make two to two and a half cups of uncooked rice and add water until it touches the line on my index finger first joint.
In terms of the pot, as you might be able to tell, I prefer a non-stick pan, heavy aluminum sides and a clad bottom. My pan of choice is Analon with a glass lid, so I can peek without opening the lid. I prefer a sauce pan with vertical sides, 8 to 9 inch diameter and 6 to 7 inches deep.
The pot is placed on high heat to bring to a boil, I prefer to start with warm water for the soak, to keep the process of bringing to a boil as short as possible. Once the water comes to a moderate boil, let it boil uncovered for 4 minutes, then reduce heat to low and cover. It needs to cook for 15 to 17 minutes, then turn off the heat. Do not uncover, it must sit covered for at least 20 minutes. This will result in excellent rice suitable for serving plain, or for preparing for sushi or onigiri. It sure was good with the chicken, next post please.
First off, the rice, as the rice is the most crucial thing, a note about what I consider to be the perfect rice. I prefer my heritage rice, the short grained glutinous rice common throughout the modern Japanese table, I like it to be a little on the moist side with a clean translucent surface. This is my process for excellent sushi rice. And I can see no reason, if I can make rice good enough for sushi preparation that I should not do it right. First off, I like the use the best rice I can afford. It makes a difference. The newer hybrids like koshihikari are really great.
I wash the rice thoroughly and through several washes. Below, you can see the difference between the first wash and the fifth wash in terms of the water clarity. This is important as a lot of this is starch, either added to insure the rice stays separate and dry, or worn from the grain. Leave this stuff in, and you cannot avoid gummy steamed rice.
As is clear here, the difference between washed and unwashed is clear. In truth, it is not just washing, when the water is placed in a bowl with water, it is agitated pretty thoroughly and with purpose. It is not just swished about, you are trying to use the water and friction between the grains to polish the rice and complete the bran removal process. You hands should be soft and silky after doing the rice. Here the rice is, draining in the colander after the last rinse, if I had thought of it, I would have backlit the shot to show how translucent the rice is at this stage.
From here, the rice is soaked in clean water for 1 hour if it is new rice, and up to 6 hours if it is old rice. I do not suggest old rice, it just does not taste as good. How to get good rice...well, I find that shopping at stores carry a lot of rice and have a regular clientele will have the best rice, and I buy small packages, to insure turnover at home. Here is the rice ready in the pot.
(On Edit) Doh! I left off how much water to cook the rice in. The way I do it is to put the rice into the pot I am going to cook it in (Doh! I left that off too, more on the pot in a minute) anyways, I put the rice in the cooking pot, level it out and add water until it is covered by one inch of water for 2 measuring cups of rice. Another way to do this is to use the rule of equal parts water to rice, plus 1/2 part water for the pot. I simply always make two to two and a half cups of uncooked rice and add water until it touches the line on my index finger first joint.
In terms of the pot, as you might be able to tell, I prefer a non-stick pan, heavy aluminum sides and a clad bottom. My pan of choice is Analon with a glass lid, so I can peek without opening the lid. I prefer a sauce pan with vertical sides, 8 to 9 inch diameter and 6 to 7 inches deep.
The pot is placed on high heat to bring to a boil, I prefer to start with warm water for the soak, to keep the process of bringing to a boil as short as possible. Once the water comes to a moderate boil, let it boil uncovered for 4 minutes, then reduce heat to low and cover. It needs to cook for 15 to 17 minutes, then turn off the heat. Do not uncover, it must sit covered for at least 20 minutes. This will result in excellent rice suitable for serving plain, or for preparing for sushi or onigiri. It sure was good with the chicken, next post please.
Thursday, March 10, 2011
Pastrami
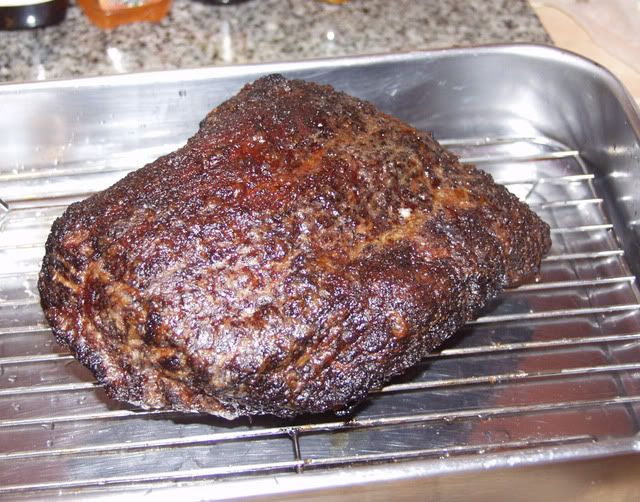
Well, since I was stuck working today, I decided to run another cook, today it was a corned beef hitting the smoker. This was a test run and worked out pretty nice. A Harris Ranch Mild-cure corned beef, soaked for 2 days to remove some salt. Then rubbed liberally with my Phu Quoc Pepper rub and smoked over apple at 225F for 5 hours. Here is what that looked like when done.
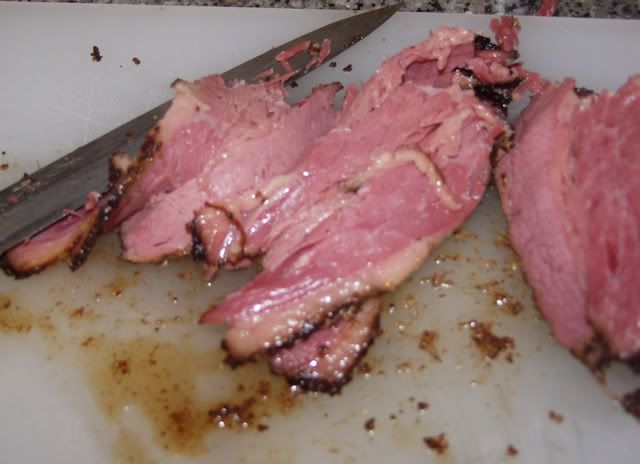
Next, the hunk of meat was wrapped in foil, then a 1/2 cup of water was added. One of the keys to pastrami, in my mind, is the steaming process. I never knew this until I saw a show on New York delis, where they showed that all of them steam the pastrami for an hour prior to serving. I have been doing this and the texture is perfect. Here is an awful picture of the sliced meat. Not sure what happened to my focus.
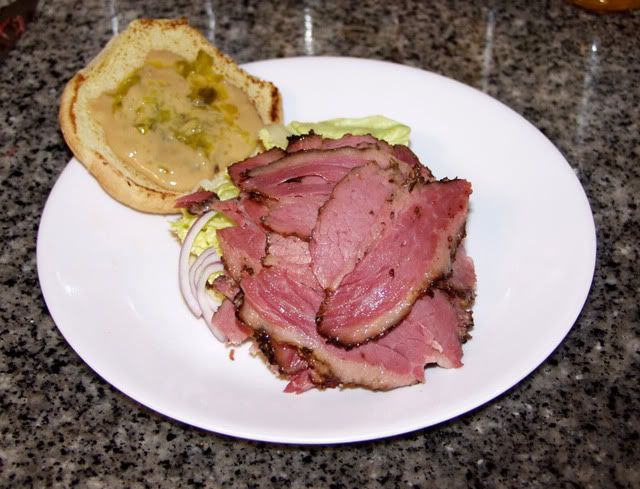
And finally, a sandwich, with lettuce, sliced red onion and some mustard. The mustard was made from the dregs of a honey mustard with a little extra kick provided by Lucky Dog Hot Sauce and some Colman's Dry Mustard added in. Dill relish was also involved. It was good, even if there was no rye in sight.
Next, the hunk of meat was wrapped in foil, then a 1/2 cup of water was added. One of the keys to pastrami, in my mind, is the steaming process. I never knew this until I saw a show on New York delis, where they showed that all of them steam the pastrami for an hour prior to serving. I have been doing this and the texture is perfect. Here is an awful picture of the sliced meat. Not sure what happened to my focus.
And finally, a sandwich, with lettuce, sliced red onion and some mustard. The mustard was made from the dregs of a honey mustard with a little extra kick provided by Lucky Dog Hot Sauce and some Colman's Dry Mustard added in. Dill relish was also involved. It was good, even if there was no rye in sight.
This was an excellent effort with the pastrami coming out with a much better overall flavor. I need some rye bread and maybe some sauerkraut.
Subscribe to:
Posts (Atom)