Search This Blog

Monday, November 5, 2012

Brisket Trimming

And now for an odd little food post, one I feel is quite overdue for this blog. How do I trim a brisket?

I think the idea of smoking a brisket is one of the more intimidating aspects of cooking in the smoke. While there are many cooks who think nothing of cooking a pork butt or some racks of ribs to be something of a natural and easy task, the brisket often stands apart was the intimidating cut of yore. Only brisket masters need apply blah, blah, blah...  As is often the case, the truth is, the same principles apply to either and any meat you are cooking.

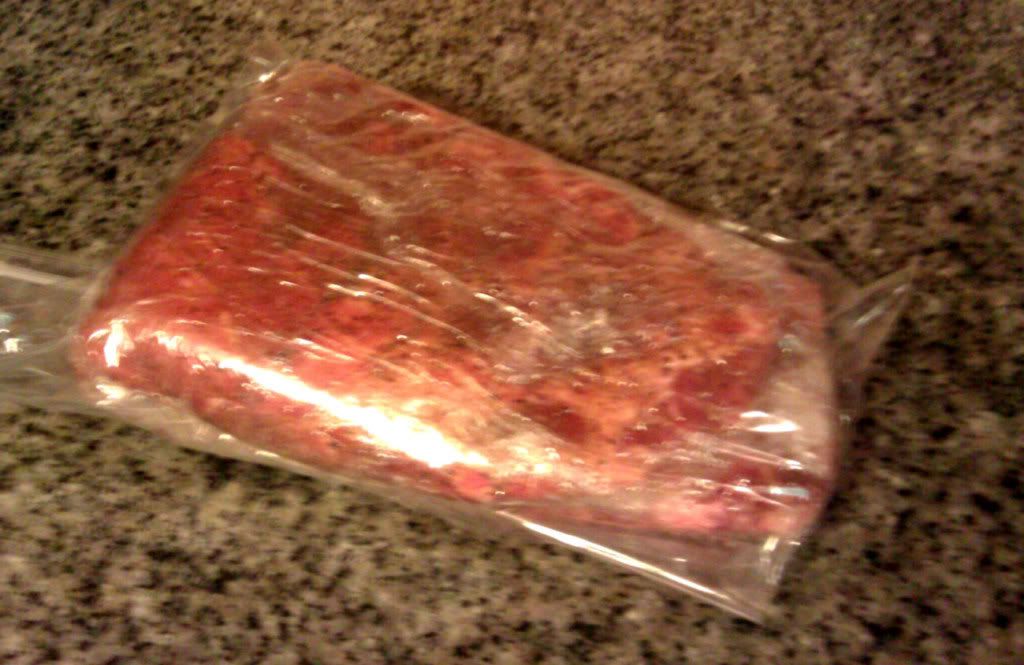
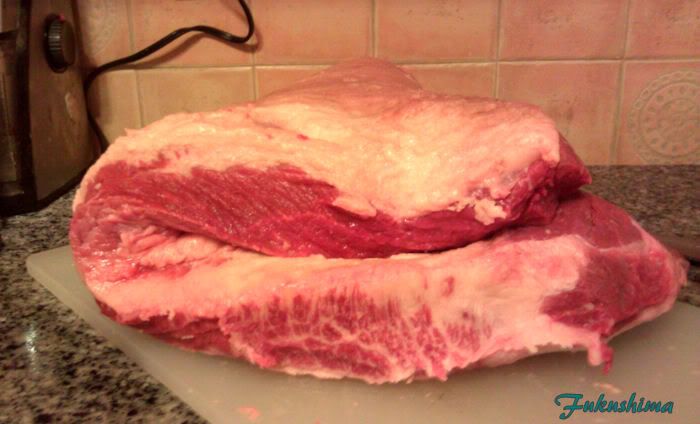
Here then, is subject one, what is known as a packer brisket, fresh from the cryo-vac. This was an IBP brand, select grade, whole packer (with a poorly butchered point), original weight around 14.9 pounds.
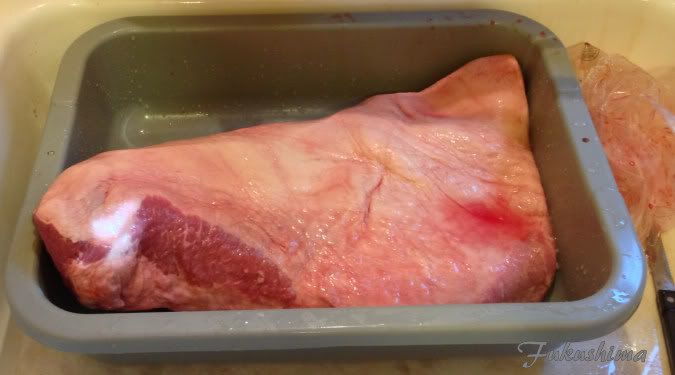
Fat Cap Up, Untrimmed
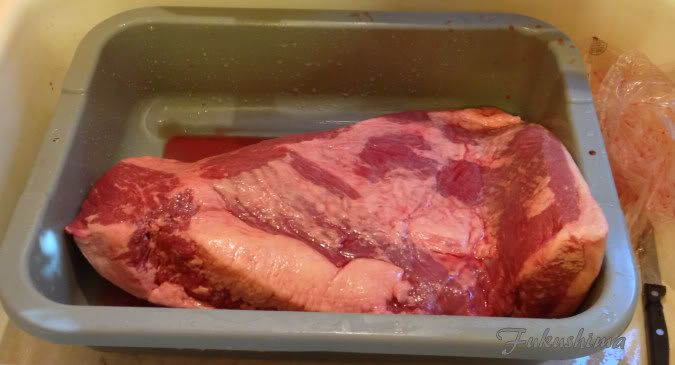
Fat Cap Down, Untrimmed

Step one for me, with any cut of meat, is to thoroughly wash and scrape the meat. The idea is to wash the liquid that seeps from the meat while it in the plastic, also, scraping will remove any bone dust or chips. From here, I shake off any excess liquid, and using a clean dish towel, wipe  the meat dry. Meanwhile, I like to put a layer of two of butcher paper down, and get the knives ready.
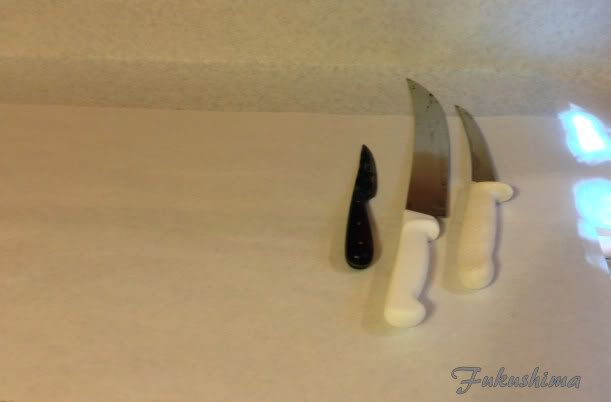
Knives
I use three knives, a small caping knife, for detailed cuts, more than anything, this knife has become like an attachment to my hand, I can use this knife for all manner of cleaning cuts. The large Scimitar is a favorite for cutting and slicing large cuts of meat. I use it with a push cut, allowing the large up-swept blade to slice through the meat, think the bow of a ship, used in this manner, a Scimitar or Butcher's knife will effortlessly slice through the thickest meat. It is not a great pull-cut blade. The small stiff-blade boning knife is what I use to clean fat and membrane, I find this knife to be invaluable for preparing all types of meat for cooking. Onto the meat.
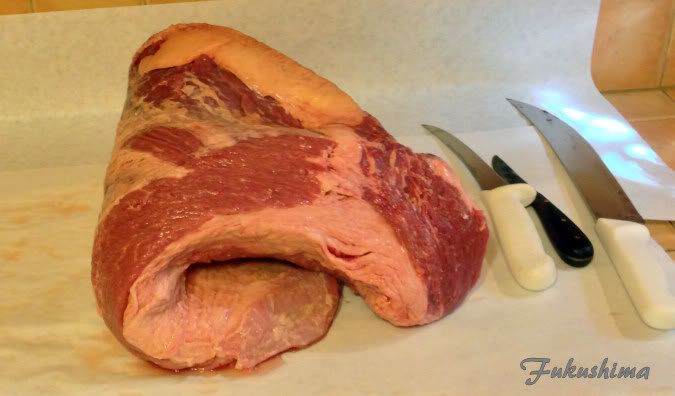
Flop!
 I like briskets that bend, this one bends nicely. If you're thinking the meat is so long and flat, it has to, nope. This brisket had a flat that was almost 3 inches thick. The point was poorly sliced and almost 1/3 of it was missing. I check each packer in the store, looking for one that is flexible, even floppy. Even though these are Select grade, I know I can turn a brisket like this into good eating. I like to trim the underside first, no reason, just do it that way. I try to remove the membrane, any fat and the wedge of fat between the point and flat. Not everyone believe this is a good practice, but, I feel the wedge of fat makes for greasier meat, adds no additional food to eat and changes how the heat interacts with the meat where the point and flat meat.
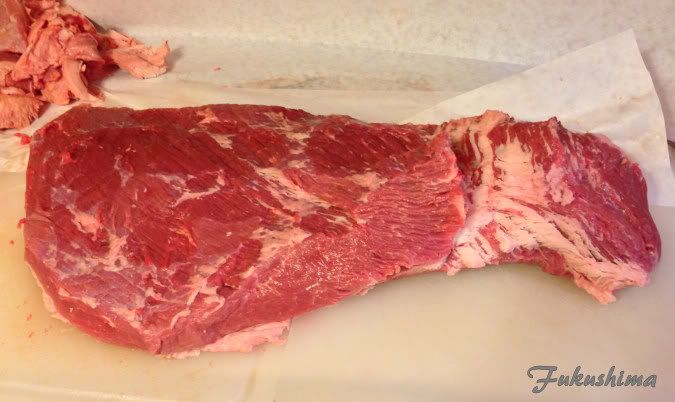
Trimmed 
Here, you can see the brisket, lean side trimmed, most of the surface fat has been trimmed, the wedge of fat removed, edges cleaned up. I stretched the brisket out a bit, to show the flat, on the left of the image, and the point, on the right of the image. One additional thing to note, I have shaped and trimmed the edges of the brisket to a thicker edge, most packers have very thin edges, these are hard to get cooked correctly and leave the edges dry. By blocking or rounding the flats edges, I get a better overall texture. Next!
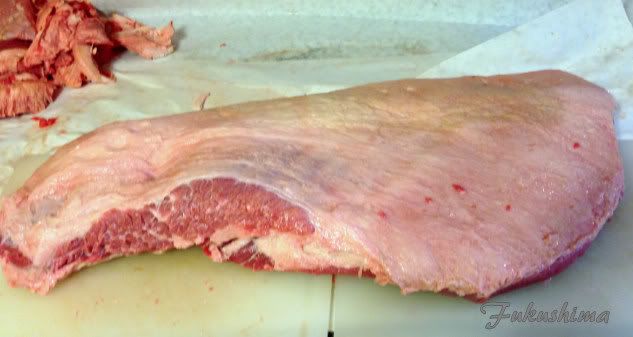
Fat Cap, trimmed
The above image, which shows the poorly cut point in all of it's glory, also shows that the entire fat cap has been trimmed, down to no more than 1/4". I know it looks like it is down to membrane, but, once cooked, that will leave a thin cap of fat, just enough to moisten the bite. Now, I would note, that this brisket was intended for the table, so I did minimal trimming of lean, just removing the discolored meat. For a competition, I would trim the flat to a width of around 10" with the grain, to try and get the slices to fit into a 9" clam shell. Oh, and there was a second...
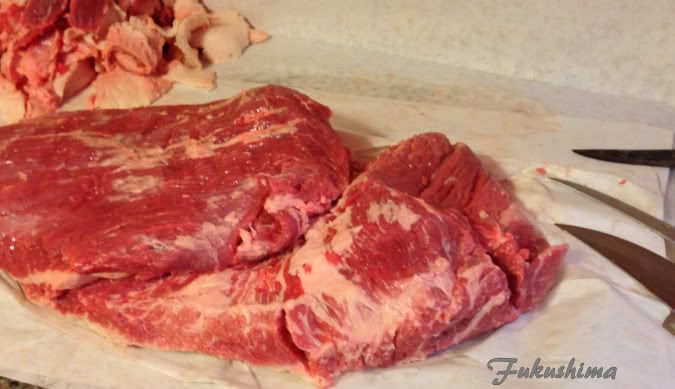
No fat cap shot, look at the marbling

Again, you can see the overall clean trim of the flat and just a little surface fat left on the point, which shows that there is still a fair amount of marbling, even in a select packer. As you can see, this packer had a very full point, which is something I consider to be a desirable trait in a brisket. Much of the flat on this packer was protected by that large point, it made positioning over the fire easier. I think the flat ends up more tender, and with more moisture as a result.

All of this trimming is really just to take a good piece of meat and make it easier to cook. Learning how to pick out a good packer, learning which kind of cut you want and how to prepare it are more important, but, preparing a brisket this way, leaves you with more edible meat, with a lot of surface and minimal surface fat.

Sunday, September 2, 2012

Hot and Fast Ribs

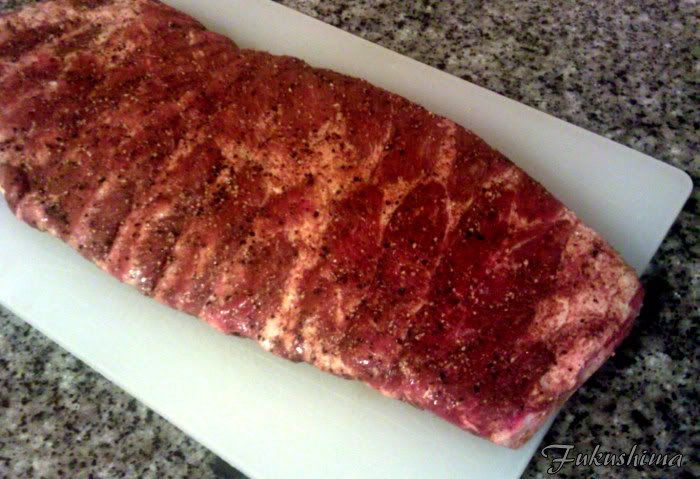
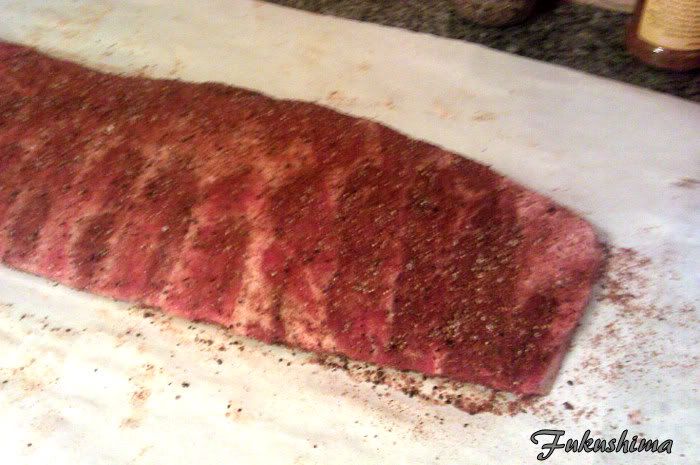
It was experiment time again, and the Landarc BBQ kitchen was to test out the idea of cooking ribs at a much higher temperature range than I normally do. This is in keeping with my working with hotter temperatures across the board, largely inspired by Donnie Thomas down in Texas and Mark Redman in Georgia, the two men who introduced me to hot-n-fast for brisket. The ribs were from Beeler's Pork, which uses their own hog breed they call Haluka hogs, this is some good pork, always full of flavor and well marbled. I hit it with some Dizzy Dust salt-free and then a higher sugar variation of Bob's Mother Rub to get a little more black pepper and some salt. Here they rack is ready to go.

The rack rubbed up

This was actually done 24 hours prior to the cook, as I was messing around with getting more flavor into the meat as well. I decided to let it sit, tightly wrapped overnight and to see how much liquid was in the wrapping the next day. There was no liquid in the wrapping at all. I still believe there is no truth to the idea that rubbing with a rub the night before leads to dry ribs.

Here are the wrapped ribs

The ribs were pulled from the rather dry wrappings, allowed to sit at room temperature for 20 minutes or so, while I got the kettle going, I decided to shoot for 300F as a target for this cook. The ribs went on at 300F, there was a little bit of apple wood over Wicked Good lump charcoal. You can see that the rub has changed the color of the meat quite a bit.

Ribs cured in dry rub overnight

From here, it was really rather easy, I let the kettle go, it ran along just fine at 300F up to 325F, where it finished. The ribs were done in around 3 hours and change, and the color was excellent. I strive to have this color and texture at lower temperatures and rarely get it this nice.

Yes, they did look that good

This is exactly the color I want when I cook ribs, and the fact that I was done at just a little over 3 hours, amazing to me. There was weep, the Pig honey, all over these ribs. Note, I did not spritz or mop, this was all about a sprint of a BBQ cook.

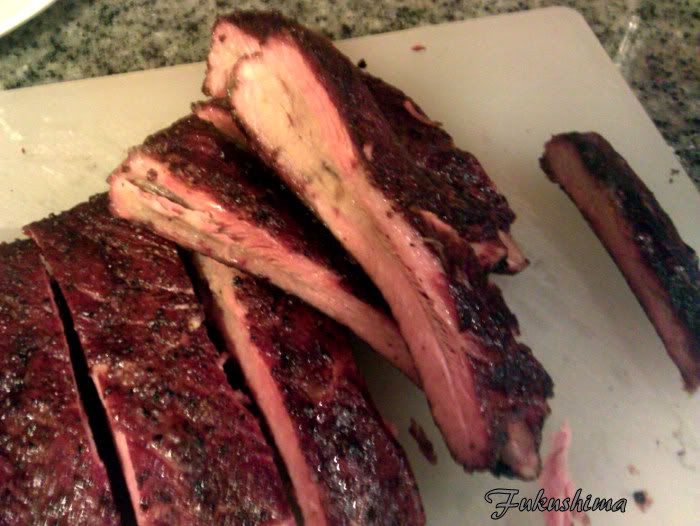
Clean cuts, smoked through

There was nothing about these ribs to suggest that there were any shortcuts taken, these had a wonderful smoke flavor, the rub had worked into the meat, they were juicy and the surface had a tender bark, bit through to the very definition of the word. I had gotten lazy and did a modified St. Louis cut, which is to say, some of the tips were left on. Still, these ribs were as good as I would ever need ribs to be. (again, I apologize for the pictures, phone camera, what can you do?)

Sunday, August 19, 2012

Steak Night

Well, I decided it was to be steak night, this had a lot to do with the fact that I had gotten home from a week of camping and had so much in terms of vegetable matter than had to be consumed, that I spent Friday and Saturday eating mostly vegetables at home. I figure, I am allowed a nice juicy steak. There were not a lot of preparation pictures, as I figure, it is just not that tricky to prepare a steak.

Since I spend much of the past week eating food cooked over a fire, I had little taste for more smoke, so it was to the cast iron pan, ripping hot, dry and ready to go. I oil and salt the steak, no pepper, then into the cast iron pan. Seared for 2 minutes a side and pulled to rest.

Steak resting

I has some fresh English Peas and decided the classic of Peas and Mushrooms for the steak was a good route. I sauteed up some onion, added the mushrooms and a little butter, rasied the heat to drive off some liquid and char the onions a bit. Oh, about the butter added after the onions, I use grapeseed oil to saute or fry, it is very high heat stable. The butter is just for flavor. In any event, the peas were added for just a few minutes to heat through, but, barely cooked.

Yes, I meant for the onions to be that color!

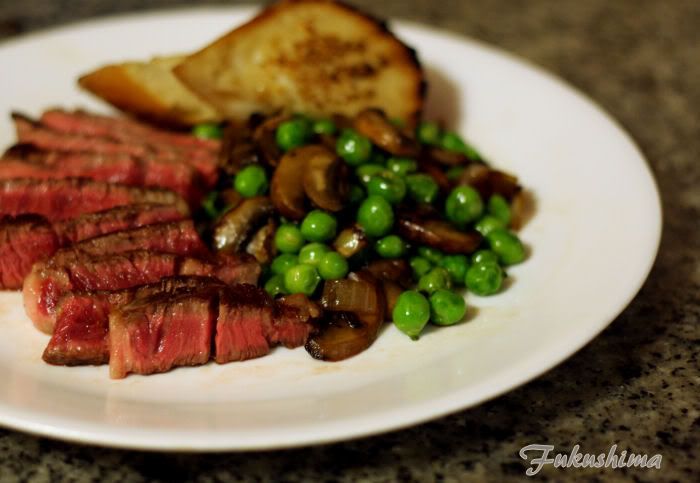
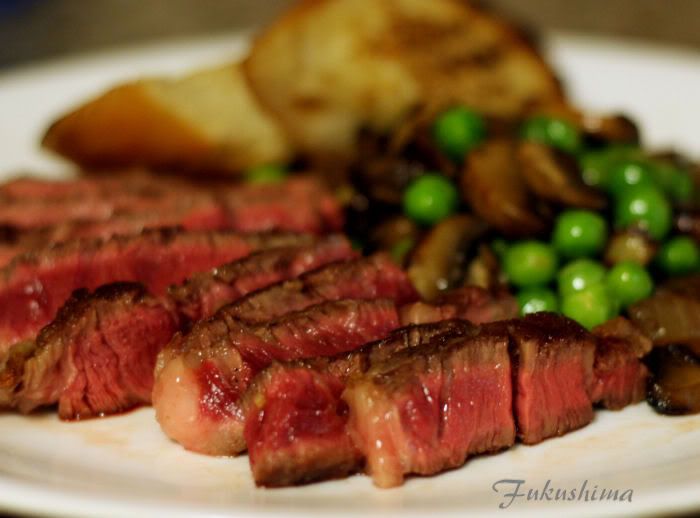
I ended up slicing the steak, and eating just 1/2 of the steak, it felt like a better portion and let's face it, I need better portions. There was a little garlic bread points to finish the plate. Here is a close-up of the meat, as I figure nobody comes here for the peas.

Too red? NO!

For me, this is a perfect rare-medium-rare, I really prefer these steaks on the just rare side of medium rare. The cast iron pan did it's job, putting a nice crust onto the steak, just enough to complement and caramelize the surface. A little black pepper after the rest, so there is no bitter, burned pepper smell or taste. Perfect dinner.

Friday, August 3, 2012

Summer comfort on a Friday

Somedays, when things have just not quite gone right, such as angry clients telling you to get a problem fixed and you are the guy standing in front of the delay, by Friday evening, you want some comfort. Now, I am not against a beer or three, and Fridays often find me practicing my mixology. But tonight, was to be different.

I went with this...


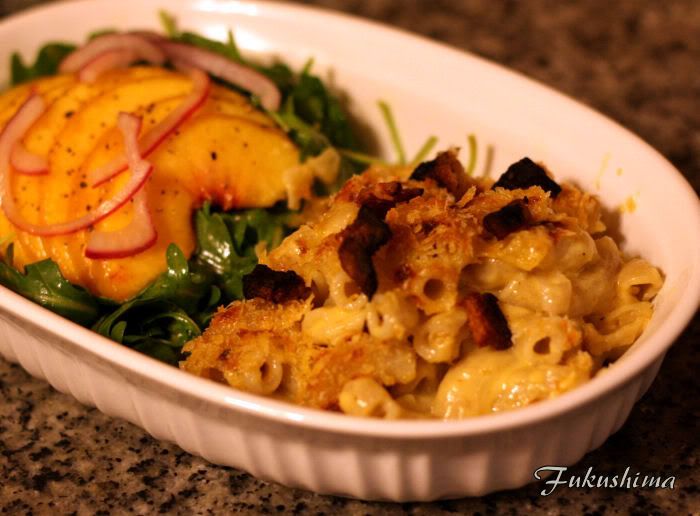
Comfort, why yes, I'll have some please...

What you see here, is a simple four cheese macaroni featuring my favorite cheese, Bellweather Farms Carmody, with a little cheddar, parmesan and emmenthaler. A simple roux, some white port and fresh cracked black pepper from my stash of Phu Quoc black pepper. Oh, and to top it off, there was some home made cracklins, from a few scraps of smoked bacon fat.

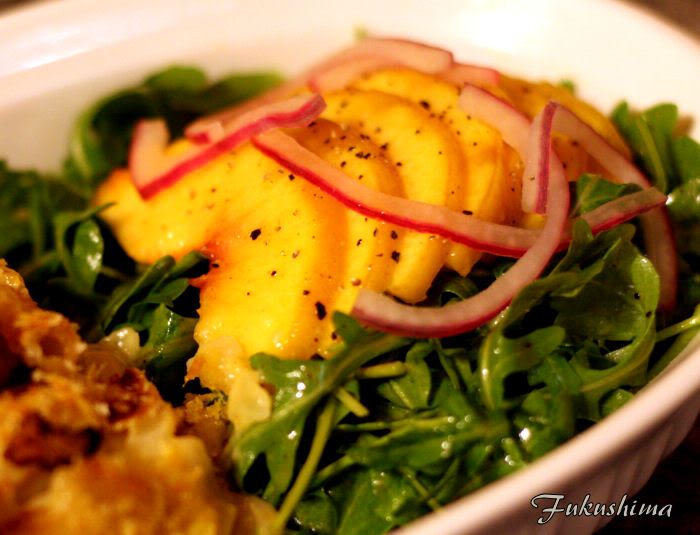
I am often asked how I would chosse elements for a plate, in this case, with the creamy, fatty flavor and soft texture of the macaroni and cheese, the complement could have been to try and match the main course, but, that really taxes the palate. I went with a contrast, a sharp one. That is a soft Elberta Peach, bridging the dish, it's soft texture and sweetness mimics the main course while not copying it.

The salad is a base of wild arugula dressed with a classic vinaigrette, kept a little sour on purpose. Very high quality olive oil and a spalsh of cider vinegar and balmsamic, the sweet and sour let's the arugula pepper work with the peach. It is also worth noting, the natural pepper flavor of arugula works brilliantly with both the peach, and the mac-n-cheese. Finally some sugar sured red onion, sliced paper thin, gives just one more layer of flavor.

There ain't no salad in BBQ!

With a macaroni and cheese dish that is anything but the blue box, something slightly crunchy, sweet and sour, soft and crunchy, it holds up the complexity of the mac-n-cheese without letting it dominate the palate.

Sugar-cured Red Onions:
A treat with any dish, I love these on fried potatoes, or with pulled pork in-lieu of slaw.

1 red onion, sliced very thin. I prefer a knife cut, but, a slicer works
2 tablespoons fine turbinado sugar
2 tablespoon fine sea salt
1/2 cup cider vinegar

Throughly blend onion, sugar and salt, let sit for 1 hour at room temperature. Drain and add vinegar, do not rinse. Allow to sit for at least one hour.

A note on the onion, I prefer small red onions, and not torpedo onions but, the flatter ones.

The Vinaigrette:
1/8 cup very high quality oil, I prefer olive oil
1/8 cup champagne or other mild vinegar
1/16 cup Balsamic vinegar, does not need to be the good stuff
2 tablespoons Dijon or other delicious prepared mustard.

Add all ingredients to a stainless bowl and whick vigorously until an emulsion is formed. There you go, hand toss with salad of choice. The arugula is a great choice, I really like mache as well.

Sunday, June 3, 2012

Smoked Pork Trimming

I ended up doing a lot of smoking today, along with a rack or three of baby back ribs, I ended up buying a couple of rather poorly trimmed pork butts. In the end, it doesn't matter that they were not trimmed too well, they are on their wat to smoked carnitas. But, I found a small muscle that is usually removed as trim, that was still attached. There are a few of these small muscles that occur in odd locations on a pig, that are incredibly tender. This one is along the top and back of the butt of a pork shoulder. It looks a lot like the "money muscle" from the butt.

I rubbed it up with my usualy Mother Rub (same as I use for tri-tip and brisket) and smoked over apple for 3 hours at 250F. I ended up applyin yet another test baste/sauce for kicks.

Unsliced Pork Trim

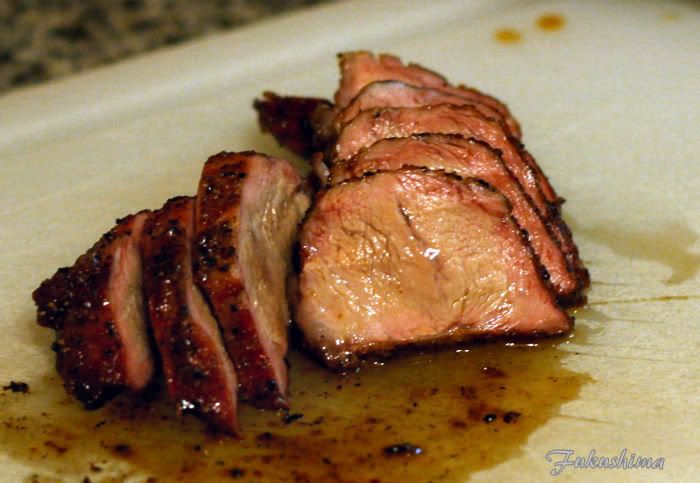
Juicy, tender, smoky, spicy

Along with the test sauce, this hit on every note. That sliced photo, is pre-sauce. This is one juicy cut of meat. The sauce is a test bed I have been playing with as a sort of clone of a popular competition sauce, but, with a few tweaks to increase complexity.

Friday, May 18, 2012

Brisket in Paper

Of late, I have been hearing a great deal about the use of butcher paper for wrapping briskets for the smoker. The process appears to be to smoke the brisket, to the point of the stall, or to where the bark, the coating and surface of the meat, is the color you want it to be. Then to wrap it in a couple of layers of butcher paper to create a slightly moist environment for the meat to cook. Foil does a similar thing, but, since it does not breathe, it affects the bark by making it soggy. Some folks also feel it makes the meat feel steamed in texture.

I decided to give the process a try, but, in searching around, could not find a single 'Choice' grade brisket, so select it was, not my favorite grade of meat to cook. I performed the cook in my UDS, using a mixture of lump charcoal, natural briquettes and apple wood. The temperature was started at 225F for two hours, then ramped to 300F for three hours, two of which were in paper. I then ramped it another time to 350F for one and a half hours. I used standard white, uncoated butcher paper.

The Rub (Bob's Mother Rub sort of)
3 parts Redmond Real Kosher Salt
2 parts Phu Quoc Black Pepper, ground to a medium grind, no fines
1 part each of organic onion granules and garlic granules
1/2 part lime powder
1/4 part Natural sugar, finely ground

The Liquid
2 parts water
1 part Red Boat Fish Sauce
1/2 part Bragg's Amino Acid

I ended up using 2 packers, which is to say, briskets that have both the deckle (aka point) and the flat still attached. They stareted out around 14 pounds, went on to the cooker around 11 to 12 pounces once they were all trimmed up, I like to trim off the excess fat and any meat that looks grayed. One of the things I believe is a good starting point, is if the packer brisket is flexible, I believe this translates to a more tender end product, these were flexible.

One Packer, folded in half, what you want.

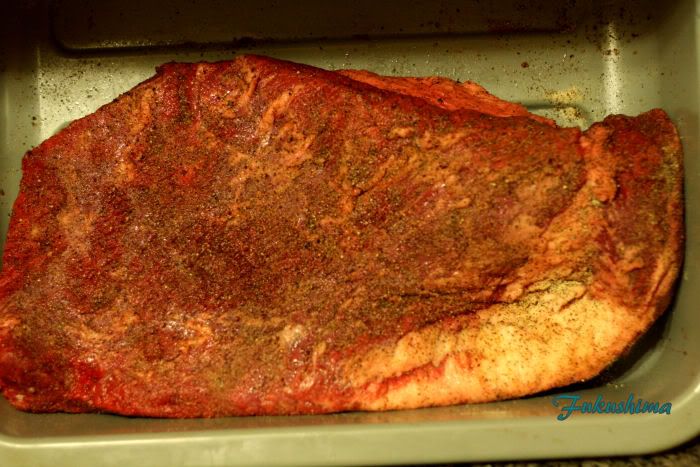
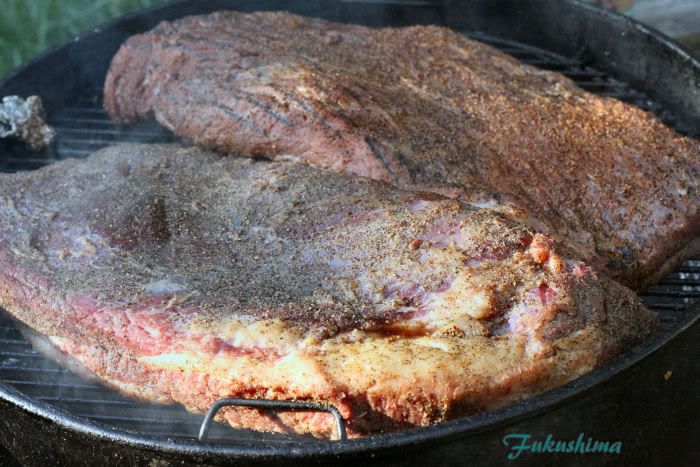
From here, both packers were seasoned with the rub, just the ingredients above blended in a shaker and applied over the meat. I changed my ususal process, which was a mistake. Normally, I apply a base coat, let it melt onto the meat, then apply a second coat once the pellicle forms on the meat surface. I didn't do this, and the price was a mediocre bark. Bummer.

My Rub on Brisket

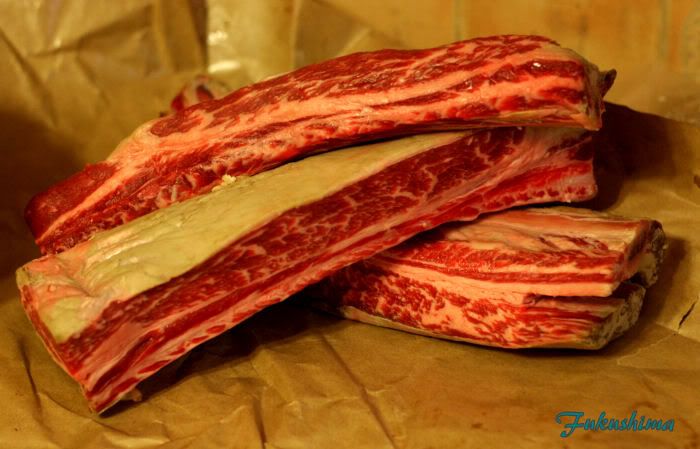
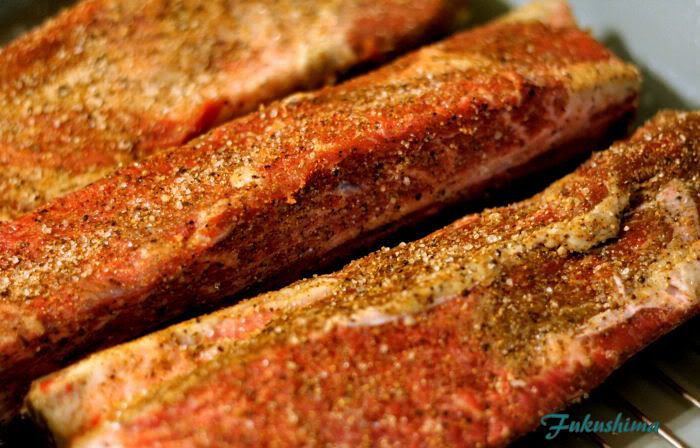
I was also cooking a brisket for my friend Rob, who, with a newborn, doesn't have the chance to fire up his smoker. His rub is more powdery, a much finer texture, which made for a difference in the bark. I prefer a more medium textured rub, which normally gives me more of a textural coating on the meat. I also cooked some whole chuck ribs, I really like these and they are easy to make on a smoker. I hit them with the same rub.

Nice Choice Chuck ribs

Rubbed Up

Sadly, this is the last shot of the ribs, I ran out of time to deliver Rob's share of the cook and no done shots were taken. I assure you, these were tender, juicy and have a great color, a deep mahogany. Anyways, this all went onto the cooker. Chuck ribs on lower rack, briskets on upper rack.

Oops, forgot to change white balance

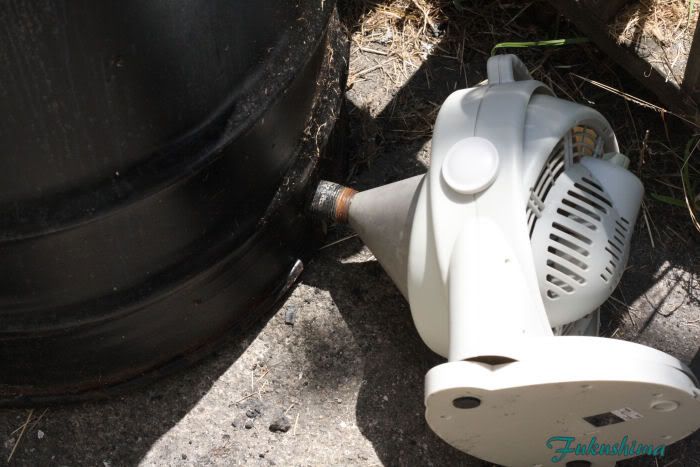
It was a snug fit. From here, it was just waiting for the color, then wrapped and waiting for the meat to get done. I mentioned the timing above, I do not cook brisket by temperature of the meat. This leads to a lot of bad cooks, judging by internal temperature. I use a method of checking once the meat gets to around 190F internal of poking it with a metal skewer to see if the skewer goes in easy. This often happens at temperatures of 200F to 205F, but, the only way to be sure is to use a probe method. I did have some temperature issues, trying to keep the smoker at 350F, and one of those fancy PID controlled fans would have been nice, but, they are too pricey for me. I do have a small fan and a funnel though, and a BOB controller.

This worked well

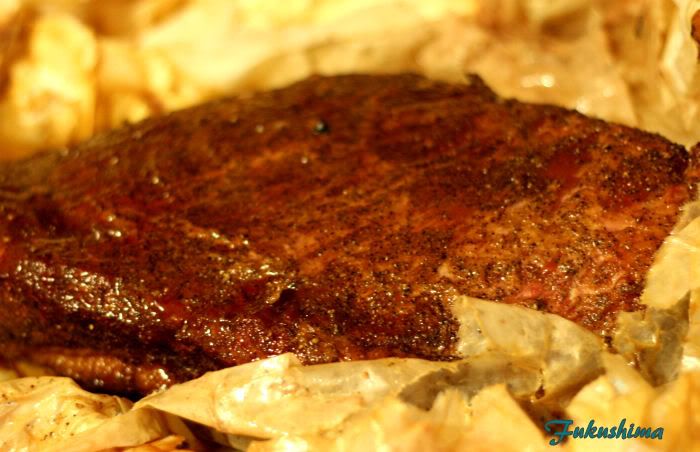
Rob's brisket looked like this when it came off the UDS and out of the paper. I have to say, his brisket just about flopped over in half when I pulled it. I am expecting that it will be very tender.

Rob's Brisket (I think)

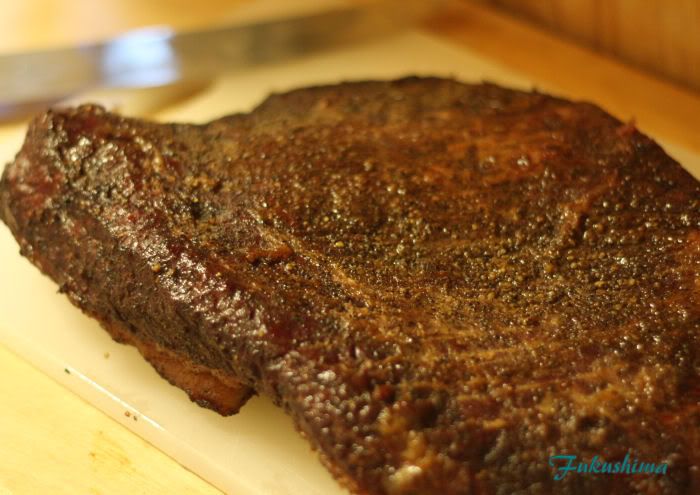
Mine took a little longer to get done, still working with the whole testing with a probe method. I pulled it after another hour on the cooker and put it to rest in my oven. I prefer to use a cooler, but, it is doing duty as a vessel for bottle conditioning some oatmeal chocolate milk stout. So into the oven for a minimum one hour rest, two or three hours is better. I went with one hour.

The finished brisket flat

The flat turned out terrific, the surface bark was noticeable, firm yet cut easily. The meat was tender and moist, it could maybe have used another 30 minutes. But, it was very good as it is, with great flavor.

Sliced and plated flat

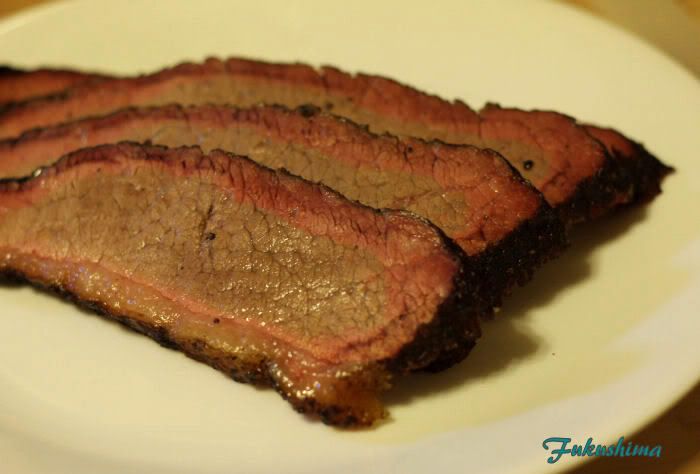
Often referred to as 'lean brisket', the flat can easily dry out and get hard when being cooked. The use of the paper, along with the liquid I added to the paper when it was wrapped seemed to help with the retained moisture. I am very happy with this product, it sure looks good.

Sliced and plated point (or deckle)

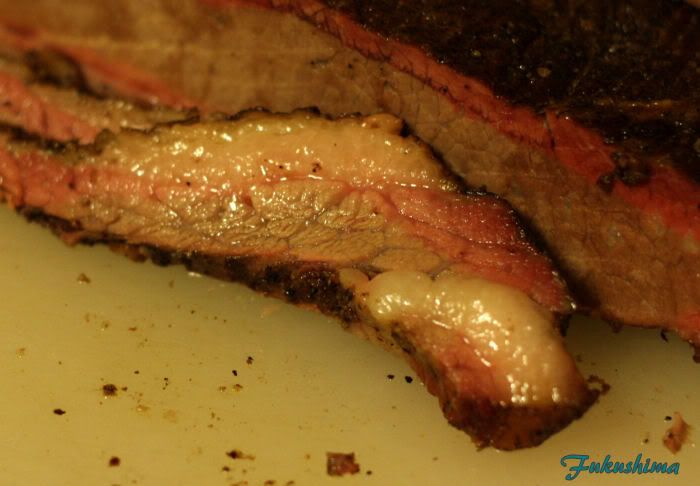
Sometimes referred to as the point or deckle, this is the part of the brisket that you would get if you 'fat' instead of 'lean' at a BBQ joint in some parts of the country. Many folks will cook this down in a sauce and call it 'burnt ends', referring to the old practice of stewing down the hard edges of smoked meat in the sauce to make it more palatable. I prefer it sliced when it is properly cooked. This was unctuous, meltingly tender, salty and peppery, everything I think of for a great piece of smoked brisket. You wouldn't want to eat a lot of it, but, like foie gras, it isn't always about volume.

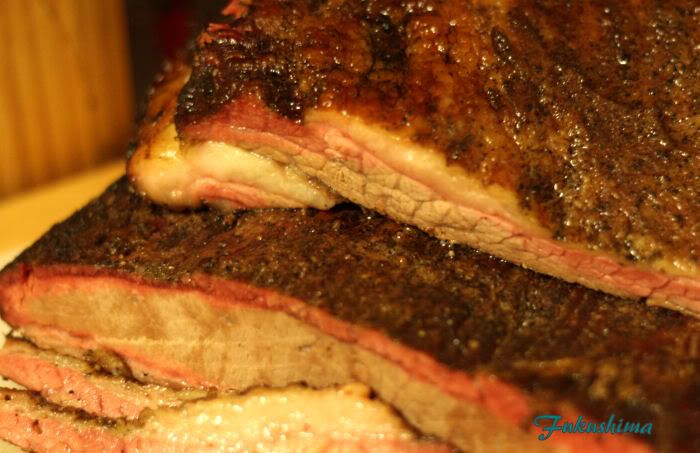
Point and Flat in repose

There is no doubt in my mind, this is an excellent method for cooking brisket, or chuck ribs for that matter. The meat had an excellent bark, great color and the texture and moisture is spot on. I cannot wait to get a nice 'Choice' packer and try this again, see if it is even more tender and moist.

Thursday, April 19, 2012

Burger NIght

Tonight was burger night, I decided it would be interesting to try something new with this classic of the backyard grill. First off however, I needed a bun. I decided to make a small batch of butter dough for some buns. I have no idea what butter dough is, I had no recipe, and decided to wing it.

Butter Dough
1 stick butter, melted
1 tablespoon sugar
1 cup warm water
1 pack Yeast
1 cup each A.P. flour and Bread flour
1/2 cup water
1 teaspoon salt
bench flour, I used whole wheat, about 1/4 cup.

With the butter still warm, I added the warm water and yeast, allowed to proof for 15 minutes. Then added sugar, allowed to dissolve. Added the 2 cups of flour and 1/2 cup water and mixed into a dough. Kneaded for 5 minutes and let rest for 30 minutes. Kneaded again and let proof for 2 hours. Divided and proofed for 4 hours in a oiled oven pan covered with plastic wrap. These were baked, in the pan, in the oven, for 40 minutes at 350F, then finished at 425F for 10 minutes on the rack. At this time, I burned myself taking them out of the oven.

In the Proof and Cook pan

Sliced and Ready for the oven

To the patties, I was lazy and opted not to grind my own. But, since I was able to get some nice grass finished Painted Hills Beef from Oregon, I felt safe that the ground beef was of a high quality. I have found the meat from Paitned Hills to be consistently high quality. This meat was no different. I formed into patties, from here, I made a variance from my normal process. I formed the meat into balls, then perforated the meat with a steel skewer. The idea was to emulate the texture of a granulated burger, a technique created by Heston Blumenthal to create a better burger patty. More on this later. Here are the patties, coated with The Rub Company Santa Maria Rub and Simply Marvelous Season-All. Yes, I seasoned them like I do tri-tip, which I figure makes sense, they are both beef.

My Ventilated Patty

You can't really see it in the photo, but, the holes through the burger were quite apparent in person. You could tell that each 1/3 pound patty had a bunch of holes in them. Maybe this shot will show them better.
 
See the holes?

 Oh well, they were there. These were meant to be classic burger, nothing special in terms of toppings, a true backyard burger with the exception of a home baked bun and a ventileated patty. So, some iceberg lettuce, tomato and red onion were added to the mix. I meant to buy pickles, they were missed.

Fixings

A little mayo and spicy brown mustard, some fresh ground black pepper and some cheddar which was melted on while the burgers cooked on the kettle, which was set to 400F, there was a little apple wood in the charcoals. You could see a little of the effect of smoke in the reddish hue of the patties. I built the burgers, as I always saw at Nations and The Red Onion, mayo and mustard, lettuce, tomato, onion, beef and the top of the bun. Served with tater tots. The tots were coated with olive oil and Simply Marvelous Sweet and Spicy Rub.

Burger and Tots

Section View

Now, I am not sure what the deal was, but, you can clearly see the effect of the butter (oddly more yellow than in real life) in the part of the bun on the back of the plate, but, the front bun is white (oddly much more white than in real life). I am sure this is a lighting issue, odd though, just could not get the color right no matter the angle. You can see the salad piled under the burger patty.

Burger Patty texture shot

Hopefully that last shot shows the texture of the patty, which was actually quite airy and still juicy. The skewer I used was quite dull, my brisket skewer to he honest, and it pushed slits through the meat, as opposed to cutting the fibers of the grind. The patty had a granular texture, the juices sitting in the voids quite nicely. In my real life, there is a thing called a peched water table, where a gravel drainage bed does not drain, becasue the pores in the gravel section are just small enough to allow fluid surface tension to bridge the gaps, desptie being porous, the liquids stay in place. This was amazing to me, as that is exactly what happened. A delicate texture, light to the teeth, meaty on the palate, bursting with juice with each bite flowing with flavor. I may never do patties the same again.