Search This Blog

Sunday, September 1, 2013

Brisket Cook, the Grand Experiment, Part One

So, it was a beautiful weekend, a long weekend, and it seemed like a perfect time to pull out the stops and try something that my friend Rob and I have been wanting to do for a while. Rob had already secured a Piedmontese Heritage brisket, and he was working on scoring a Snake River Farms American Wagyu brisket. Now, there are a couple of mouthfuls, we will look at those soon. All I needed to do, "you're only job", was to get a Choice Black Angus brisket.

The Three Briskets, before the fire

Using the impeccable skills of timing and planning that Rob and I have honed over years in business, we planned on cooking these, starting at 8:00am, running the cookers at 300F, grate temperature, and we expected to be eating at 6:00pm-ish. As soon as I arrived at 9:15am, we got the cookers fired and the meat prepared.

SRF Wagyu 

Trimmed SRF Wagyu

In terms of the Wagyu, this is a hybrid beef, a cross between original Wagyu cattle genetics bred to American Black Angus cattle. The meat is far more marbled, at the point of grading, than USDA Prime beef. In handling this meat, it was clearly softer than regular beef. The image above shows ho the meat starts to pull apart once the membrane is removed. One of the things we noticed, was the when we pushed out fingers into the meat, the indentation stayed, unlike normal beef, that has a notable resilience. The deckle, or point, portion of the packer was so marbled, it was far more than any other brisket I have seen.

Piedmontese Heritage 

Piedmontese Beef

Now, to the Piedmontese, this is a breed of cattle that is barely known in any circles. Originating in Italy, the Razza Bovina Piedmontese is a dual purpose cattle breed, that is most noted for a characteristic called "double-muscling". A genetic mutation that leads to excessively muscular cattle. As it happens, the beef ends up with lower fat levels, lower calories per gram and higher Omega-3 acids, it is a healthy beef. It is also alleged to be more tender. We shall see. One thing was for sure, while trimming, this beef 'jiggled' like gelatin. It was unbelievably soft, in BBQ circles, this was the ultimate floppy brisket. It appeared very lean, and a lot more pink than the other meats. Originally considered a dual purpose breed, this breed of cattle has become endangered, as it is so unknown.

Certified Choice Angus

The Angus packer


Finally, there was my brisket, the Choice Angus beef, which I got from my usual supplier for these types of cooks, this is what I consider my bargain beef, from a local restaurant supply shop, it is normally a very good brisket, I ended up with a 14 pound packer. In the realm of 'you get what you pay for', the Wagyu and Piedmontese briskets required very little trimming or cleaning, a little membrane and some fat. The 14 pound Angus ended up around 11 pounds by the time I got done trimming. Several large hunks of fat had to be removed. This still appeared to be a good packer for our purposes.

Three Brisket trimmed and ready for rub

In terms of the rub, the point of this exercise was to pull together three briskets and get a good feel for the taste of the meat. That doesn't mean that adding no spice makes any sense. I prepared what I consider to be a simple rub, consisting of equal parts of Kosher salt and medium grind black pepper. I used RealSalt Kosher salt, and a Kampot Black Pepper/Tellicherry Black Pepper combination, along with small amounts of granulated garlic, granulated onion, citrus peel and sugar. This was applied with a moderate coating to all of the surfaces of the briskets. I do this as the cookers are coming to heat, so the rub sits on the meat for about 15 to 20 minutes, which gives it some time to 'melt' onto the meat.

Rubbed and ready

These were places onto the cookers, the Piedmontese, as it was smaller, went on to the large Big Green Egg, the Wagyu and Angus, closer in weight, went on to the 26" Weber kettle. The BGE was fired with Cowboy lump and apple wood, the kettle has a mixture of Cowboy lump, natural briquettes and apple wood. Both cookers were run at an average of 300°F. Barring the fact that I arrived nearly an hour late, and took far longer to prepare, as I was enjoying fussing with the fancy beef, this was the last point where we were even close to staying on the plan. Did I mention we started the morning with Bier de Chocolat slushies? Anyways...

Our host

Maple and Pepper rubbed fatty

Fatty Sandwich, with Arugula slaw and fried egg

Angus on the left, Wagyu on the right

No, I did not forget about the brisket, but, a man's got to eat breakfast. This was a few hours into the cook, no foil or paper, these were run straight through. briskets were flat down for most of the cook, I flipped after 6 hours, yes, 6 hours at 300°F, go figure.

Piedmontese and Burnt Ends

Well, a couple hours later, the Piedmontese was ready, as were some Burnt Ends. These were made form the Angus, which was nowhere near ready, but, I figured I would separate them point and do this. Rob and I had discussed burnt ends for a few days, I don't care for them, at least, compared to properly cooked and sliced point. Rob loves them, the compromise was the Angus was cubed and braised. It is worth noting, that along the way, some guests arrived, some bacon wrapped jalapenos and padron peppers were eaten, along with fried squash blossoms and loofah in tare.

These people did not smell of smoke

The Cookers

Okay, burnt ends do not suck..but, lookie...

The finished Piedmontese

Piedmontese Flat
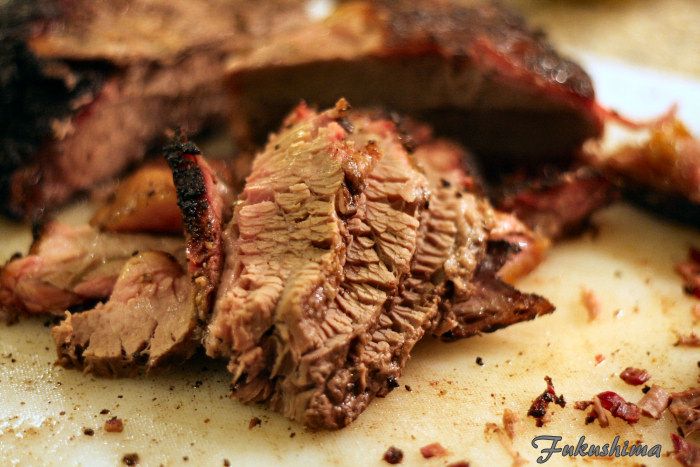
Piedmontese Point

What you see there, is a moist and very tender flat, and a point that is perfect, absolutely perfect, rendered out, tender beyond belief. You could actually pick up those slices, but, once you placed it in your mouth, it melted. The flat was amazing, moist and just a little pull, so tender. But, the key thing, was this tasted so much better than any beef I have had in years. To this point, this was the best taste of beef I have had in a long time. In terms of what we had this night, this tasted the closest to the beef I grew up eating from my uncle in Idaho. What beef should taste like.

Wagyu Flat

Wagyu Point

The Wagyu, my photos don't do it justice, the flat was dripping with moisture, that shot is after wiping the board. It literally flooded the board with juice, to the point I thought I had pulled it too soon. But, the flat draped over the knife, it was supple, and just perfect to the tooth. As I was cutting, fingers from other people kept swiping the meat off the blade. The point, unbelievable texture and moisture. It was not as rendered as the Piedmontese, which would be true to the difference in fat and marbling, but, this was delicious fat, rendered almost to liquid, a perfect cut of meat. The difference in flavor was marked though, like other Wagyu I have had, the beef flavor is quite subdued, refined, it lacks the edge of blood and minerality of beef. This is not a flaw, so much as a difference in taste. If I was going to cook one brisket, to stake my reputation on, it would be a Wagyu brisket.

The Angus Flat

I'll some right out and say, that I was not happy with this Angus brisket. Almost from the point it hit the heat, it felt and looked wrong. It cooked painfully slow, refusing to color at all for 4 hours, despite a 300°F grate temperature. The flat that I pulled and ended up cooking at 400°F for the last 30 minutes never rendered. I had little hope for the flat. In truth, having gone on the cooker at 10:00a.m., this brisket was not pulled until 10:00p.m. But, when it finally came out of the stall, that stall, it sat at 165°F for 6 hours, it was actually pretty good. Even after eating the other two briskets, this flat was tender and juicy. It may be the worst cook I have had of a packer in 5 years, but, the end result was certainly good.

In terms of the take away, if I had it within my means, I would never cook another Choice Angus packer again. The Piedmontese had such a great flavor, something that was a throw back to when beef had a stronger flavor, with the blood and muscle still in beef. The Wagyu was subtle and transcendent in texture, the point was amazing, the flat was the most moist and tender flat I have ever had. I loved this cook, despite the blown schedule, good company, too much junmai daiginjo, and a lot of good eats.

Sunday, August 4, 2013

Baby Back Ribs

Decided to test out a couple of ideas, and since I was going to be at home futzing around with a few repairs, I went with some ribs. Low cost, low time investment, low effort was my thinking. It is odd how this never works out.

The ribs ended up being the extra meaty ones, which I actually dislike, and then they were pricey, as the local grocery store didn't have the pork I like, so off to the butcher counter. Now I was spending more time and money than planned. Oh well...made up this stuff.

Ready for eating

The Rub: (total 1/3 cup)
3 parts kosher salt (I use Redmond Real Kosher Salt)
2 parts medium grind black pepper (Tellicherry from Oakland Spice Shop)
1-1/2 parts Maple sugar
1/2 part smoked Spanish paprika
1/4 part ground nutmeg

The Injection:
1/4 cup apple juice
1/4 cup white wine vinegar
3 tablespoons Red Boat fish sauce (brand matters, no MSG, no sugar, no wheat)
2 tablespoons of Yuzu hot sauce
1/2 teaspoon of the above rub

Combine all ingredients, load into injector

Pig Honey:
1/2 cup water
1/2 cup apple juice
4 tablespoons Red Boat fish sauce (brand matters, no MSG, no sugar, no wheat)
1/4 cup maple syrup

Heat all ingredients to combine, do not boil.

First off, I used a typical injector and injected each of the spaces between the ribs, as well as the top part of the extra thick ribs. You could see the meat plump with the liquid. The membrane was left on for this part of the cook. I wrapped the ribs up and let them sit for an hour in the fridge. Then they were removed and sat on the counter for a few minutes.

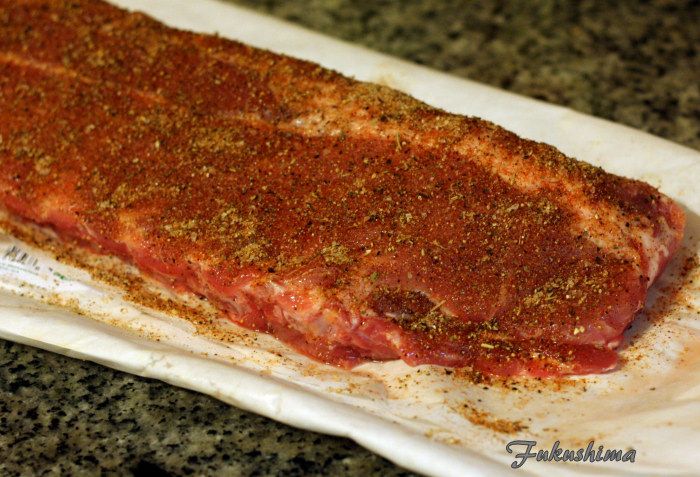
Step two of the process was to strip the membrane, I feel this makes for better bite through once the cooking is done. I apply the rub using a shaker bottle, trying to get a fairly even coating, although it doesn't matter all that much. I do manage to get it around all sides of the meat. I let it sit while I fire up the cooker.

Injected, Rubbed, Ready

The UDS was fired, largely because I hadn't used it in a while. I loaded about half the basket with charcoal and chunks of apple wood. Set it on fire and let it ride up to 215F. Got the light, sweet, smoke I wanted, so put the ribs on and left two of the vents open. The UDS rode up to 300F and settled in, so I left the vents set and went about with doing other things. After 4 hours, I hit it with a dribble of the Pig Honey, and then again an hour later. By now, the cooker was almost out of fuel, temperatures were down around 225F, and the ribs were just about done. Took them off between 5 and 6 hours in, tented in foil for 20 minutes. This looked promising.

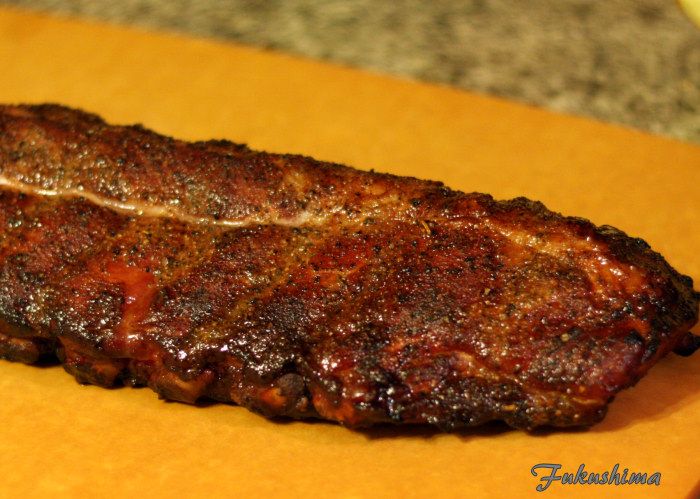
The ready to eat rack

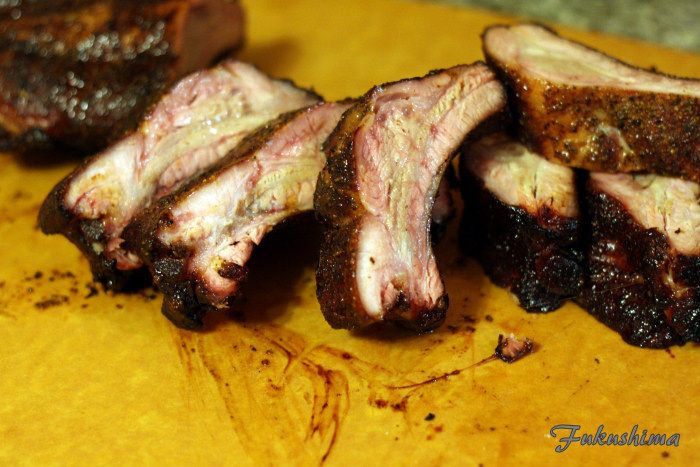
Sliced off a few bones, and was a little concerned about the texture, but, as I sliced more, things seemed to be alright. Very juicy and the knife slid right through.

Dinner

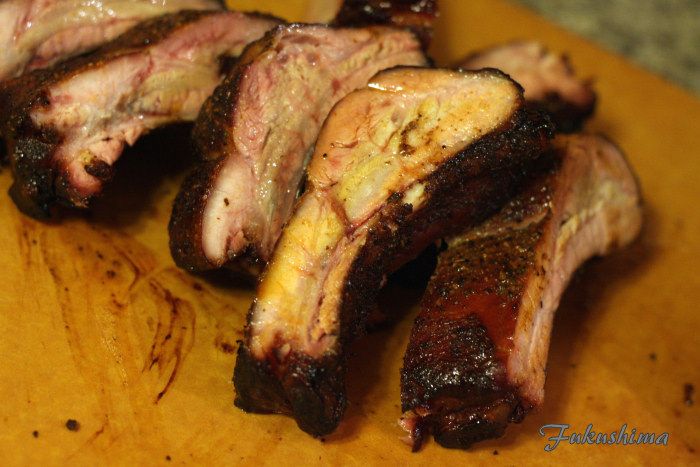
There was a slight smoke ring, the texture was terrific looking, there was a lot of juice and some fat, the yellow discoloration showing the fat that stayed in the meat. I find that this is common with the extra thick baby back ribs, there is a layer of fat in them, that renders and leaves that extra grease. It takes that extra hour to render them up right.

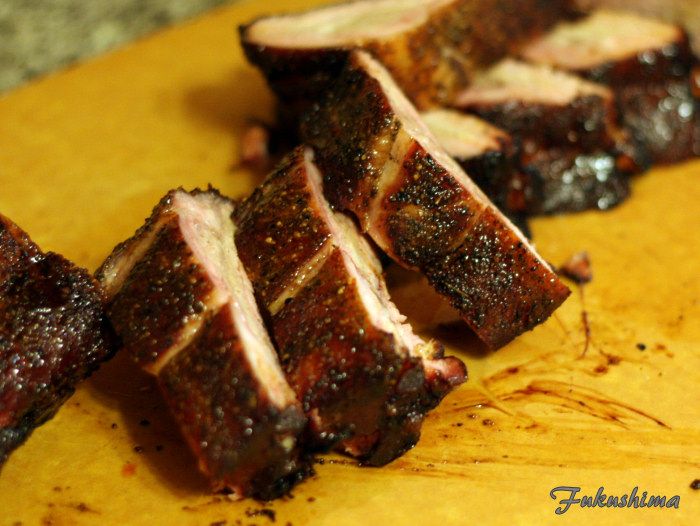
The Bark

I neither use, nor believe in the use of a slather. I have never seen the reason for it, as the rubs I use build up fine without it. This rack had beautiful color and the bark was just crisp, but, broke with just a slight bite. Texture of the meat was tender, with a little pull when you bit into it, but, leaving a clean bone. Once off the bone, the meat had great texture. And there was loads of juice. I need to try this with spares, as I was really happy with the cook.

Thursday, August 1, 2013

Porchetta on the Big Kettle

My friend Rob is moving from the temporary rental house he and his family have been living in for the past year and a half, after finally finding the next great home for them. And it was time to do a farewell cook to the patio that has hosted quite a few great cooks. It had to be epic. And it was up to me to do something special, enter the Live Fire Bucket List. The idea of digging a huge pit was not really a good idea, so it was to Item Two that we turned. Porchetta! To be more specific, a version of the real deal, we went with a pork belly wrapped around a tenderloin, and smoked, then roasted. A true Porchetta, still Item Two on the list, is a small pig, boned whole, and stuffed with herbs, then tied and roasted in a wood oven (this will happen). In any event...

Porchetta and Beef Ribs

How did we get there? Well...

Herbs

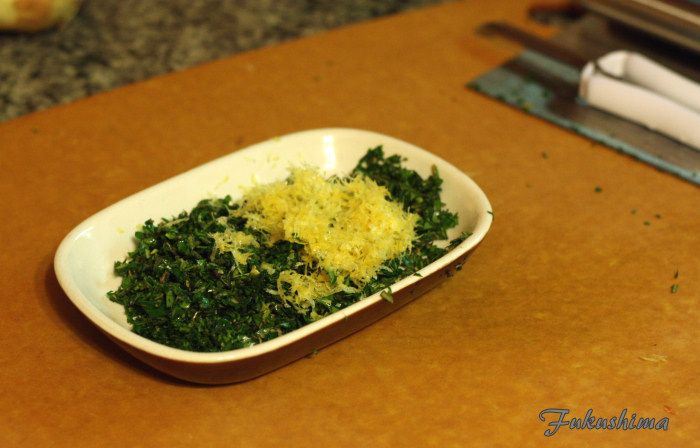
To start the process, I took some home grown sage, basil, thyme and store bought rosemary and flat leaf parsley, reduced this to a very fine chop. Added the zest from a lemon (for this use, organic lemon, as I want a clean rind) and mixed it all together. Three-fourths were to be used as herbs, the other fourth was ground into the salt and pepper, to make a spiced salt. This brings out more aromatics and integrates the flavors into the salt and pepper. I also toasted some fennel seeds and coriander seeds, these were powdered in the mortar and pestle.

Herbs and Zest

That may not look like a lot, but, it is plenty of herbs for this size roast. I also minced up three shallot bulbs and a dozen garlic bulbs were first minced then turned into a paste.

Pork Belly-untrimmed

And here is the pork belly, untrimmed. I needed to remove some silverskin and clean up some excess meat and fat. Although I am a huge fan of carbon steel and Japanese blades, when working with meat like this, I default to my Dexter-Russels, the handles remain secure in wet hands, and the blades have the right edge for me. I can make very precise cuts with these two knives. I should note, the skin side got a thorough scrubbing with kosher salt and vinegar, this was both to clean it, and make sure it had a coat of salt and acid.

Nice and trimmed

I went ahead and scored the meat at this point, about 1/2 the distance through the meat side and through the skin as well. This aids in getting the meat evenly cooked, and it getting the fat to render. It is pretty important, as if you don't do this, the meat folds and makes it harder to roll. It also enables more of the herbs and spices to penetrate the belly. I happened also butterflied two tenderloins.

Salt, Pepper, Fennel Seed and Coriander Seed

Shallots, Garlic, Herbs

At this point, I took the time to force the spices and herbs into the slices in the meat, and to work it around enough to get an even layer. Then the tenderloins.

Butterflied Tenderloins

And now, time to roll it up into a single roast. It is just for this reason, that I keep a roll of butcher twine handy. It actually ended up being quite easy to get a 10 pound pork belly to wrap around 3 pounds of tenderloin.

The small end

The large end

I was a little worried about the large end being open, but, there was no practical way at this point to get it closed. Ended up being a non-issue. That last two inches were sacrificed for beans anyway. You can see the slices in the skin at this point. Again, these will enable the fat to render and hopefully the skin will crisp.

And we're on the way...

At this point, I added a paste made of kosher salt, lemon juice and olive oil to the surface.

I want a rotisserie...

These are progress shots, I think the roast ended up staying on the cooker for at least another hour and a half. It was not quite as dark as it looks here, but, there was some singing. These areas did not taste at all bad though. Shortly after this shot, the end towards the camera as removed to add some pork and smoke to the fresh cranberry beans someone else was cooking.

And here we are

The first few slices, you can see the herbs, if only you could smell what I smelled when I cut into this. The entire kitchen and dining room filled with the fennel, coriander and herbs. The skin had some room for improvements, but, some parts of it were brilliant. Crunchy and salty. The pork was tender and moist, but, not as fatty as it would have seemed.

Chunks before chopping

Some chunks were served as a fine chop for sandwiches, I had bought some slider buns from Cakebox Bakery, a local bakery that makes the best burger buns. Other larger chunks/slices were served as they came off the roast. Some of the above pork may not have made it to the table.

The small end sliced

The small end stayed together quite nicely. You can see the skin didn't pop quite as well. Still, this shows how the salt and herbs worked with the meat. We ended up eating only about 1/3 of the roast for 6 people. It was very rich.

Leftovers

Yep, there were leftovers. I was sort of expecting more than 6, but, having leftovers like this, not a problem. Next time, I will start earlier and run a hotter fire earlier in the cook. I will also use a loin, not a tenderloin, as the meat in the center was so delicious, and I am certain a loin would have been even better. But, I was very happy with the flavor, texture and overall quality of the cook. Especially for a first time.

Wednesday, July 31, 2013

Picking Hops at Sauly's

Last Saturday, I had the chance to go pick some hops from the hop bines of my long time friend Saul. Saul and I went to school together in junior high and high school. As it turned out, I eventually landed about 6 blocks away from him, in our mutual new home town of San Leandro. And it was here, that Saul planted 5 hop rhizomes, and has nurtured then along for many years. He has a mix of Cascade and Nugget hops, which I have already had the chance to brew with, but, now had the chance to join in the harvest. Here are the bines, all wired up and ready for picking.

Hop Bines

So, that shows the bines, prior to harvest. A note, I know how to spell. Hops grow on bines, technically, a bine is a plant that climbs by entwining a support structure, as opposed to using aerial roots or tendrils. The bines in the above image, are on a 25 foot tall supports structure, with an ingenious pulley system, that not only allows harvest of the hops, but, allows for growth exceeding 25 feet. As the bines reach the 25 foot mark, Saul lowers the ropes through the pulley, giving him more room. These bines were actually closer to the 35 foot mark.

Hop Clusters

Here are the hops still on the plant, the actual hop that we are interested in, is a flower, that grows in clusters, hanging from the terminal of the branches of the bine. The hops appear as cones, and are often mislabelled as flowers, In truth, they are strobiles, cone structures that house the reproduction for the plant. The resin, which is what makes hops so valuable to brewers, is a yellow powder that is located along the central core of the hop. These are actually quite beautiful structures as they hang amongst the dark green leaves.

Hop Strobile/Flower/Cone

Just a glamour shot of a large and quite lovely hop strobile. This is something you never see at a brew shop, the large, fresh, hydrated version of the little green pellets or smashed up petals in a vacuum pack. These are far less delicate than they look, but, so valuable to a brewer, you want to take a little extra care when handling them anyway. I also found out, that the billions of tiny hair like thorns on the bines, which I blithely ignored (after all, I am the son of a rose grower) actually scratched up my arms so much, it took two days for the feeling of burning to calm down. Next time, long sleeves.

Tub o' Hops

And the end result, this is actually around 2/3rds of what was on the plants. Saul estimated that this would make about 5 batches of ale. These will be air dried and then Saul vacuum packs them for use throughout the year. I ended up with about 15 ounces to take home, which will end up as around 3 ounces of hops once dried. I will be brewing a Saul ale at that time. What a great time I had, both with the fact that I got to experience the harvest of an integral part of one of my hobbies, and for the fact that I was able to catch up again with my friend Saul and his lovely wife Carla, whom I also went to high school with. There are not a lot of better ways to spend an afternoon.

Monday, July 22, 2013

Food Trends Week

This past week was spent on the move, from Carmel, CA to Willits, CA, and hitting the home base for a day or two in between. And due to that, there was precious little cooking, but, a fair amount of eating that was accomplished. One of the key things for my life, is good coffee, which I have yet to find a great place in Willits, but, I do love the Carmel Roasting Company for very decent coffee every morning. I did sneak in a visit to Blue Bottle, for a latte, and they never disappoint. One of the best pulls anywhere. Along the way:

The Parkburger with Fried egg

Park Burger in Oakland, is one of the latest additions to the upscale burger trend in Bay Area food, and this place did not disappoint. It was not cheap, and it was not a challenger for what I consider to be my benchmark for burger joints in the Bay Area, that would be Kronnerburger in San Francisco. But, this was quality meat, and excellent presentation, they offer a fried egg, huge plus there. The fries, onion rings and sweet potato fries were all excellent. Definitely a place to go to again. It successfully fits into the local burger scene, by being both trendy and distinct.

Shorty Goldstein's Pastrami

Yet another addition, to the trend of house cured meats and pickles, Shorty Goldstein's in the Financial District of San Francisco, featuring their own cured corned beef, and smoked pastrami, house sour pickles, that are clearly soured and not dill, and a house mustard that has a great kick of horseradish. All great stuff, the pastrami sandwich I had used a cracked seed Rye bread, and the pastrami was terrific. As good as any I have had, tender, chunky, salty, all things it should be. I am lukewarm about sour pickles, so that these being great sour pickles, means I am greatly lukewarm about them. The cole slaw, though, is a different story, and exceptional slaw, that worked great as a complement to the pastrami. I would buy this slaw if I was cooking pulled pork. This was the second great slaw I have had in a week, with my friend Hiroo's edging it out, but, both being very original.

Main Street BBQ

I created for myself a little embargo on BBQ restaurants for this season, and have been pretty good about not going into any BBQ place since April. This was the exception, it was 110F outside in Willits, and I did not want Mexican food, so this new BBQ joint was the place. And it was a surprise. I consider brisket to be the measure of how good a cook is, in terms of BBQ. Pulled pork is too easy, ribs as well. Have the patience and understanding to cook and hold a good brisket and you get my attention. The couple running Main Street BBQ in Willits, CA are doing a great job. The brisket flat was excellent, tender with that dry edge of real smoked brisket. They serve it unsauced, and offer a thin, vinegar and pepper heavy red sauce, or a uber-tangy mustard sauce. I tried both, and both were excellent. I associate thin, vinegar and pepper heavy sauces with Kansas City and mid-south BBQ. The couple hail from Georgia, and this reflects in the cooking. The slaw was creamy, which I associate with foods other than brisket, but, it was tasty as well.

I am not travelogue writer or restaurant critic, instead, what I found with these three distinct food places, was that there are folks creating their own spins, on classic foods, looking to raise the bar on local and everyday foods, in such a way as to appeal to our memories of foods, while elevating past fast foods, or the mundane of yet another burger, yet another mass market pastrami or just copying BBQ from some other place. I love the story of cooks who care about making good food.